Standard SmartClamps™ Pressure
Push the Clamp Pressure Knob IN to use the standard clamp air pressure, which is Push the Clamp Pressure Knob IN to use the standard clamp air pressure, which is
suitable for most material. suitable for most material.
Low SmartClamps™ Pressure
Pull the Clamp Pressure Knob OUT to use low clamp pressure, which is suitable Pull the Clamp Pressure Knob OUT to use low clamp pressure, which is suitable
for more delicate material, such as foam core. Lower pressure is applied to the mat for more delicate material, such as foam core. Lower pressure is applied to the mat
clamps so that it does not crush the material. When you have nished cutting the clamps so that it does not crush the material. When you have nished cutting the
delicate material you can push the knob in to reapply the standard air pressure to the delicate material you can push the knob in to reapply the standard air pressure to the
clamps.clamps.
Adjusting the SmartClamps™ Pressure
SmartClamps™ Pressure Adjustment
To adjust the clamp pressure, see “To adjust the clamp pressure, see “SmartClamps™ Pressure AdjustmentSmartClamps™ Pressure Adjustment”. ”.
Variable Pressure Optimization (VPO) Feature
Adjusting for Regular or Dense Matboard
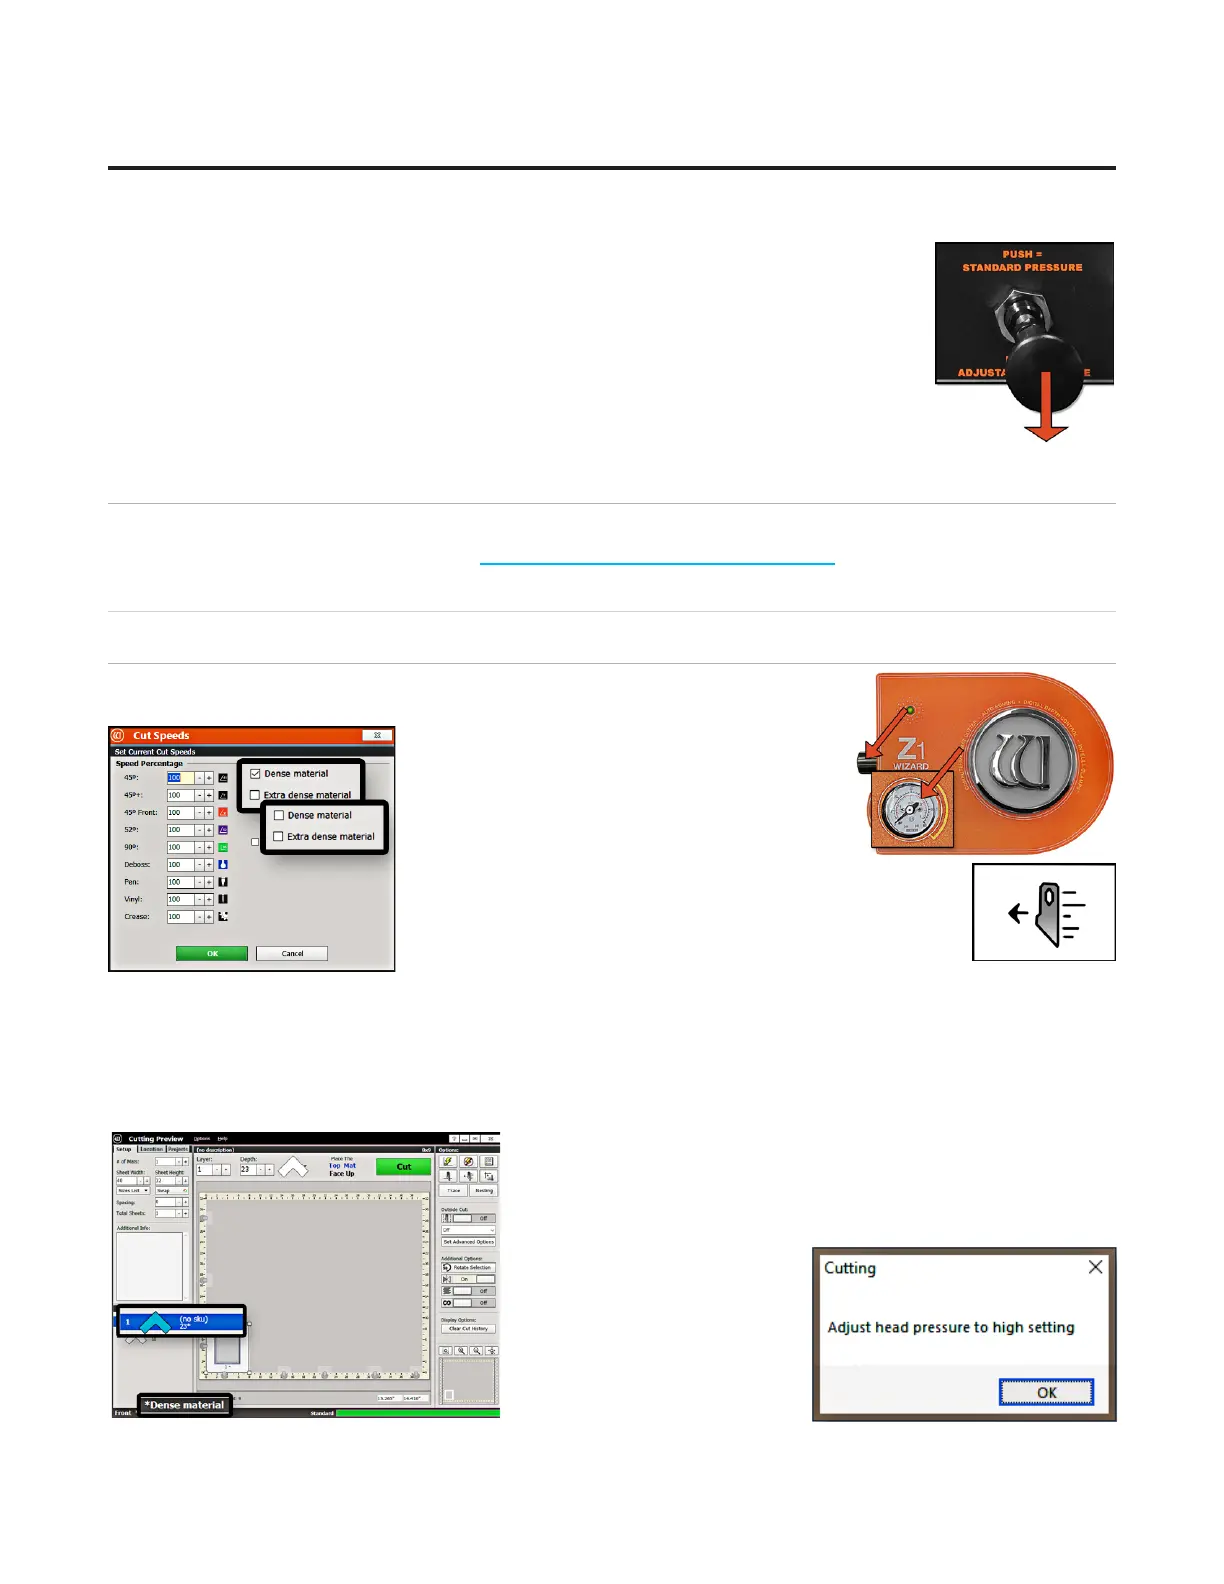
The head air regulator is located on the left side of the head and controls the
pressure of the Footblock against the matboard as it is cutting.
The software will prompt for a head pressure
change only if the current mat is a dierent
setting than the previously cut mat. If the
settings are the same as the previously cut mat,
adjusting the head air pressure is not needed.
1. Select the desired layer on the Cut Preview.
2. Click the Cut Speeds button to open the Cut Speeds
Screen.
3. Check or uncheck the Speed Reduction options according
to the type of matboard you’re cutting. For instance, uncheck Dense Material if
you are cutting regular matboard.
• • Uncheck Dense for regular matboardUncheck Dense for regular matboard
• • Check Dense for dense matboardCheck Dense for dense matboard
4. Click OK. Change the Blade Depth to the appropriate setting for this matboard from within the software.
5. The Cut Preview displays the selection of matboard. 5. The Cut Preview displays the selection of matboard.
• • Regular matboard displays no indicator.Regular matboard displays no indicator.
• • Dense matboard displays the dense layer with an asterisk and Dense matboard displays the dense layer with an asterisk and
indicates that this layer is dense.indicates that this layer is dense.
6. Click Cut to cut the mat and
Align the Head if requested.
7. The Head plunges at the
home position and applies the
current pressure and prompts
for the requested pressure.
24
Wizard™ International, Inc., 4600 116th St. SW, Mukilteo, WA 98275 888/855-3335 Wizard™ International, Inc., 4600 116th St. SW, Mukilteo, WA 98275 888/855-3335 wizardcutters.comwizardcutters.com
20-36070-1 GettingStartedManualZ1-70FrameShop
04/03/24
Wizard™ CMC Model Z1 Hardware and Software Getting Started Guide