Cut Your First Mat
1. Click 1. Click
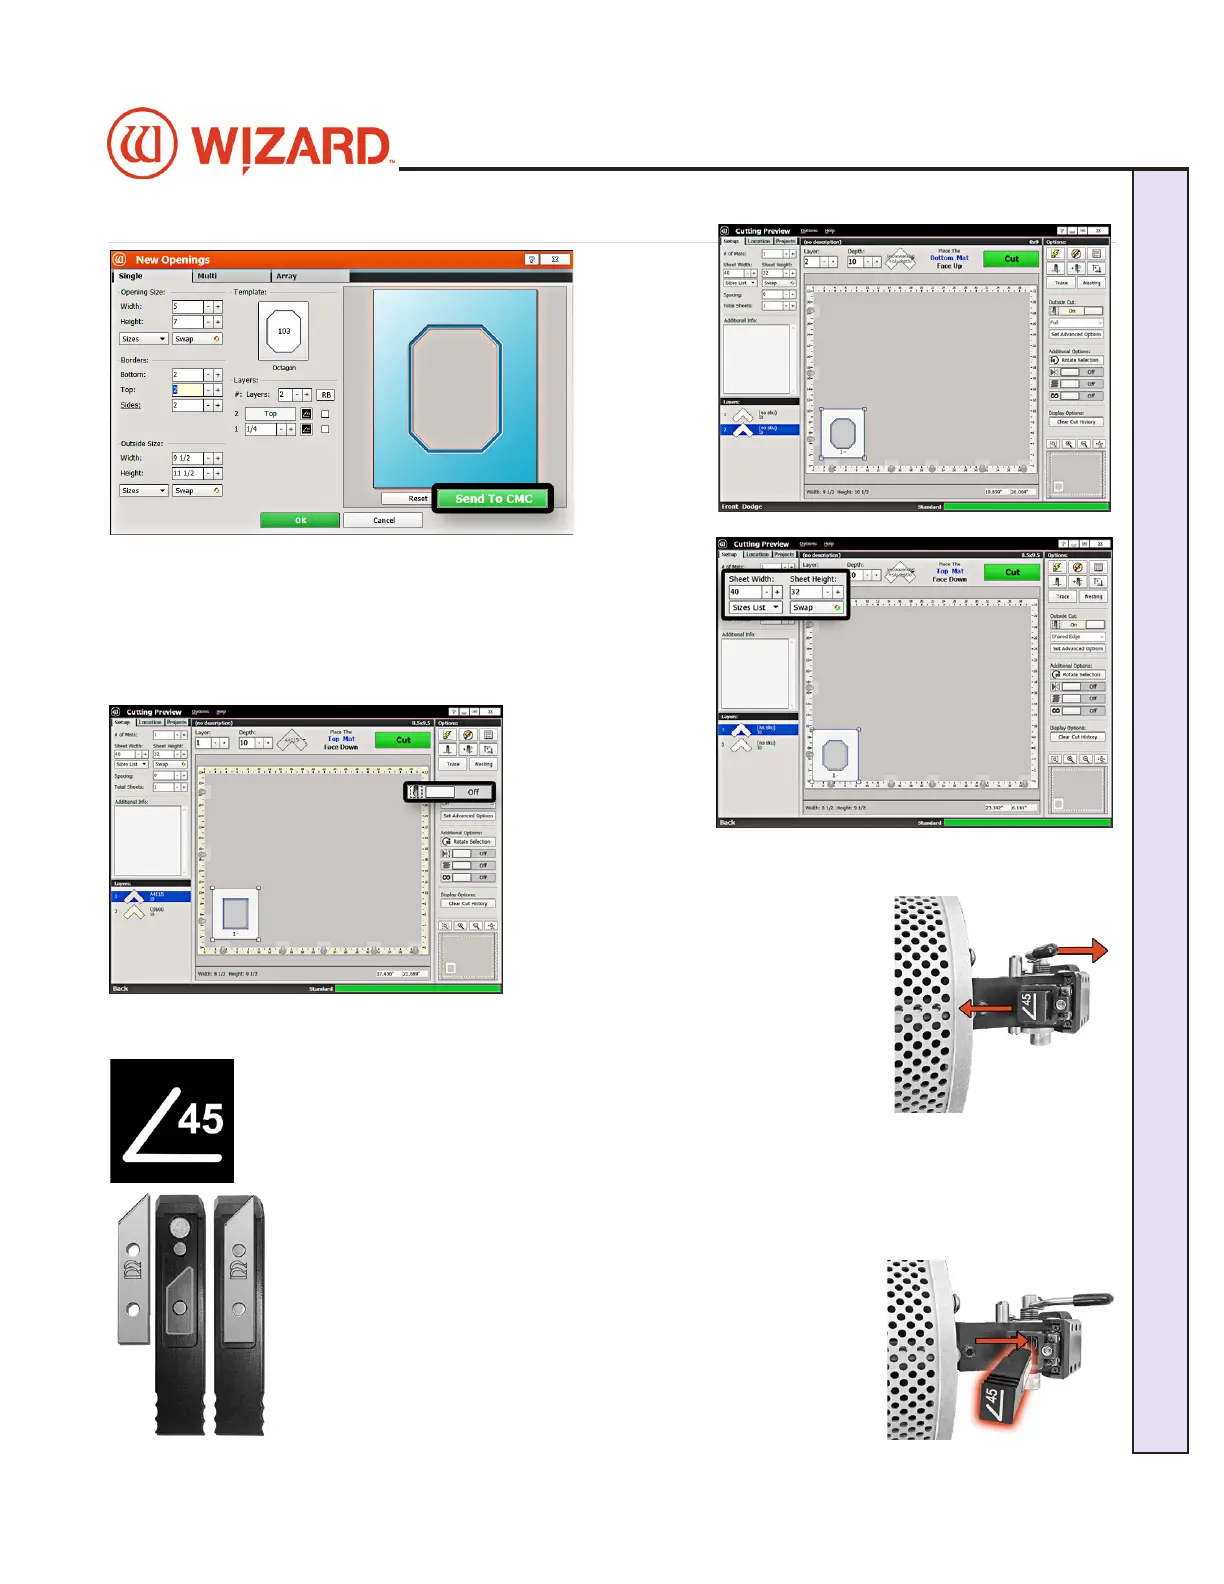
Send to Send to
CMCCMC to take to take
the design the design
to the to the Cut Cut
PreviewPreview. .
Matboard Size
1. Make sure the matboard size is sucient for the mat being 1. Make sure the matboard size is sucient for the mat being
cut. Since we’re cutting a small design, the default setting cut. Since we’re cutting a small design, the default setting
should be acceptable.should be acceptable.
Outside Cut
1. Since we’re 1. Since we’re
using a pre-cut using a pre-cut
piece of matboard piece of matboard
for this project, we don’t need to cut the outside of the mat. Click for this project, we don’t need to cut the outside of the mat. Click
the the Outside CutOutside Cut toggle to toggle to OO. .
Install a Blade
The 45° cartridge is labeled 45 on the end and is black.The 45° cartridge is labeled 45 on the end and is black.
1. Push the blade cartridge release lever down to eject the current 1. Push the blade cartridge release lever down to eject the current
blade cartridge.blade cartridge.
2. The blade cartridge displays a diagram of the blade orientation (shown in contrast). 2. The blade cartridge displays a diagram of the blade orientation (shown in contrast).
Place the new blade into cartridge with the longest straight side to the right and the bevel Place the new blade into cartridge with the longest straight side to the right and the bevel
face down, lining up the holes of the blade over the pins in the face down, lining up the holes of the blade over the pins in the
cartridge. The blade should t snugly into the recess space cartridge. The blade should t snugly into the recess space
provided for it. provided for it.
3. Turn the cartridge over and reinsert into the head with the 3. Turn the cartridge over and reinsert into the head with the
blade facing the CMC board and the notch on the back of the blade facing the CMC board and the notch on the back of the
cartridge facing the head, until it clicks into place. It can only be cartridge facing the head, until it clicks into place. It can only be
inserted one way.inserted one way.
20-36070-1 GettingStartedManualZ1-70FrameShop
04/03/24
17
Wizard CMC Model Z1: Hardware and Software Getting Started Manual
Wizard™ CMC Model Z1 Hardware and Software Getting Started Guide