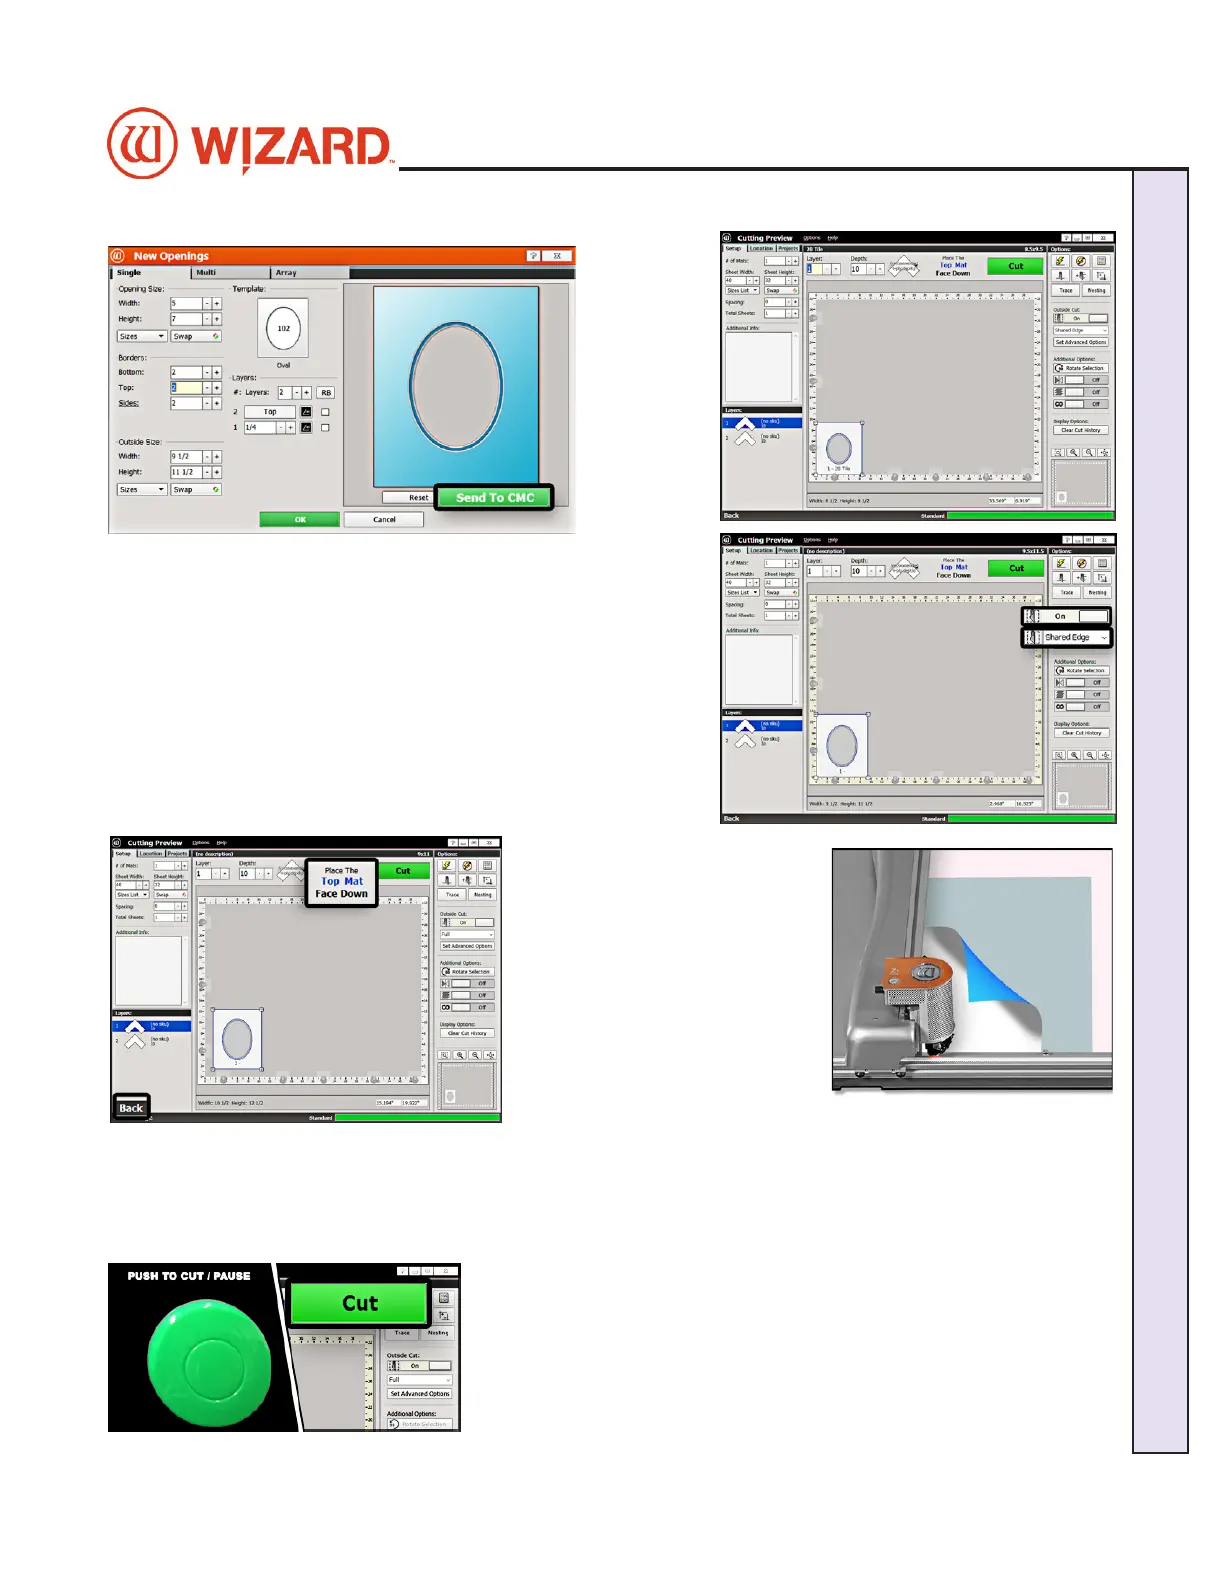
Proceed to Cutting
1. Click 1. Click CutCut
to go to the to go to the
Cut Preview Cut Preview
screen. screen.
Outside Cut
1. Click the 1. Click the Outside Cut Outside Cut to to OnOn. We will be putting in a larger . We will be putting in a larger
piece of matboard to cut the outside.piece of matboard to cut the outside.
2. Click on the 2. Click on the Outside Cut OptionsOutside Cut Options dropdown control and dropdown control and
select select Shared EdgeShared Edge. If cutting one design, it will cut only the top . If cutting one design, it will cut only the top
and right lines of the outside cut. If cutting a tiled mat, this will and right lines of the outside cut. If cutting a tiled mat, this will
cut the shared outside lines as one cut, rather than cutting each cut the shared outside lines as one cut, rather than cutting each
design’s outside cut individually.design’s outside cut individually.
3. If you have Remnant Trimming on, located under 3. If you have Remnant Trimming on, located under Set Set
Advanced OptionsAdvanced Options, it will also cut o the scrap edge., it will also cut o the scrap edge.
Prepare the Matboard
1. Make sure there are two 1. Make sure there are two
layers of disposable slipsheets layers of disposable slipsheets
of adequate size underneath the of adequate size underneath the
matboard to be cut. This design matboard to be cut. This design
is cut from the back. Since we is cut from the back. Since we
are cutting the outside, make are cutting the outside, make
sure you are using a matboard sure you are using a matboard
of adequate size.of adequate size.
2. The cut preview displays 2. The cut preview displays
whether the current layer is to whether the current layer is to
be cut from the front or from the be cut from the front or from the
back of the matboard. This determines how to place the matboard back of the matboard. This determines how to place the matboard
into the CMC.into the CMC.
3. Place the matboard face down onto the CMC (facing away from the operator). Make sure the matboard 3. Place the matboard face down onto the CMC (facing away from the operator). Make sure the matboard
nestles tightly under the horizontal and vertical clamps of the CMC.nestles tightly under the horizontal and vertical clamps of the CMC.
Cut the Mat
1. Click on the green 1. Click on the green CutCut button on the screen or use the green Push- button on the screen or use the green Push-
to-Cut button on the control panel located on the left side of the board to-Cut button on the control panel located on the left side of the board
to cut the mat. Because the motors are still engaged, the CMC will to cut the mat. Because the motors are still engaged, the CMC will
automatically begin to cut.automatically begin to cut.
We were not prompted to change the blade depth setting or cartridge We were not prompted to change the blade depth setting or cartridge
prior to cutting this time because our matboard type and cutting prior to cutting this time because our matboard type and cutting
operation did not change. operation did not change.
20-36070-1 GettingStartedManualZ1-70FrameShop
04/03/24
21
Wizard CMC Model Z1: Hardware and Software Getting Started Manual
Wizard™ CMC Model Z1 Hardware and Software Getting Started Guide