Electric Cooktop -2
Access and Removal
4-3
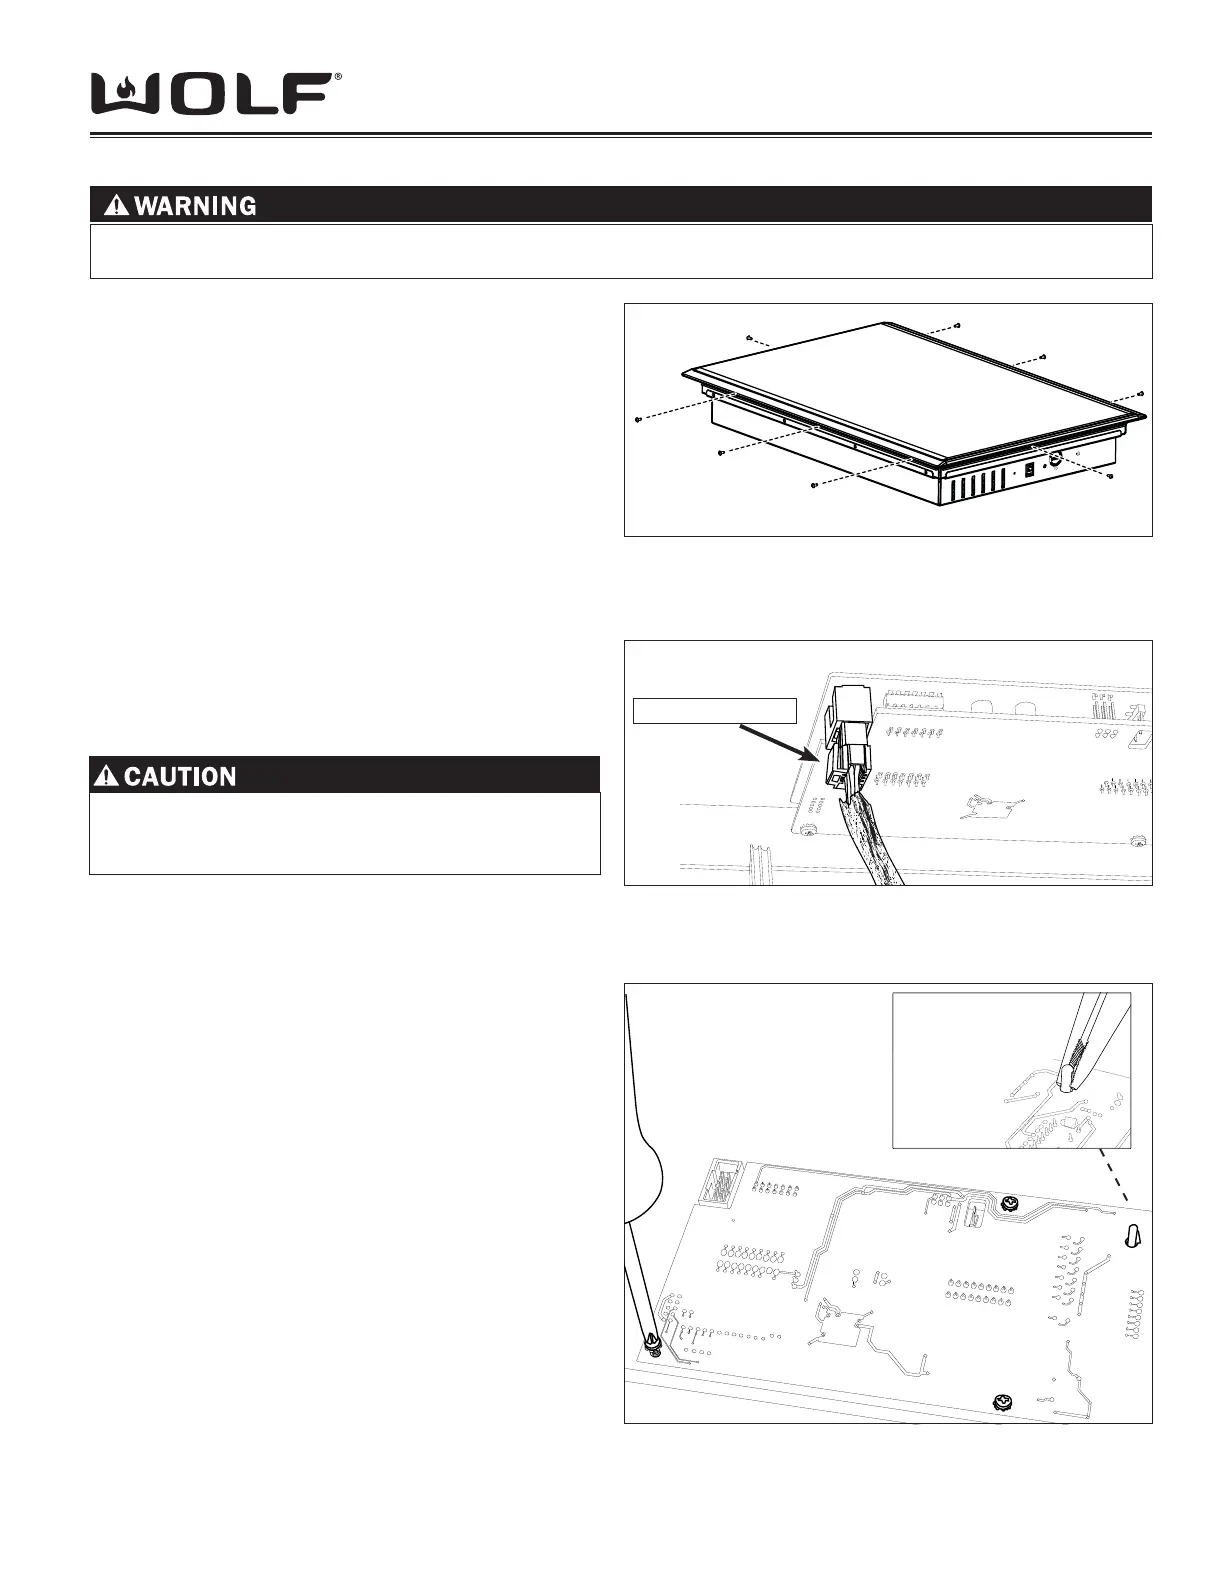
Figure 4-1 Glass Top Removal (generic)
(NOTE: Holes used vary depending on model -
not all screw holes are used )
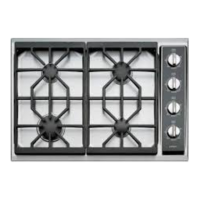
Figure 4-2 Unplug Display Board
Depress this Clip
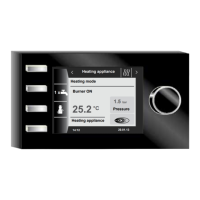
Figure 4-3 Remove Display Board
NOTE: Care must be taken to protect the glass surface
from scratches or damage. Place on protective surface.
Display Board Removal
Glass Top Assembly must fi rst be removed. (See 1.
Glass Top Assembly Removal)
After the Glass Top is laying on a protected surface 2.
you will need to remove the screws that secure it to
the Glass Top. (See Figure 4-3)
Using a pair of needle-nose pliers, depress the clip 3.
on the standoff. (See Figure 4-3) NOTE: The standoff
clip may need to be held in while removing the board.
Gently lift the board taking care that you don’t 4.
exert uneven force causing the damage to either
component.
NOTE: It is important to lift the display board straight
off the glass assembly in order to prevent bending the
connector pins. (See Figure 4-4)
NOTE: When reinstalling the display board be careful
not to over tighten the mounting screws. Correct torque
range for these screws is 5 - 6.5 in-lbs.
TO AVOID ELECTRICAL SHOCK, POWER TO THE UNIT MUST BE DISCONNECTED BEFORE ATTEMPTING TO
REMOVE THE GLASS TOP.
TO AVOID INJURY FROM SHARP EDGES, ALWAYS
WEAR GLOVES WHEN HANDLING SHEET METAL
COMPONENTS.
Glass Top Assembly Removal
The cooktop will need to be removed from its installation
in order to remove the glass top assembly.
NOTE: Refer to the installation section of this manual
or the Installation Guide included with the cooktop for
additional information needed.
Extract screws that secure the glass top and trim to 1.
burner box. (See Figure 4-1). When reassembling,
only reuse holes used in original assembly.
Next, carefully lift glass top up until access to power 2.
module cable connection is obtained.
Depress the clip that secures the connector and 3.
gently disconnect the connector. (See Figure 4-2)
NOTE: There is a clip that needs to be depressed in
order to disconnect the cable from the display board.
Plastic Standoff
CT15 only