Electric Cooktop -2
Access & Removal
4-4
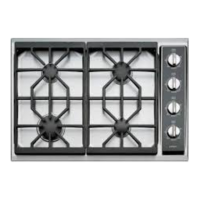
Figure 4-5 Disconnecting Elements
Element Removal
NOTE: To remove the Elements the unit must be removed
from its installation. Refer to the installation section of this
manual or the Installation Guide included with the cooktop
for additional information needed.
NOTE: Wires must not rest against element assemblies -
maintain original wire routing to prevent damage to wires.
Glass top assembly must fi rst be removed. (See 1.
instructions previous page)
Disconnect the heating elements taking special note 2.
of wiring confi guration. NOTE: The spade connectors
fi t very tight so care must be taken not to damage the
wires or elements. (See Figure 4-5)
Once disconnected, the elements lift off guide pems.3.
Upper Pan Removal
NOTE: To remove the Elements the unit must be removed
from its installation.
Glass top assembly must fi rst be removed. (See 1.
instructions previous page)
Disconnect the heating elements taking special note 2.
of wiring confi guration. NOTE: The spade connectors
fi t very tight so care must be taken not to damage the
wires or elements. (See Figure 4-5)
Remove Springs from the guide pems. 3.
Gently remove upper pan insulation. 4. NOTE: When
reinstalling insulation do not allow pan insulation to
overlap the Silicone Rubber Seal.
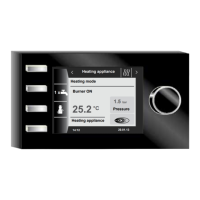
Remove the screws that secure the upper pan 5.
assembly to the lower pan assembly. (See Figure 4-6)
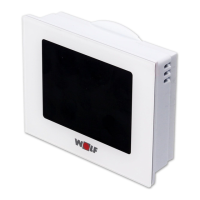
Lift this edge of the upper pan until it is clear of the 6.
lower pan and slide forward off the pins in the rear of
this pan assembly. (See Figure 4-7)
TO AVOID ELECTRICAL SHOCK, POWER TO THE UNIT
MUST BE DISCONNECTED BEFORE ATTEMPTING TO
REMOVE THE GLASS TOP.
Figure 4-6 Upper Pan Screws
Figure 4-7 Upper Pan Removal
1
2
TO AVOID INJURY FROM SHARP EDGES, ALWAYS
WEAR GLOVES WHEN HANDLING SHEET METAL
COMPONENTS.
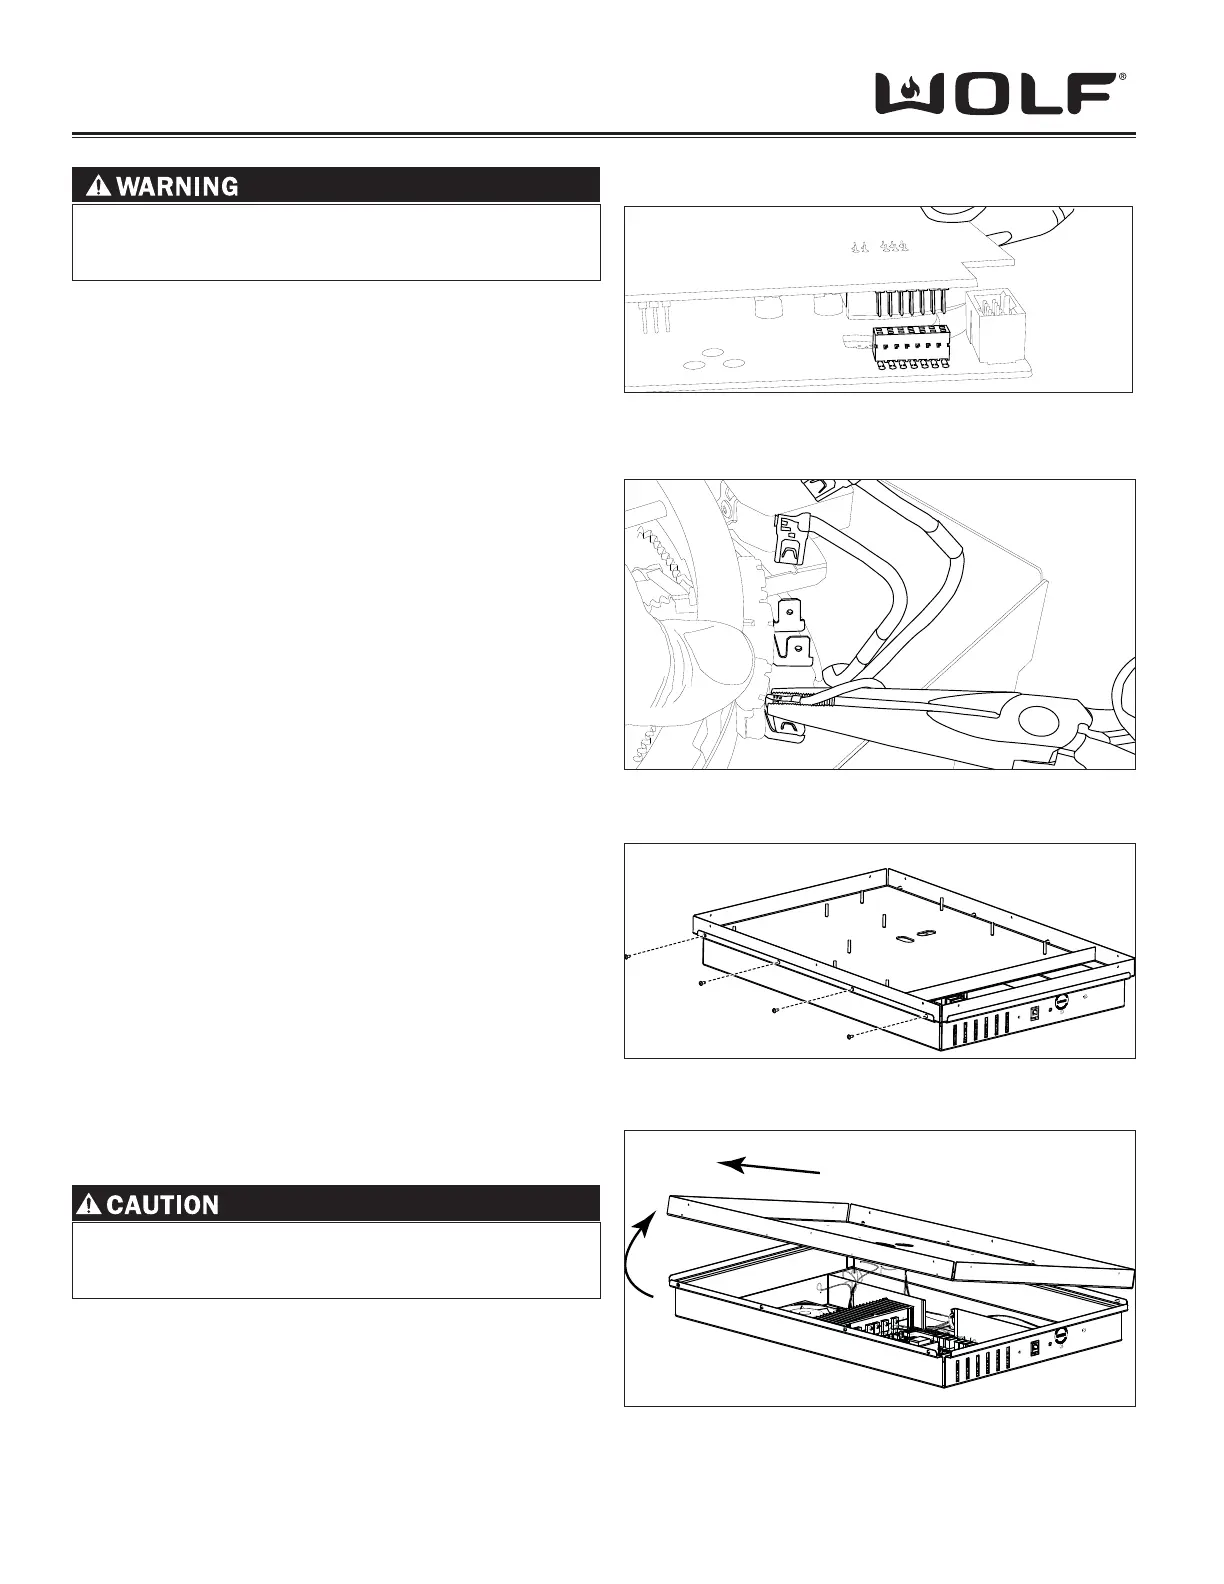
Power Module Removal
NOTE: To remove the Power Module, access must fi rst
be gained to the bottom of the cooktop which may require
removing the cooktop from its installation. Refer to the
installation section of this manual or the Installation Guide
included with the cooktop for additional information needed.
Figure 4-4 Remove Display Board