Electric Cooktop -2
Access & Removal
4-6
TO AVOID ELECTRICAL SHOCK, POWER TO THE UNIT MUST BE DISCONNECTED BEFORE ATTEMPTING THE
FOLLOWING REPAIR PROCEDURES.
TO AVOID INJURY FROM SHARP EDGES, ALWAYS WEAR GLOVES WHEN HANDLING SHEET METAL
COMPONENTS.
Cooling Fan Removal CT15 (continued)
Disconnect the heating elements taking special note 2.
of wiring confi guration. NOTE: The spade connectors
fi t very tight so care must be taken not to damage the
wires or elements when disconnecting. (See Figure
4-5)
Remove Springs from the guide pems.3.
Gently remove upper pan insulation. 4. NOTE: When
reinstalling insulation do not allow pan insulation to
overlap the Silicone Rubber Seal.
Remove the Upper Pan Assembly. (See Upper Pan 5.
Removal)
Disconnect the Molex connector that provides power to 6.
the cooling fan.
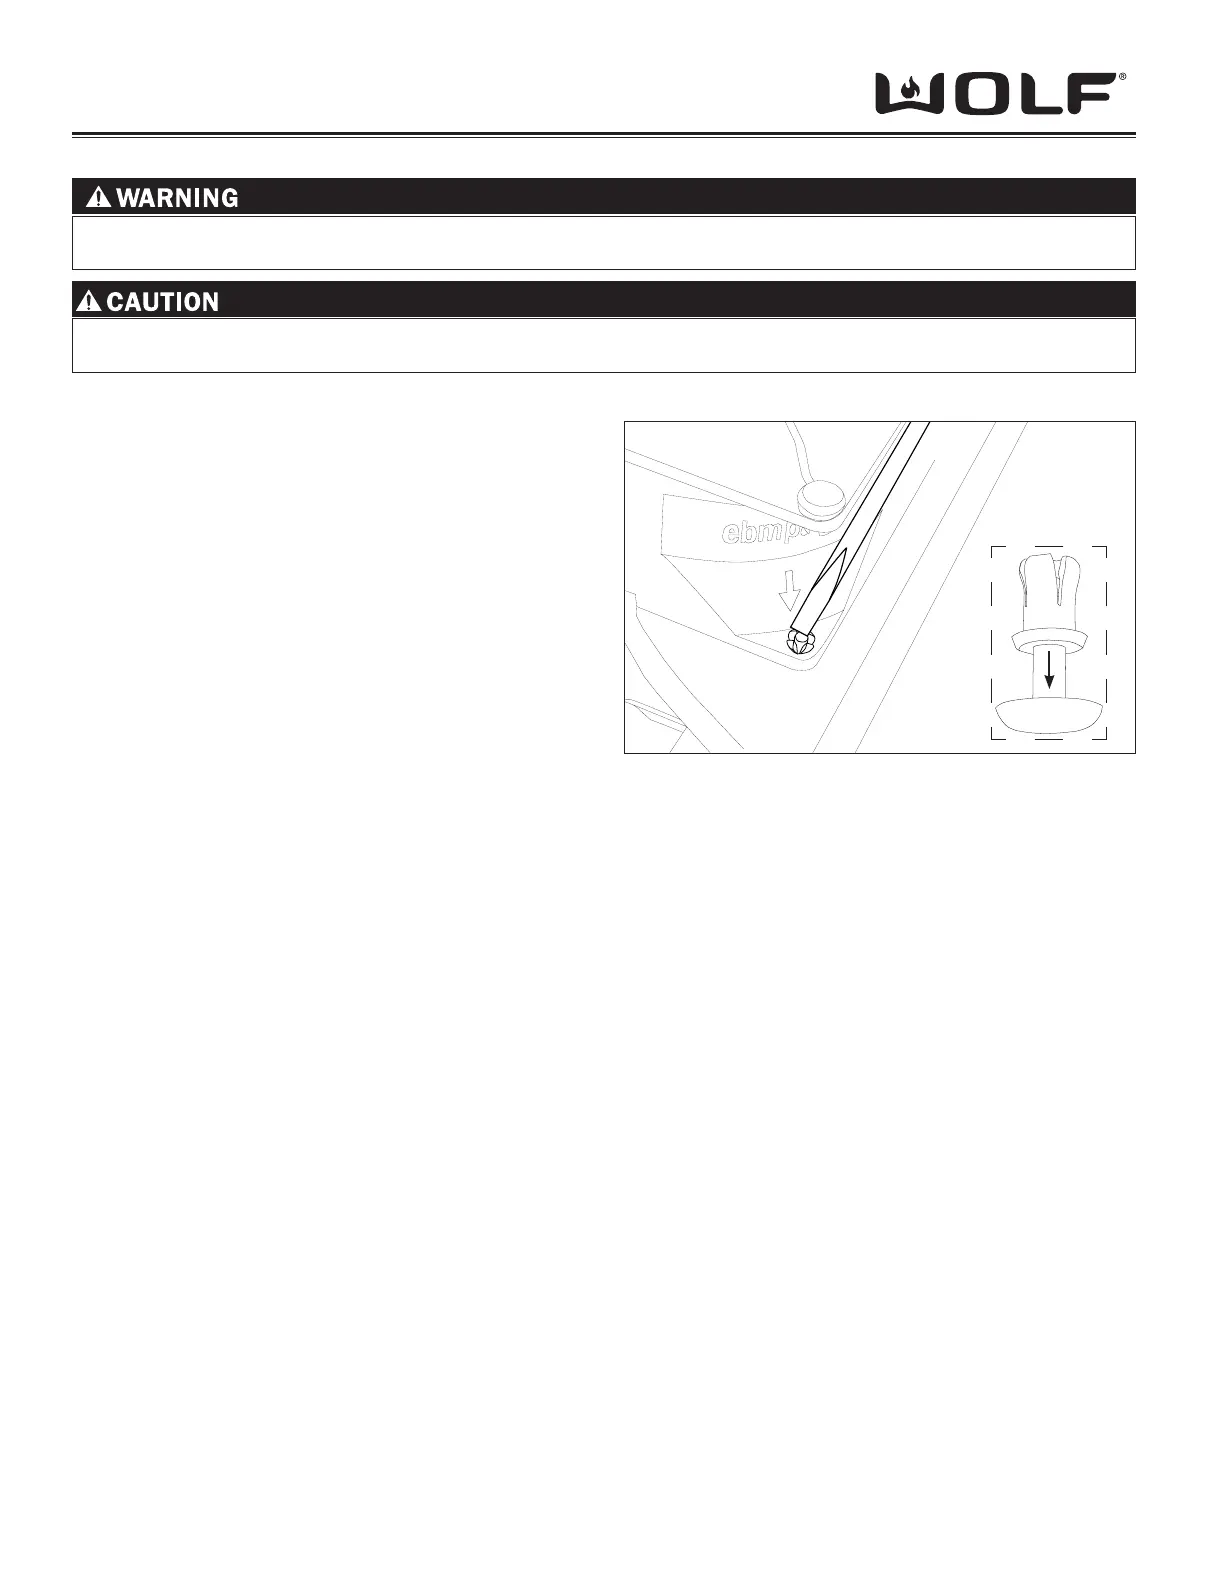
Using a fi ne blade screwdriver or an awl press the rivet 7.
pin down to allow rivet removal. (See Figure 4-11)
NOTE: Make sure the new fan is installed with the proper
air fl ow (fan blows air out of cooktop). The fan has an arrow
molded into the housing that indicates air fl ow direction.
(See Figure 4-11)
Replacing Silicone Rubber Seal
NOTE: When reinstalling insulation do not allow pan
insulation to overlap the Silicone Rubber Seal.
NOTE: When replacing this seal, make sure the new Seal
is cut so that it will remain approximately 1/4” away from
the front/back edge of the inner pan and should touch the
sides of the inner pan.
Rivet
Figure 4-11 CT15 Fan Removal