Commissioning
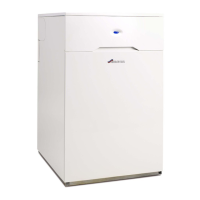
Greenstar Heatslave II
ErP -
6 720 813 344 (2014/09) 31
6 Commissioning
6.1 Pre-commissioning checks-appliance
1. Check that the service and water pipes are connected correctly.
2. Check that the oil supply is Kerosene and that the pipework is
connected correctly to the oil pump via the supplied flexible oil hose
( correct routing for flexible hose on page 25).
▶ Turn on the main oil supply valve at the tank, check the oil supply
pipework and connections. Rectify any leaks.
1. Check the flue is correctly fitted and the connections are secure.
2. Check the condensate pipework is correctly fitted and connected.
▶ Check the condensate trap is filled with water.
5. Check the CH circulating pump is set to 3.
Fig. 47
6.2 Filling the system
1. The diverter valve will sit in mid-position when the boiler has no
demand and is powered up.
Fig. 48
2. Loosen the flow pipe manual air vent screw.
Fig. 49
3. Check and if required, adjust the expansion vessel pressure using the
Schraeder type valve [A].
Fig. 50
The charge pressure of the built-in 12 litre expansion vessel is 0.7 bar as
dispatched, which is equivalent to a static head of five metres. At 1 bar
pressure the vessel will provide 107 litres expansion capacity, the boiler
has a primary water capacity of between 62 and 64 litres and therefore
additional system expansion capacity may be required.
If an extra expansion vessel is fitted to the central heating return, adjust
this to the same pressure as the appliance internal expansion vessel,
refer to separate instructions supplied with the extra expansion vessel.
CAUTION: Isolate the mains supplies before starting
any work and observe relevant safety precautions.
Replace flexible hose at annual service to prevent
possible oil leakage.
The CH circulating pump is preset to number 3 and
should not be altered.
NOTICE:
If the boiler is not to be commissioned immediately then:
After successfully completing all of the checks and any
rectification work, close the water valves, shut off the oil
supply and electrically isolate the boiler.
Complete the installation part of the Guarantee
Registration Card, and complete a CD10 or equivalent to
inform the LABC of the installation.

 Loading...
