Commissioning
Greenstar Heatslave II
ErP -
6 720 813 344 (2014/09) 37
6.4 Water treatment
Ensure that the system has been cleaned. Refer to section 4.1.2 of
these instructions.
Flushing (Central Heating)
▶ Ensure the appliance is switched off.
▶ Open all drain cocks and drain the system while the appliance is hot.
▶ Close drain cocks and add a suitable flushing agent at the correct
strength for the system condition in accordance with the
manufacturer's instructions.
▶ Run the appliance/system at normal operating temperature for the
time stated by the manufacturer of the flushing agent.
▶ Drain and thoroughly flush the system to remove the flushing agent
and debris.
Inhibitor (Central Heating)
▶ Check drain cocks are closed and all radiator valves are open before
adding a suitable inhibitor compatible with aluminium (or combined
inhibitor/anti-freeze if the system is exposed to freezing conditions)
to the heating system water in accordance with the manufacturers
instructions.
▶ Fill system via a WRAS approved filling loop to between 1 and 1.5
bar.
▶ Vent all radiators; tighten vents when complete.
▶ Re-pressurise, if necessary, to approximately 1bar.
▶ Set all controls to maximum.
▶ Record the date when the inhibitor was added to the system in the
Boiler commissioning checklist and in the guarantee registration.
Water treatment products
Suitable water treatment products can be obtain from the following
manufacturers:
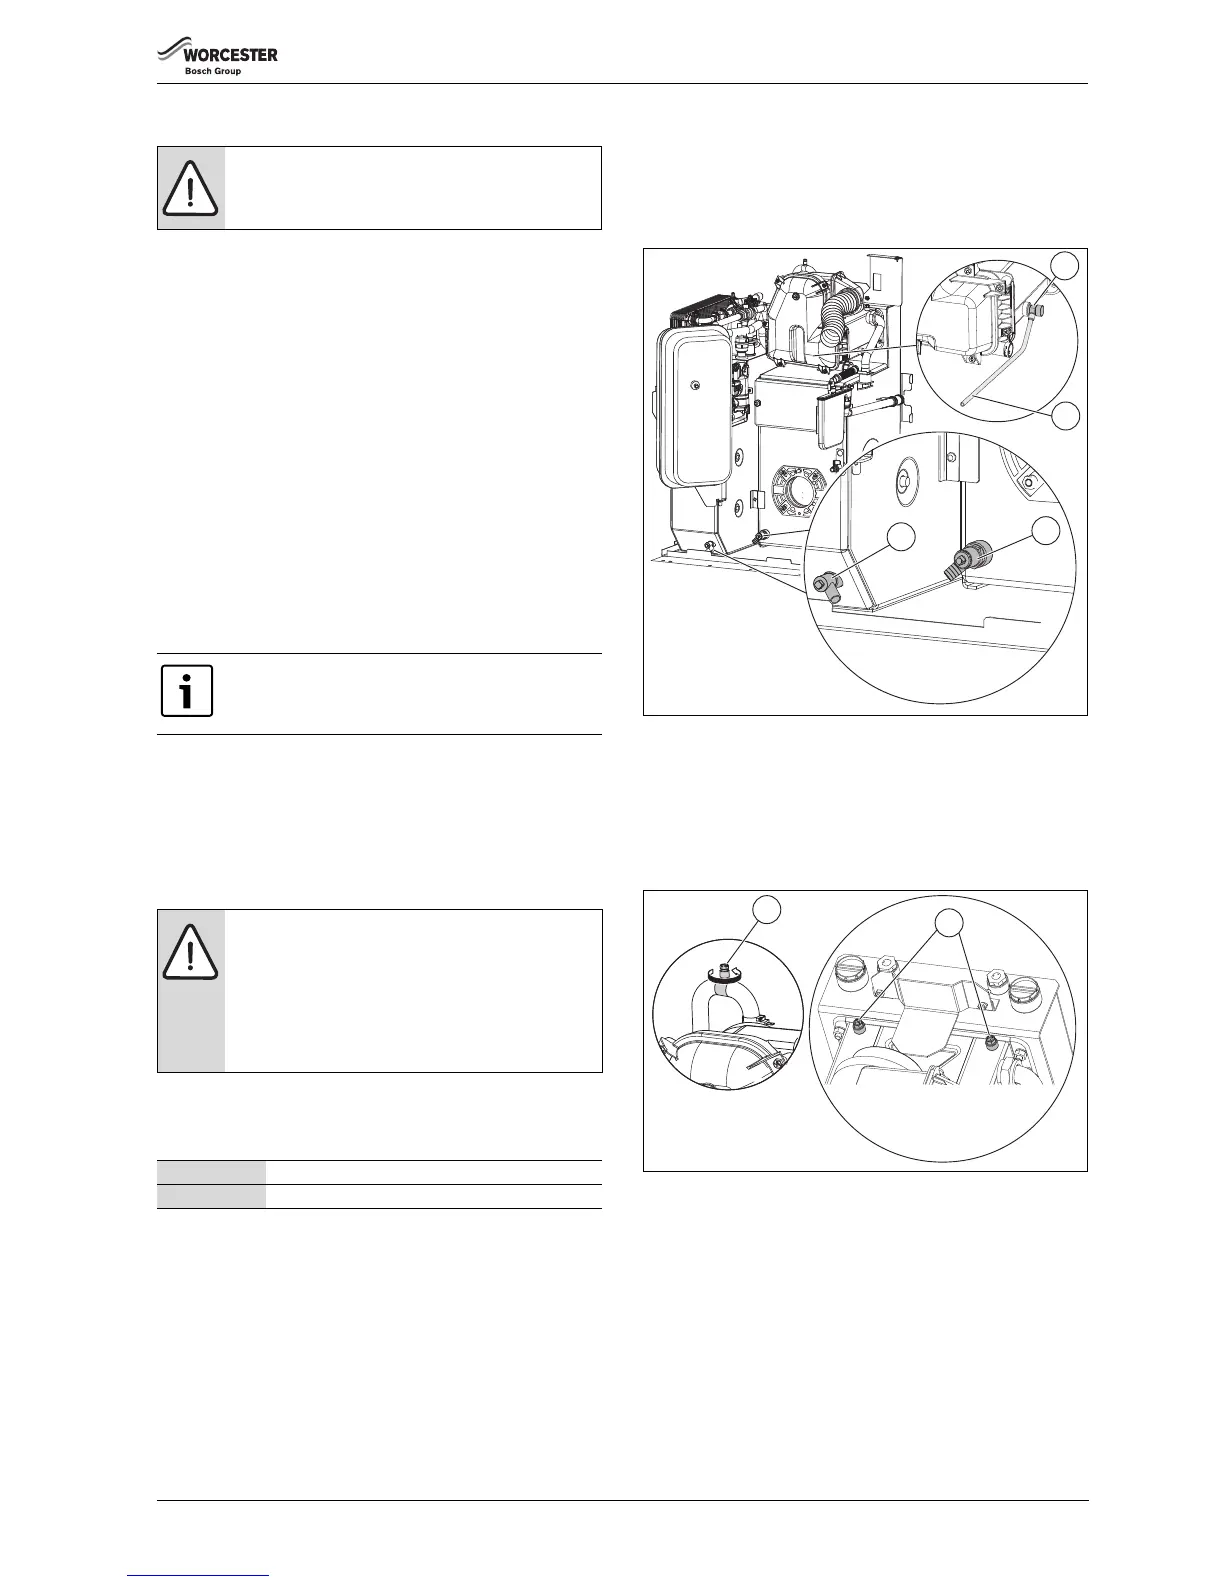
Appliance Drain Points
▶ The appliance can be drained via the primary heat exchanger point
[4]:
– There is an additional drain point on the secondary heat
exchanger [1] with drain tube [2].
– The heat bank also has a drain point [3]
Fig. 69 Appliance drains points
Appliance manual vent points
▶ The appliance can be manually vented via:
– The two vent points at the top of the secondary heat exchanger.
Only one may be in use, the other may be obscured by side fluing.
– A vent point on the primary flow from the primary heat exchanger.
▶ Use a radiator key or suitable screwdriver to open the vent point.
Fig. 70 Appliance manual vent points
6.5 Finishing commissioning - Appliance
1. Rotate the control box [A] towards you [B].
Slide back into position [C].
2. Locate the bottom edge of the front panel [D] onto the supporting
ledge off the baseplate [E] and secure in place with screws [F].
3. Locate the top panel [G] onto the brackets at the rear of the boiler
[H] and locate the ball stud connections [J] and press down to
secure.
Always apply pressure at the edges of the boiler panels when
securing to avoid accidental damage.
NOTICE:
▶ Artificially softened water must not be used to fill the
central heating system.
The pH value of the system water must be less than 8 or
the appliance warrantee will be invalidated.
NOTICE:
▶ The concentration of inhibitor in the system should
be checked every 12 months or sooner if system
content is lost.
▶ In cases where all attempts to find a micro leak have
failed, Worcester, Bosch Group supports the use of
Fernox F4 leak sealer.
FERNOX 0870 601 5000 or www.fernox.com
SENTINEL 0800 389 4670 or www.sentinel-solutions.net
 Loading...


