EVOM™ Manual
World Precision Instruments 31
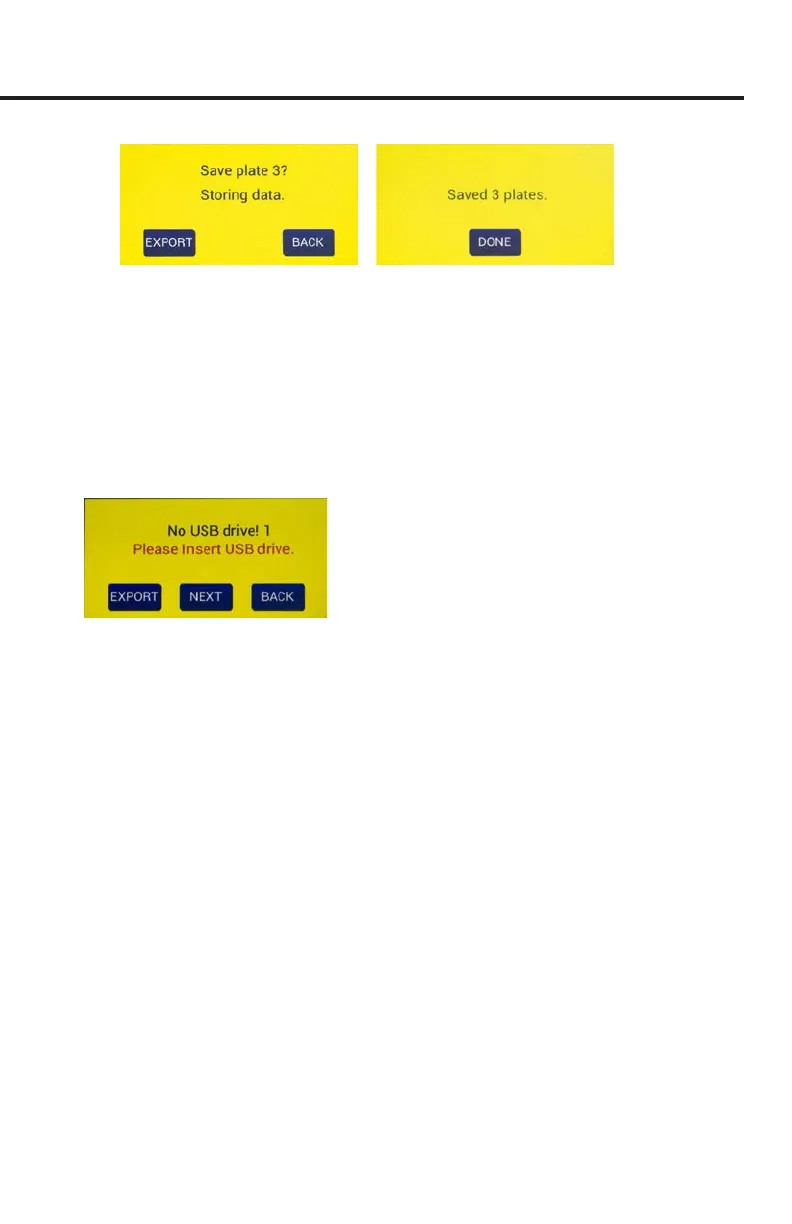
Fig. 57—(Left) The message changes showing which plate is being saved. Here Plate 3 data
is being stored on the connected computer.
Fig. 58—(Right) All three plates were saved to the connected computer.
4. When the plate data has been saved, a conrmation message appears (Fig. 58).
Press the
Done
button to return to the main screen.
NOTE: If you save to the USB ash drive and the drive is not plugged in or it is not
recognized, a warning message appears (Fig. 59). Press the
Back
button and try
another USB ash drive. The Export function cannot be used on an unrecognized
drive.
Fig. 59—When the USB ash drive is not plugged in or not recognized, a warning message
appears.
NOTE: EVOM™ Manual should respond with “Plate data saved to USB” within
15 seconds. If “Saving le...” is still seen after 20 seconds, press the
Back
button
and use another USB ash drive. Once a le has been saved, open the le on a
computer to verify the contents.
5. Now you can work with your data.
• If you stored your data on the USB ash drive, remove the drive and transfer
the data les to your computer. They are in comma separated value (CSV) le
format for Microsoft
®
Excel.
• If you stored your data using the EVOM™ Companion Application, all your
data les will be located in the directory you specied when you started the
Companion Application.