DPI (Dots per
Inch)
Image Quality
File Size
Purpose
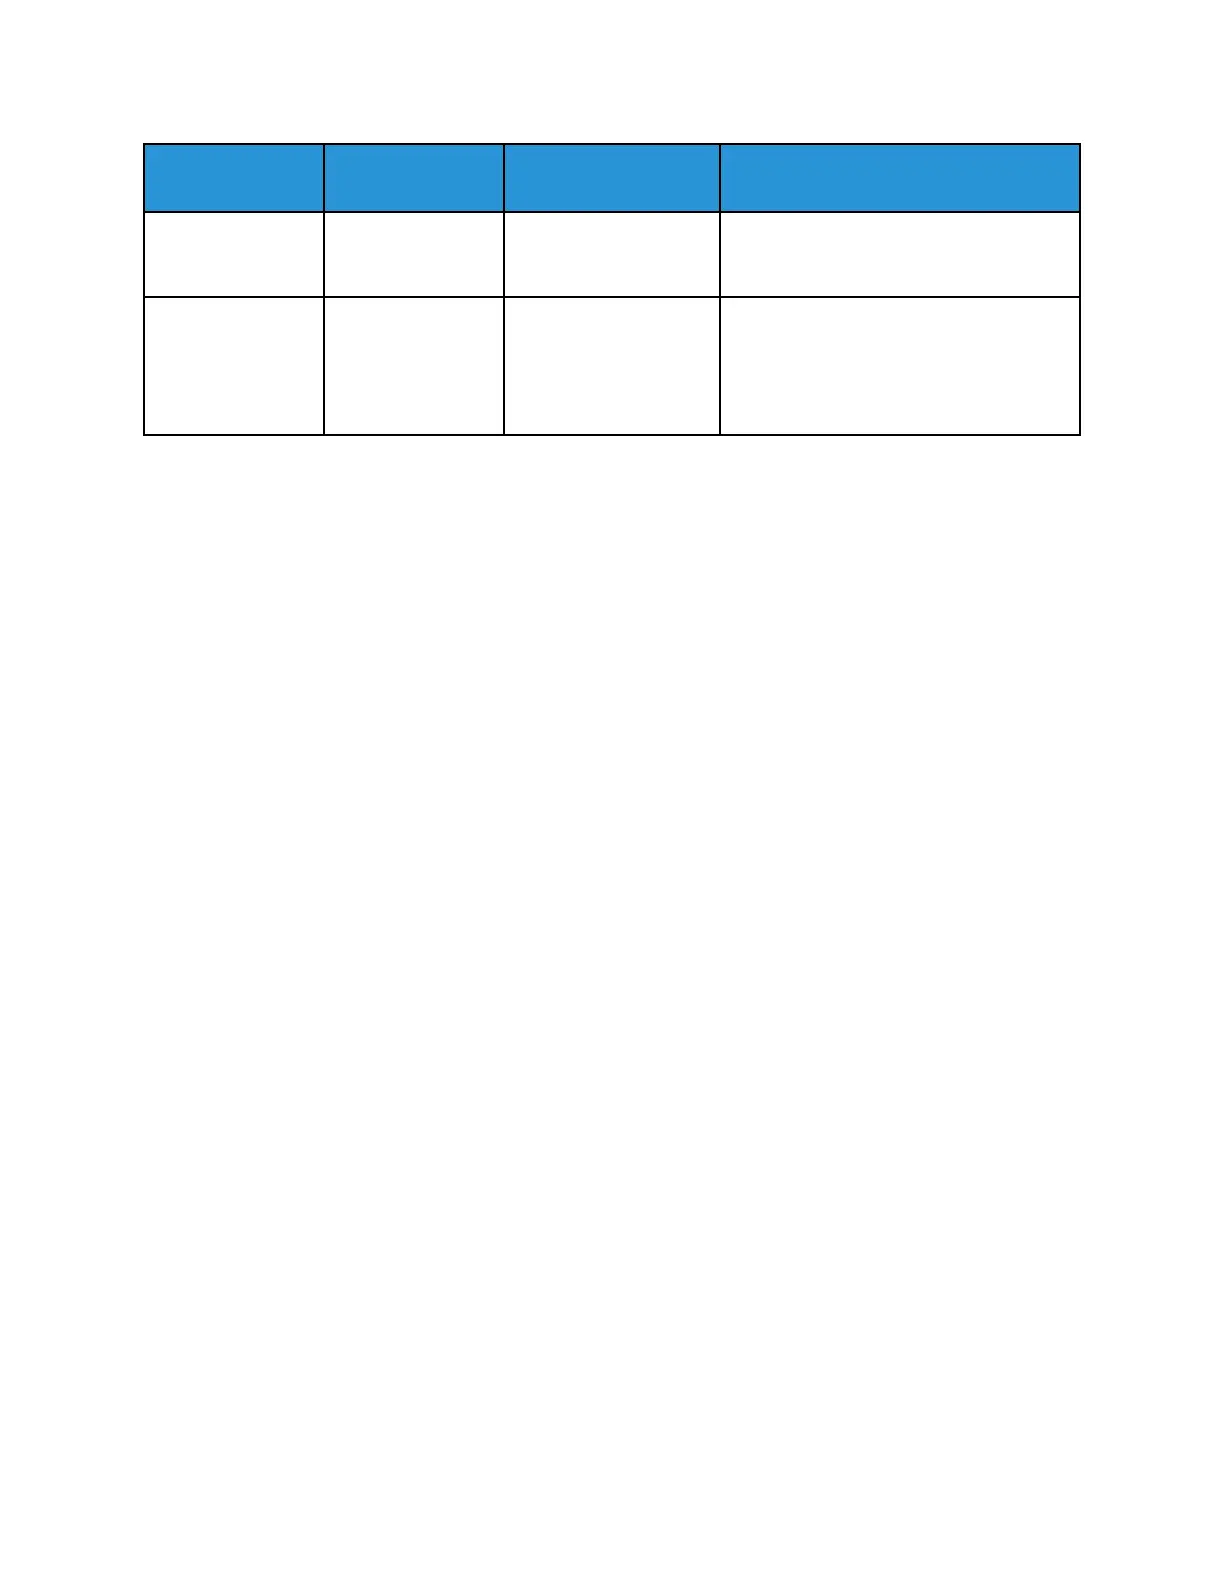
400 Higher Very Large Used for original documents that have
thin lines, small font sizes, or for image
enlargement.
600 Highest
Extremely Large
Files scanned at 600
DPI can take longer to
transmit over a
network.
Intended for commercial-quality
printing.
SSppeecciiffyyiinngg tthhee OOrriiggiinnaall DDooccuummeenntt SSiizzee
When you scan a document to send to a network, you can set various features.
To specify the original document size:
1. At the printer control panel, press the Clear All button, then press the Services Home button.
2. Touch Scan To.
3. Touch the Right Arrow icon repeatedly until the Scan To Features screen appears.
4. Scroll, then touch Original Size.
5. To select an option, touch theDown Arrow icon.
• Preset: This option provides a list of document sizes.
• Custom: This option provides a way for you to enter a custom document size or area to scan.
6. Touch OK.
SSppeecciiffyyiinngg tthhee OOrriiggiinnaall DDooccuummeenntt TTyyppee
The printer optimizes the image quality of the copies, based on the type of images in the original
document, and how the original was created.
To specify the original document type:
1. At the printer control panel, press the Clear All button, then press the Services Home button.
2. Touch Scan To.
3. Touch the Right Arrow icon repeatedly until the Scan To Features screen appears.
4. Scroll, then touch Original Type.
5. Touch the Down Arrow icon as many times as necessary to select an option:
• Photo & Text: Use this setting for the following:
• Documents with text and photos printed on the paper
• Photocopied documents that include text and photos
• Documents that include photos and text on photographic paper
• Photo: Use this setting for the following:
• Original photographs on photographic paper
• Photos printed on magazine paper
Xerox
®
B1025 Multifunction Printer
User Guide
63
Using the Services

 Loading...


