• Enhance: This option improves image quality. To adjust the image quality, move the slider up
and down between the range of 1–2. The higher the number, the more vivid the background.
• Erase: This option erases the margins from the image. To erase the margins, move the slider
between 1–4. The higher the number, the lighter the background.
6. Touch OK.
SSeettttiinngg tthhee SSccaann RReessoolluuttiioonn
Set the resolution options based on the type of original document that you want to scan, and how
you plan to use the scanned image. Scan resolution affects both the size and image quality of the
scanned image file. Higher scan resolution produces better image quality and a larger file size.
1. At the printer control panel, press the Clear All button, then press the Services Home button.
2. Touch Scan To.
3. Touch the Right Arrow button repeatedly until the Scan To Features screen appears.
4. Scroll, then touch Resolution.
5. Select a DPI option:
Note: DPI indicates the scan resolution options in dots-per-inch.
• 72
• 100
• 200
• 300
• 400
• 600
Note: For details, refer to Scan Resolution Options.
6. Touch OK.
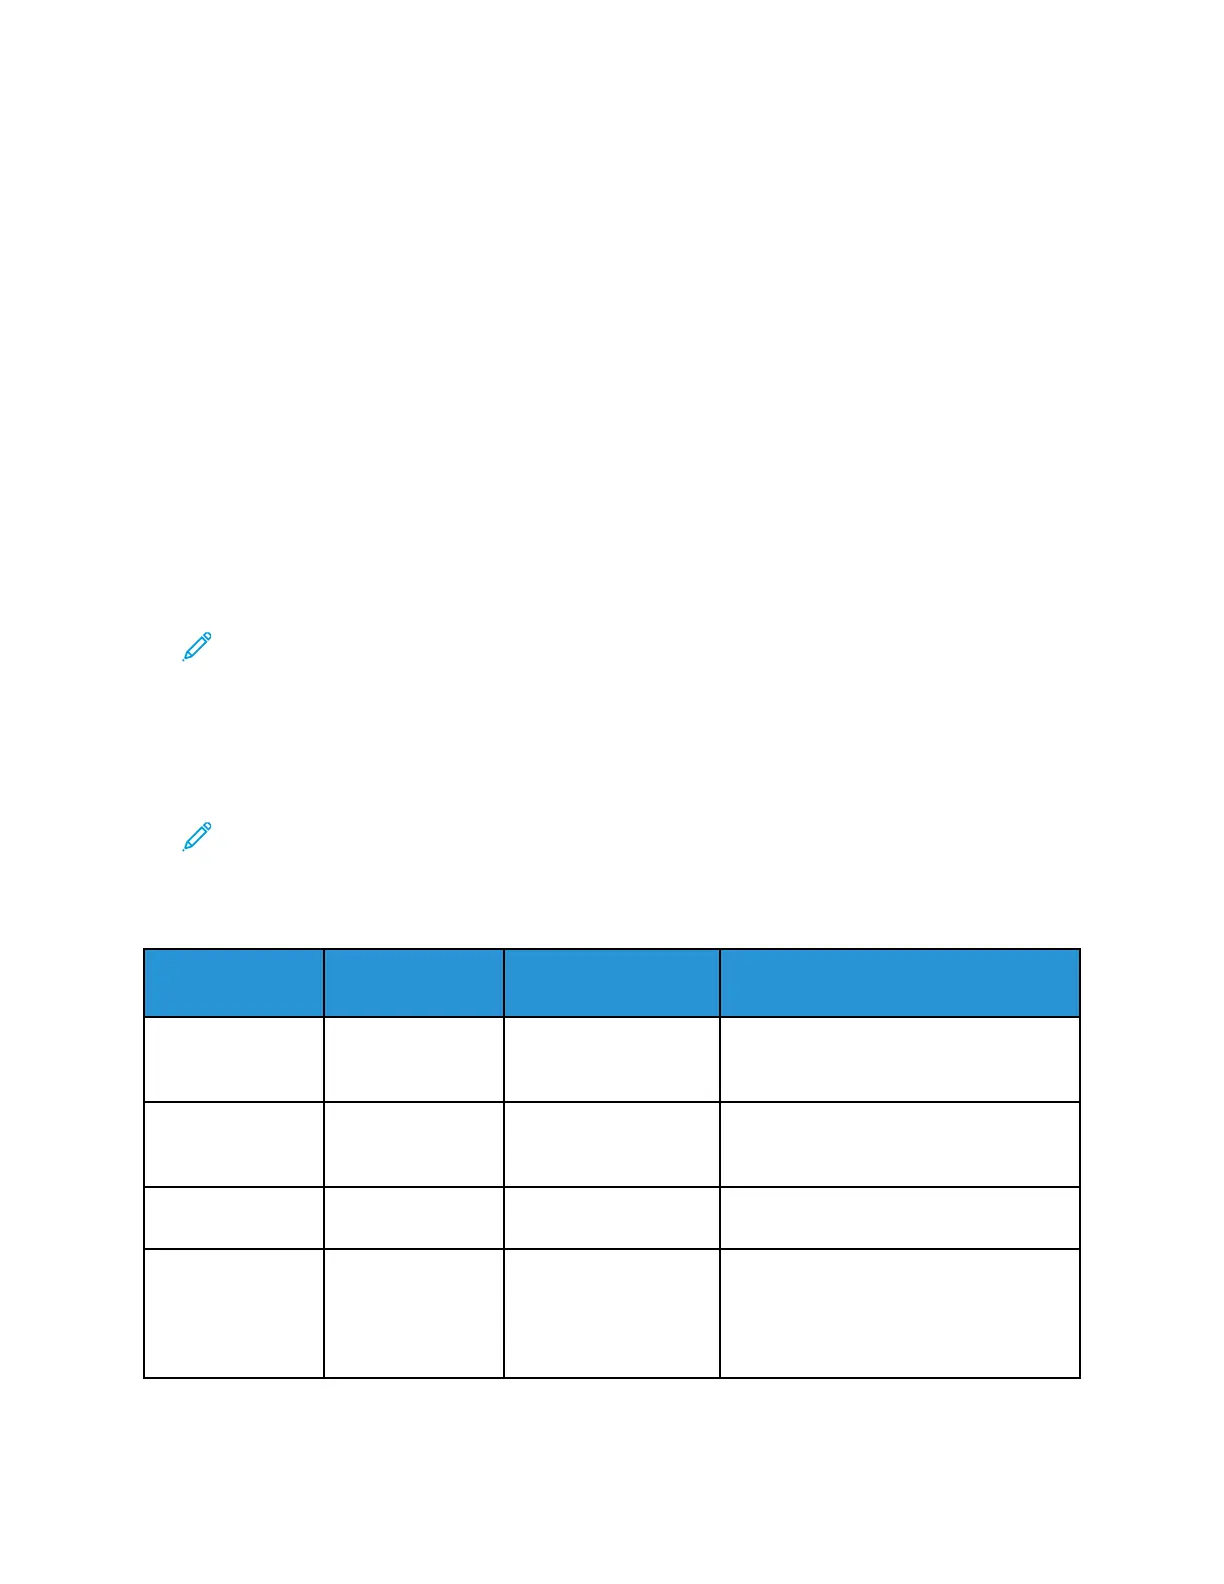
Scan Resolution Options
DPI (Dots per
Inch)
Image Quality
File Size
Purpose
72 Acceptable Smallest This DPI setting is for onscreen viewing
only. If you print the image, it can
appear grainy.
100 Good Small This DPI setting is for onscreen viewing
only. If you print the image, it can
appear grainy.
200 Good Moderate Best suited for standard office
documents and photographs.
300 High Large Offers better image quality for standard
office documents and photographs.
Recommended for automated
processing and OCR (Optical Character
Recognition).
62
Xerox
®
B1025 Multifunction Printer
User Guide
Using the Services

 Loading...


