Maintenance
128 Phaser 6600 Color Printer
User Guide
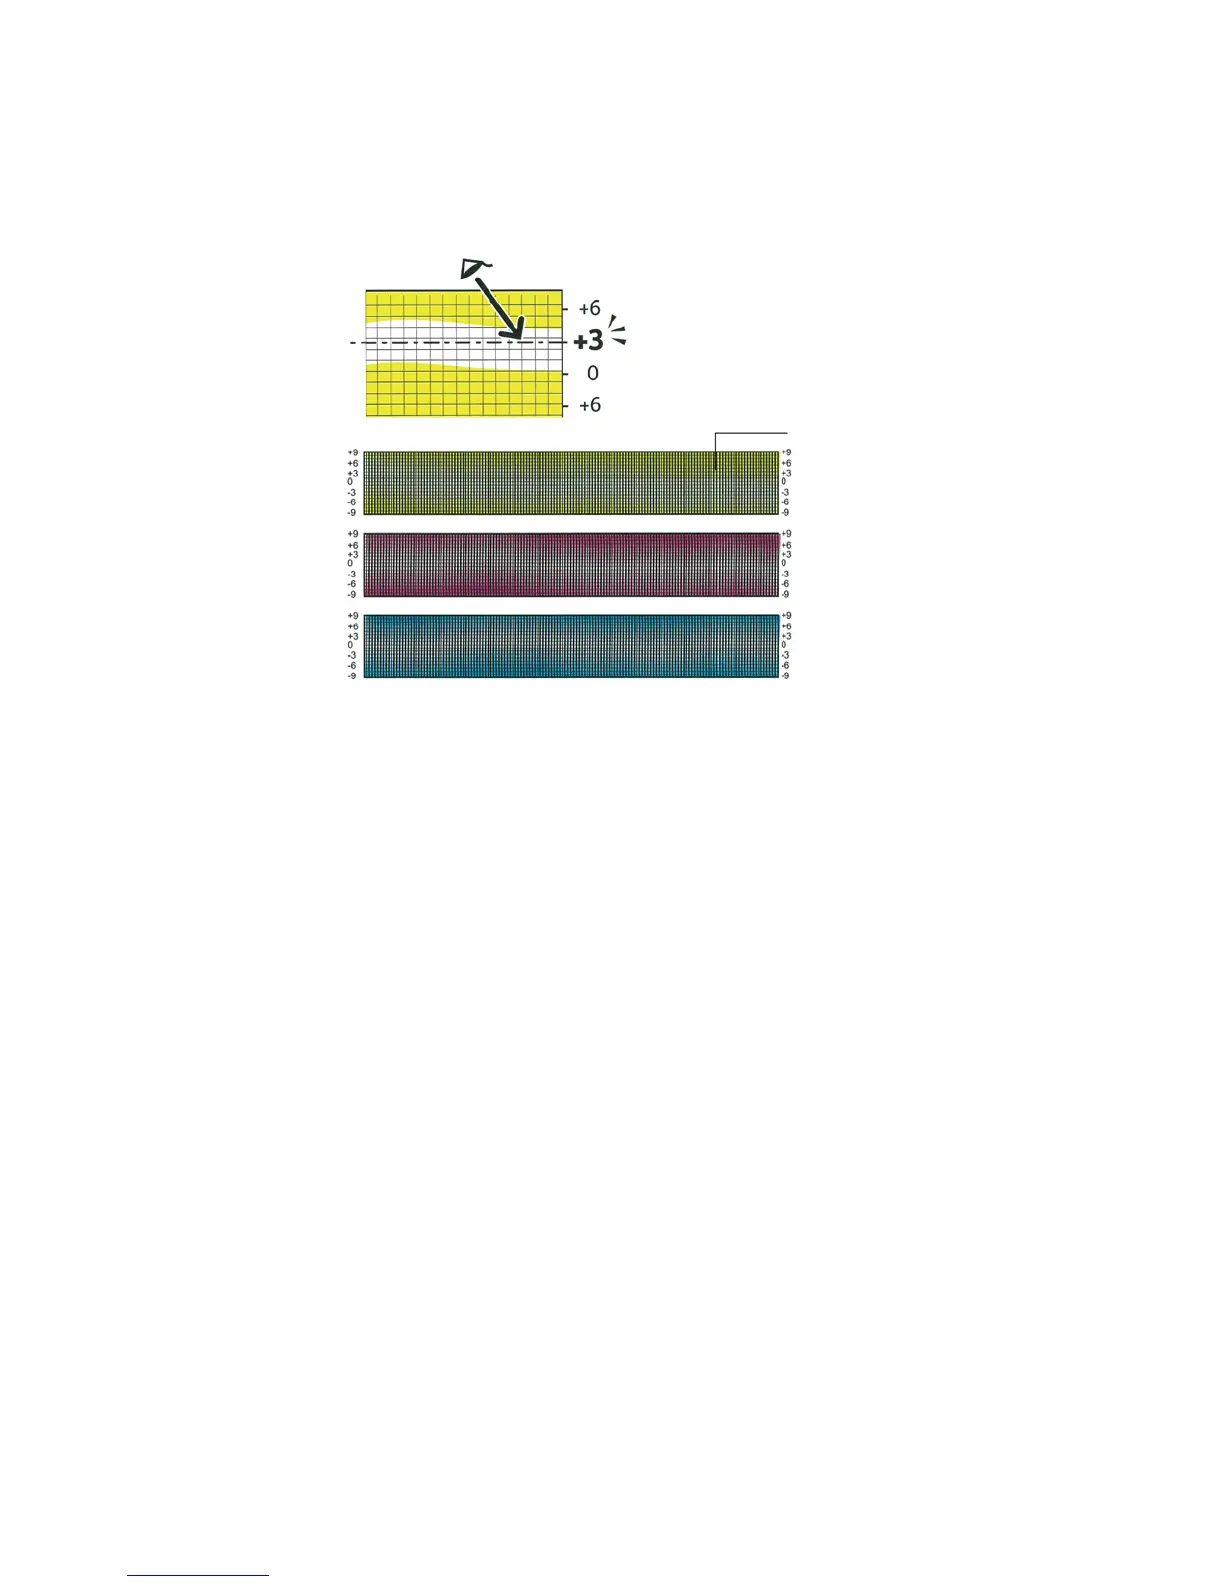
7. Repeat the process for the right side calibration lines, RY, RM, and RC.
8. Align a straight edge through the middle of the white zone in each of the PY, PM, and PC charts.
Circle the number at the end of each chart that represents the middle of the white zone.
9. Navigate to Enter Number.
10. To enter values for each LY, LM, and LC field, use the Up and Down arrow buttons. Adjust the
value to what you circled for each field, then press OK.
11. Repeat step 9 to enter values for each RY, RM, and RC field, and each PY, PM, and PC fields.
12. Print another Registration Chart, then repeat the process until you complete the color
registration corrections.
Checking the Firmware Version
1. At the printer control panel, press the Menu button.
Note: To navigate through the menu, use the Up or Down arrow buttons.
2. Navigate to Admin Settings, then press OK.
3. Navigate to Service Tools, then press OK.
4. Navigate to F/W Version, then press OK.
The firmware version appears in the bottom line of the display.
5. To return to Service Tools, press the Back arrow button, or to return to the main menu, press the
Menu button.
Adjusting Paper Type
Use Adjust Paper Type to compensate for paper thickness within a paper type. If the printed image is
too light, use a heavier setting for the paper you are using. If the printed image is mottled or
blotchy-looking, decrease the setting for the paper you are using.
To adjust the paper type: