June 2014
4-13
Xerox® WorkCentre® 3025 Multifunction Printer Service Manual
REP 1.7
Repairs
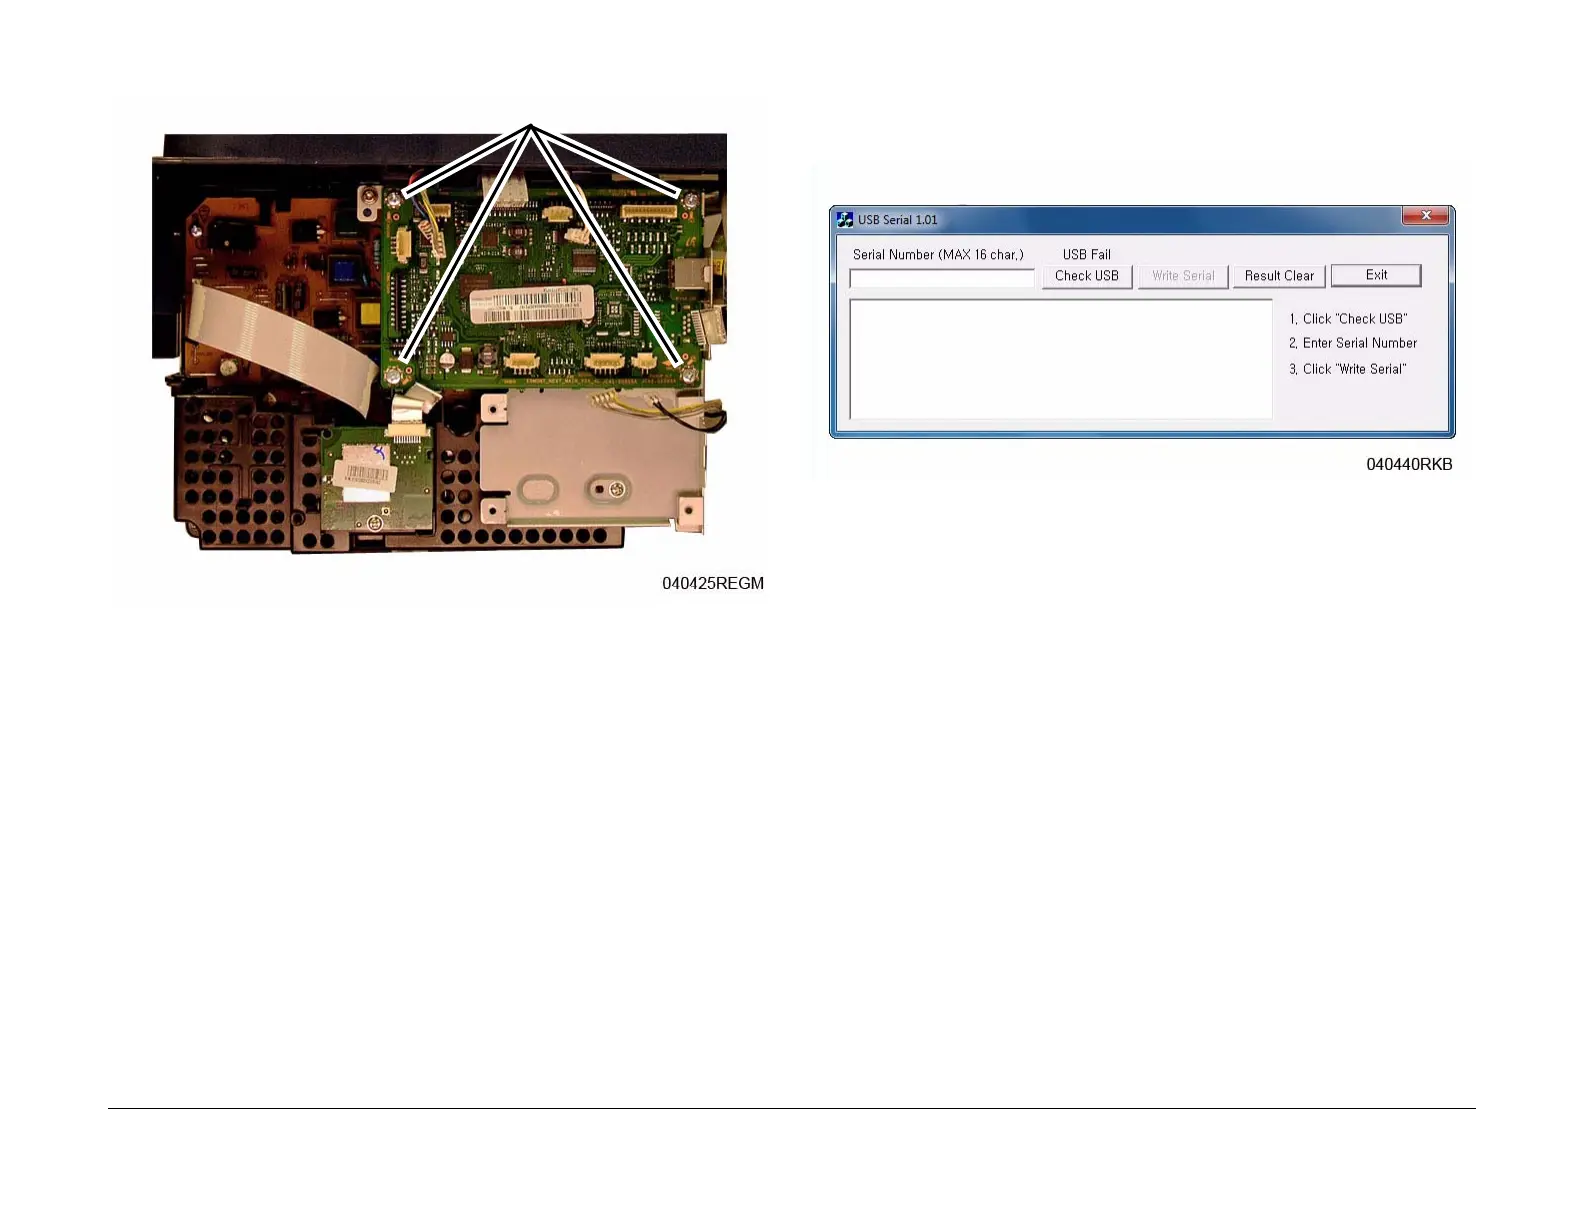
5. Remove the screws (4) and the Main PWB (Figure 2).
Figure 2 Main PWB Screws
Replacement
NOTE: Tapered Plastic Screws and Round Machine Screws are used to hold the PWB to the
frame. Make sure that the Plastic Screws go into plastic components and Machine Screws go
into the metal frame.
Install the components in the reverse of removal.
After installing a new Main PWB, the following steps MUST be performed to write the machine
serial number to the new Main PWB:
1. Reconnect the Power Cord. Power On the machine.
2. Connect the PWS to the printer via USB connection.
3. Download the USB Serial Number writing application; USB_Serial.V1.02.exe, to the PWS
from the GSN website (GP 10), and run the application.
a. Double-click the executable file and follow the steps listed in the USB Serial applica-
tion window to write the machine serial number to the new Main PWB. Figure 3.
NOTE: Select the [Check USB] button to ensure that there is a good USB connec-
tion BEFORE entering the serial number. If the connection is good, “USB Success,”
will display in the area above the button. If there is an problem with the USB connec-
tion, “USB Fail“ will display.
Figure 3 PWB Serial Number Tool Screen
4. After successfuly entering the serial number, exit the PWB Serial Number writing applica-
tion.
5. Print a Configuration Report and check that the original machine serial number is dis-
played under the Device Profile heading.
NOTE: There is a function in Diagnostics that allows for entry of the serial number using
the keypad (3025NI). From Diagnostic Mode, (Ref. GP 1) select: [Data Set Up>Set Serial
Number] then, using the keypad, enter the serial number. Press the <OK> button to con-
firm selections. This function allows numeric entries only. For serial numbers contain-
ing alpha characters (letters), use the serial number writing tool; USB_Serial.V1.02.exe.
Screws

 Loading...


