iFT Series Hardware Installation Manual ADPRO
26 27817_05
3.9 RAID 1 Support
3.9.1 About RAID 1
RAIDstandsforRedundantArrayofIndependentDisks(originallyRedundantArrayofInexpensiveDisks).Itisa
storagetechnologythatcombinesmultiplediskdrivecomponentsintoalogicalunit.Dataisdistributedacross
thedrivesinoneofseveralwayscalledRAIDlevels,dependingonthelevelofredundancyandperformance
required.RAIDhasbecomeanumbrellatermforcomputerdatastorageschemesthatcandivideandreplicate
dataamongmultiplephysicaldrives,whiletheoperatingsystemcanstillaccessthedataasbeingononesingle
drive.
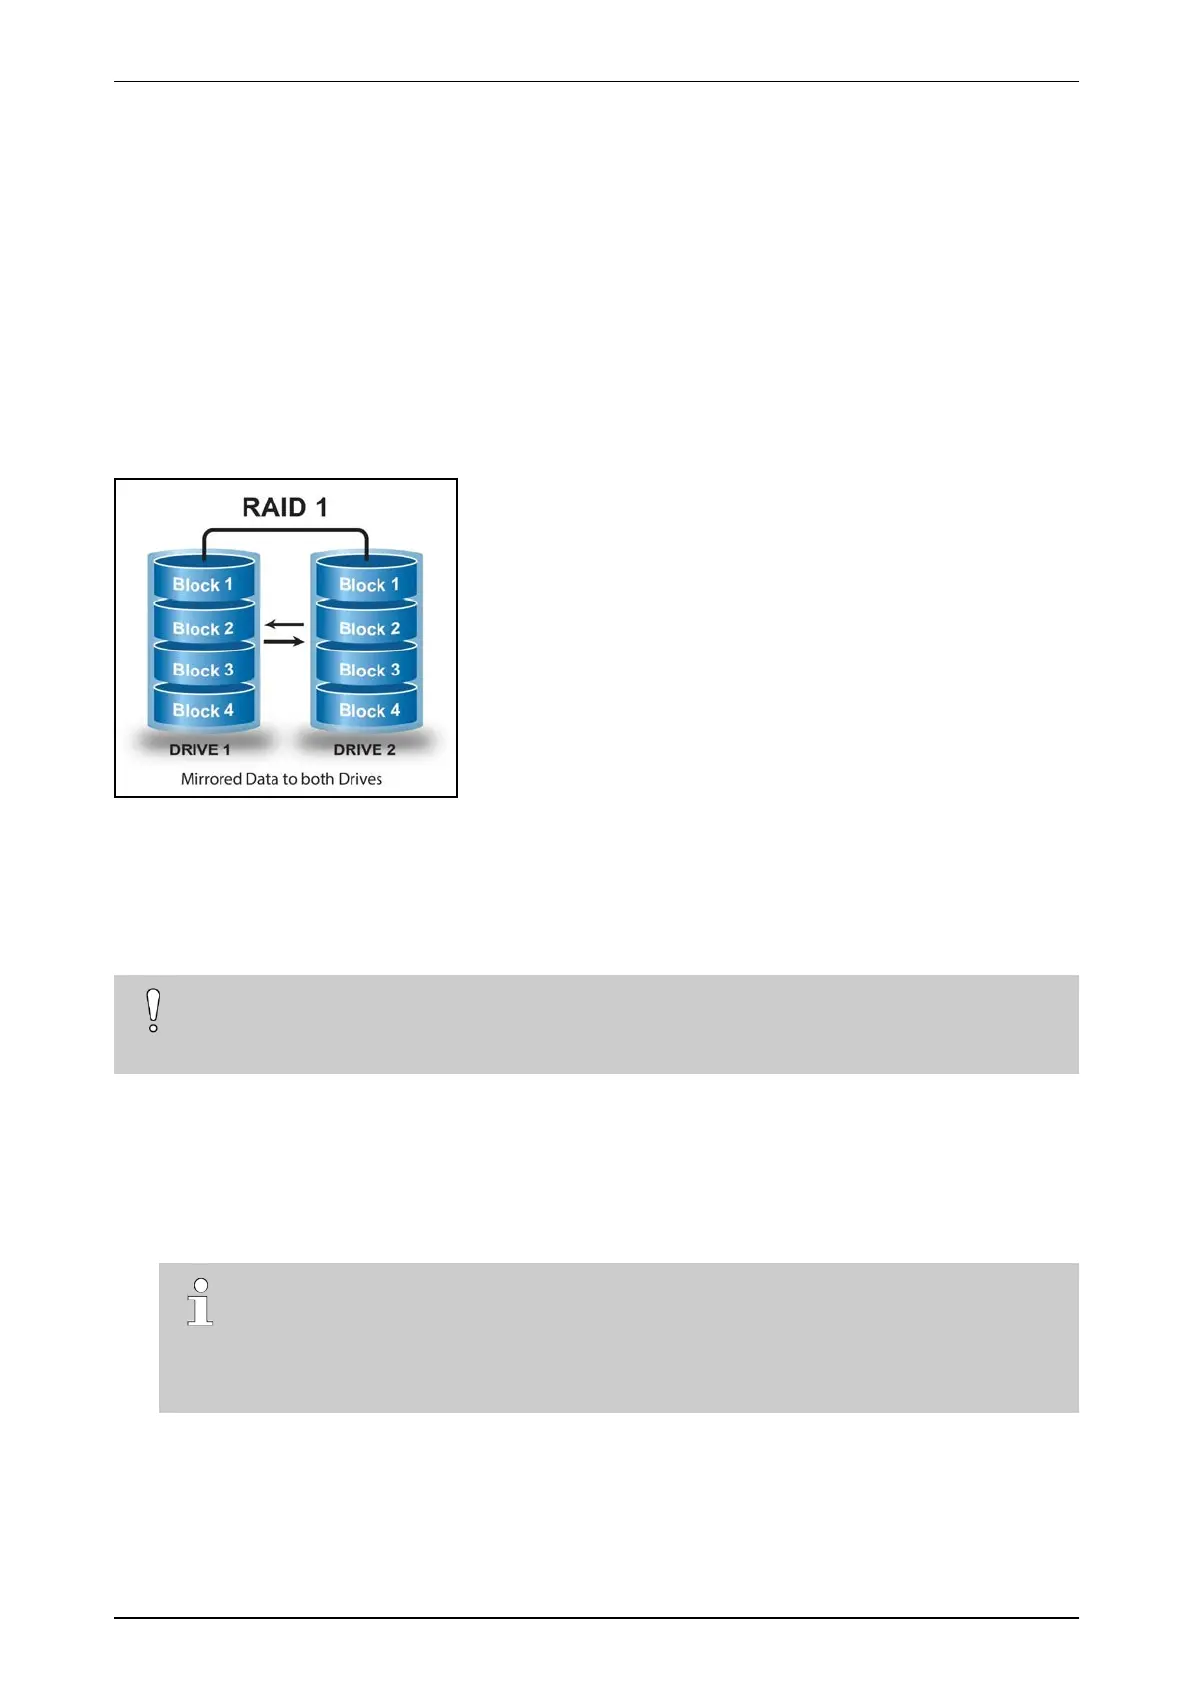
RAID1isaboutmirroringwithoutparityorstriping.Dataiswrittenidenticallytotwodrives,therebyproducinga
“mirroredset”:thereadrequestisservicedbyeitherofthetwodrivescontainingtherequesteddata,whichever
onehastheshortestsearchtimeplusrotationallatency.
3.9.2 Activating RAID 1
RAID1requiresminimum2harddisks.ThesizeoftheRAID1recordingcombinationisthesmallerofthe
2disksinstalledinyourdevice.Forexample:ifyouhavea1TBdiskanda2TBdisk,theRAID1recordingdisk
hasa1TBcapacity.
Caution!
WhenyouapplyRAID1,thesystemformatstheselecteddisksanderasesthedataonthedisks.
Youwillloseallthedataonthedisks.Backupyourrecordingsfirst.
ToactivateRAID1,proceedasfollows:
1. Stopthedevice,andswitchoffthepowersupply.
2. Connectamonitor/screenandkeyboardtotheXOdevice.
3. Switchonthepowersupplyandwaitforthebootwindowtoappear.
4. SelectXO Installer andpressEnter.
Note
Thebootwindowonlyappearsforafewseconds,thenthedevicecontinuesbooting.Tomake
surethatyoudonotmissit,pressthearrowkeysonthekeyboardrepeatedlywhilethedeviceis
booting.Thedevicewillthenstopatthebootwindow,andthisgivesyoutimetoselectandopen
theXO Installer menu.
5. ChooseUpdate current system>Manage recording disks.
6. UsethearrowkeystoselectthedesiredharddiskandpressEnter.AnXappearsinfrontoftheselected
harddisk(betweenthebrackets).
7. Selectalsothesecondharddisk.