VESDA VLI Product Guide VESDA by Xtralis
30 www.xtralis.com
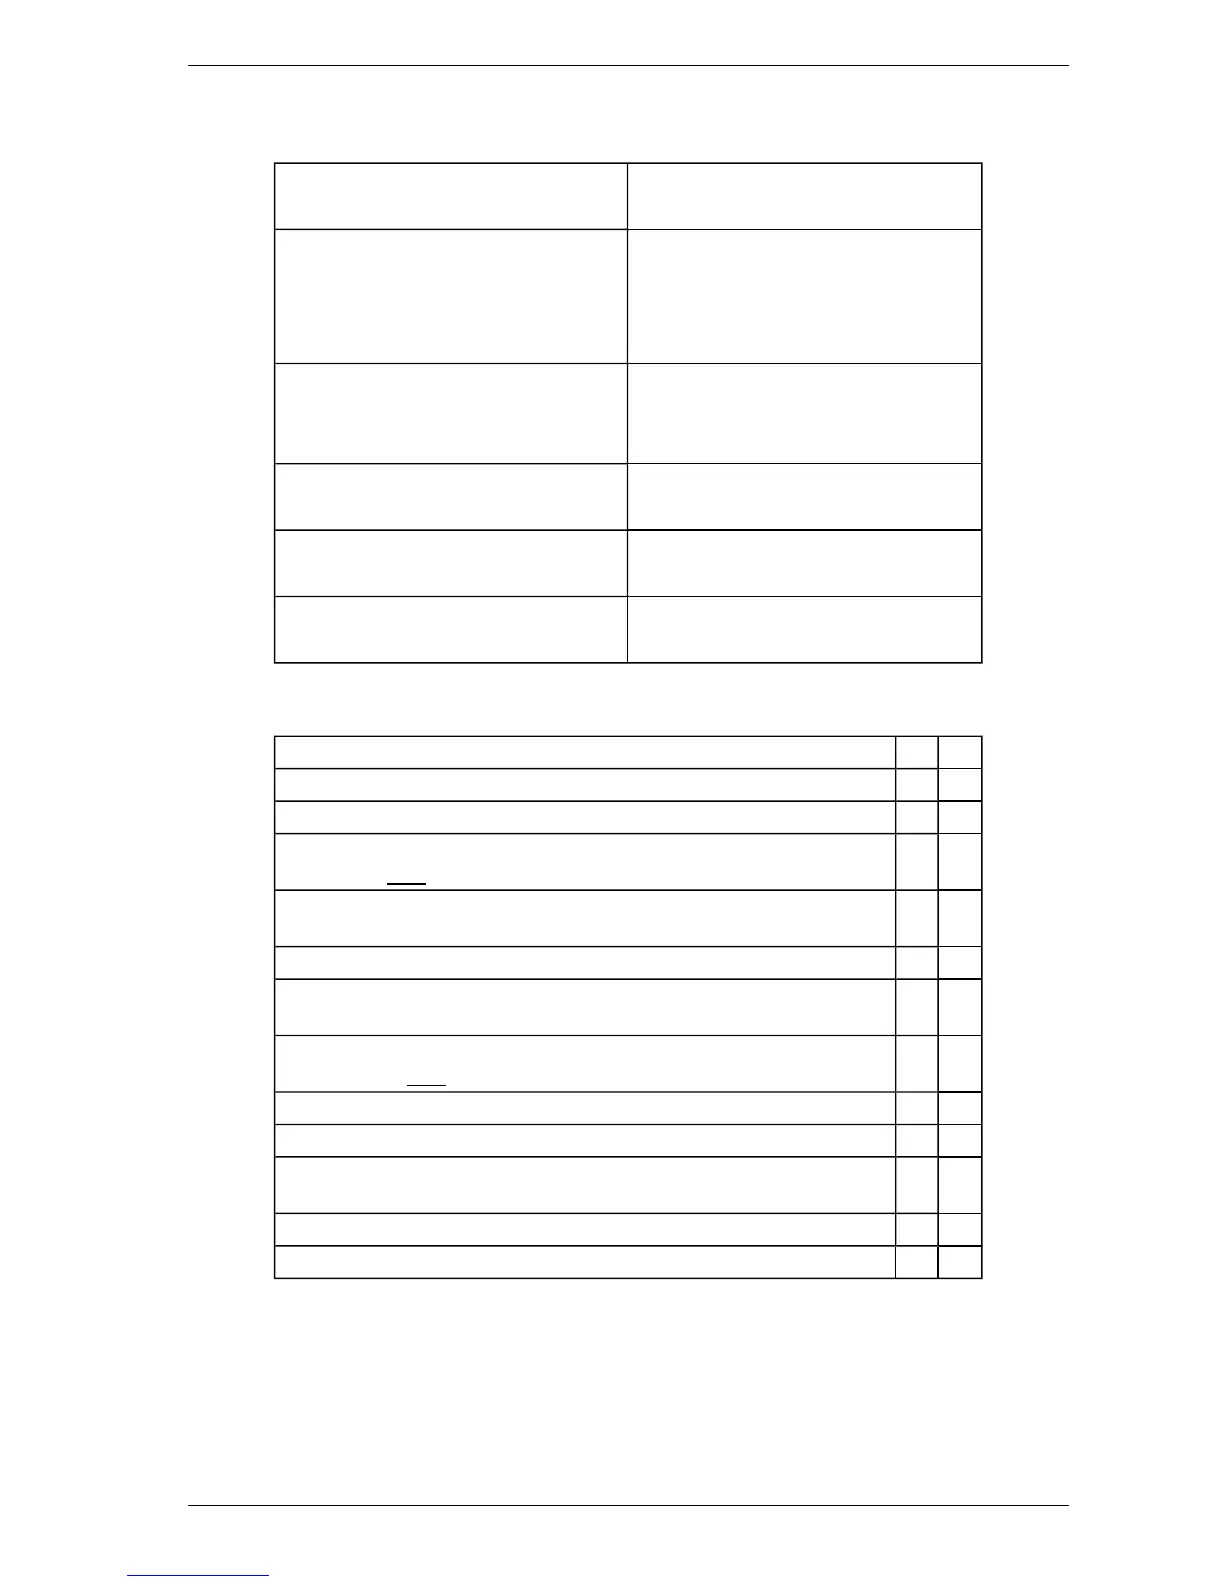
3.5 Installation Checklist
Site Name
Address
Detector Serial Number(s) and Date of
Manufacture
Name of Installer
Signature
Date
Perform the following checks listed below to ensure that all the necessary items are completed
before handing over to a commissioning engineer.
Installation Checks Yes No
Were the detector and the mounting bracket intact in the box?
Is the detector securely locked onto its mounting bracket?
Are the sampling air pipes firmly connected to the air inlet ports? Ensure that
the pipes are NOT glued.
Have the power wires been connected to the correct terminals on the
detector?
If required, has the end of line resistor been connected?
Have the alarm and fault signaling wires been terminated to the correct
terminals of the detector?
Has the plug at the exhaust port been removed? Ensure that the exhaust
pipe (if fitted) is NOTglued.
Has the front cover been fitted correctly?
Is the air sampling pipework installed and checked as per the site plans?
Are the VESDAnet terminals looped back on a standalone VESDAnet
enabled detector? Refer to section 3.2.2.
Is the Intelligent Filter installed and its lever locked down?
Is the secondary foam filter installed?
Table 3-6: Installation Checklist