VESDA by Xtralis VESDA VLI Product Guide
www.xtralis.com 47
7.5 Replacing the Aspirator
Any time the aspirator is removed ensure the area surrounding the aspirator is clear of dirt and
debris prior to replacement.
Care must be taken during aspirator replacement. The aspirator must be correctly seated; this is
essential so that gaskets are not damaged or dislodged from the underside of the aspirator.
Remove the Aspirator
1. Set the detector to Standby mode. Refer to section 7.1 for further information.
2. Remove the front cover. Refer to section 7.2 for further information.
3. Power down the detector.
4. Unplug the Aspirator electrical connector.
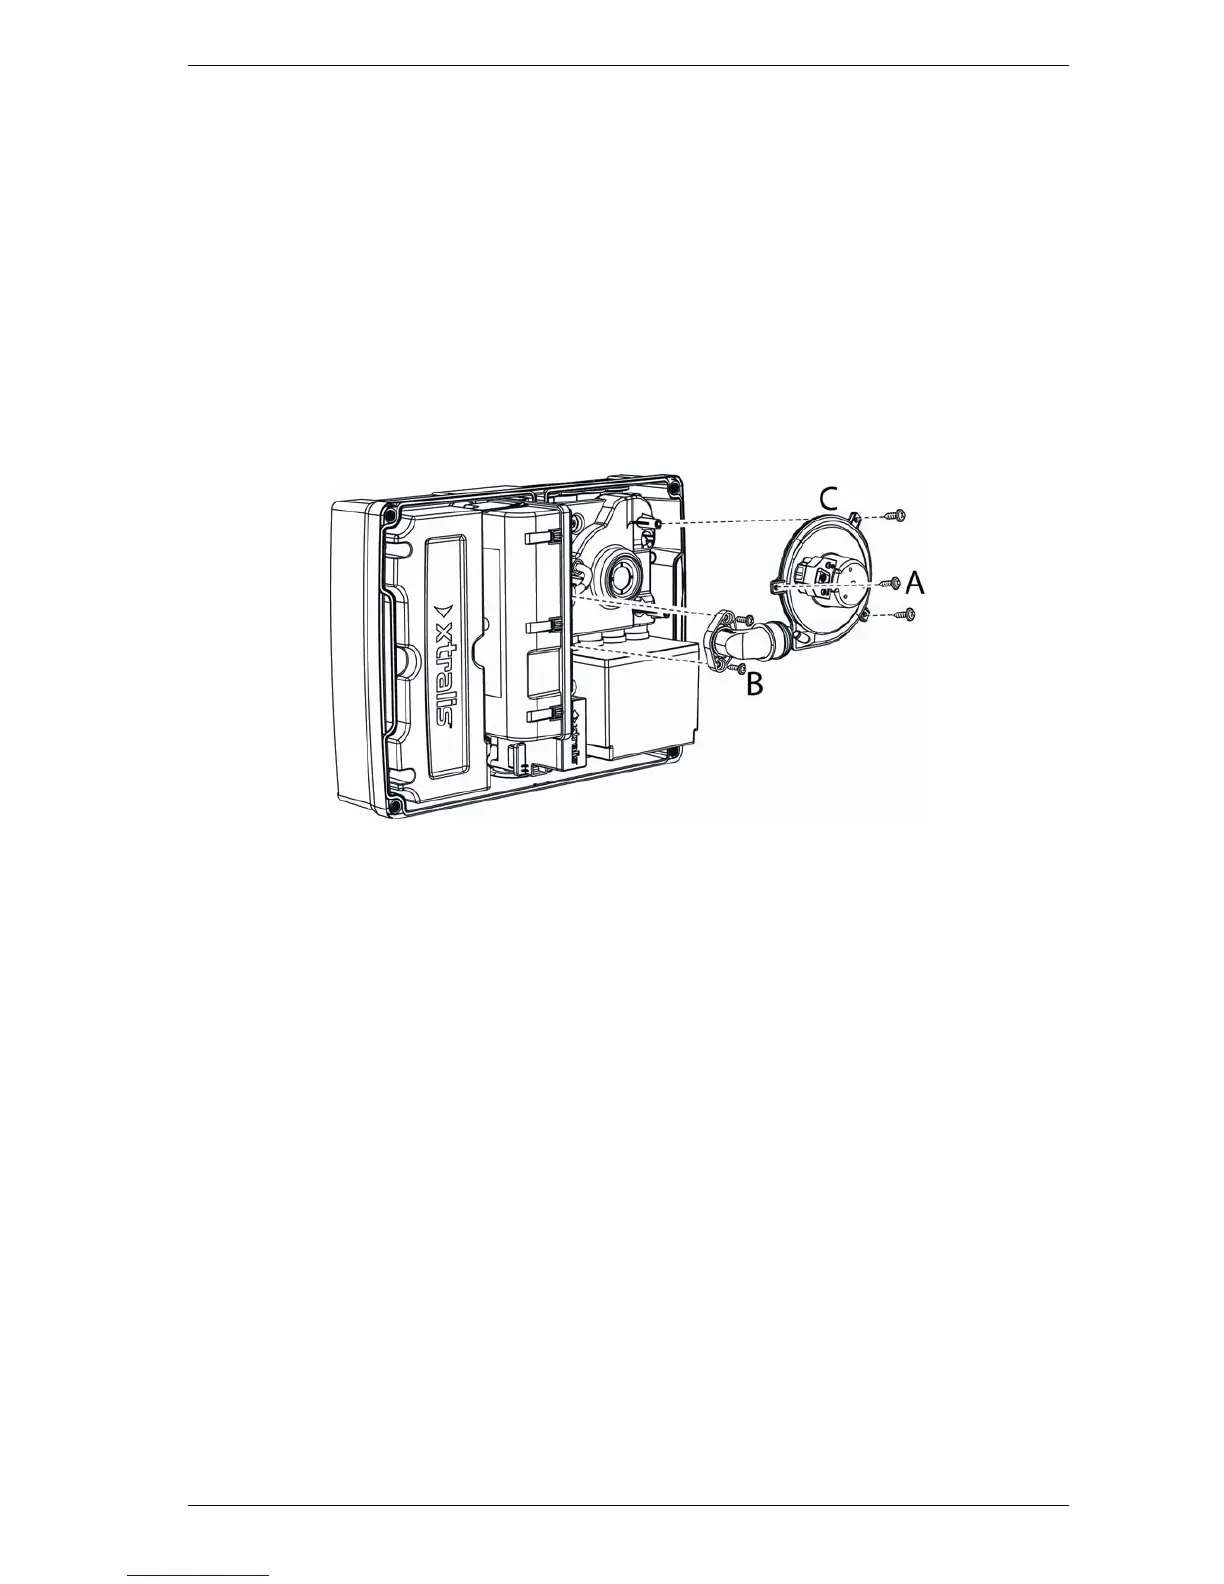
5. Remove the three Aspirator screws (A) and the two screws on the exhaust port (B).
6. Remove the Aspirator (C).
Figure 7-5: Aspirator Replacement
Reinstall the Aspirator
To reinstall the Aspirator, follow the removal procedure in reverse order.