VESDA by Xtralis VESDA VLI Product Guide
www.xtralis.com 45
7.3 Replacing the Intelligent Filter
The detector constantly monitors the difference between the flow of filtered air and the flow of un-
filtered air into the manifold. The flow of filtered air decreases when compared to the flow of un-
filtered air as dirt and other particles accumulate in the Intelligent Filter. Although it is recommended
to replace the Intelligent Filter every two years, environmental conditions dictate the actual
frequency of Intelligent Filter replacement.
The detector displays a fault condition that requires replacement of the Intelligent Filter when the
flow of filtered air falls below the minimum threshold when compared to the flow of un-filtered air.
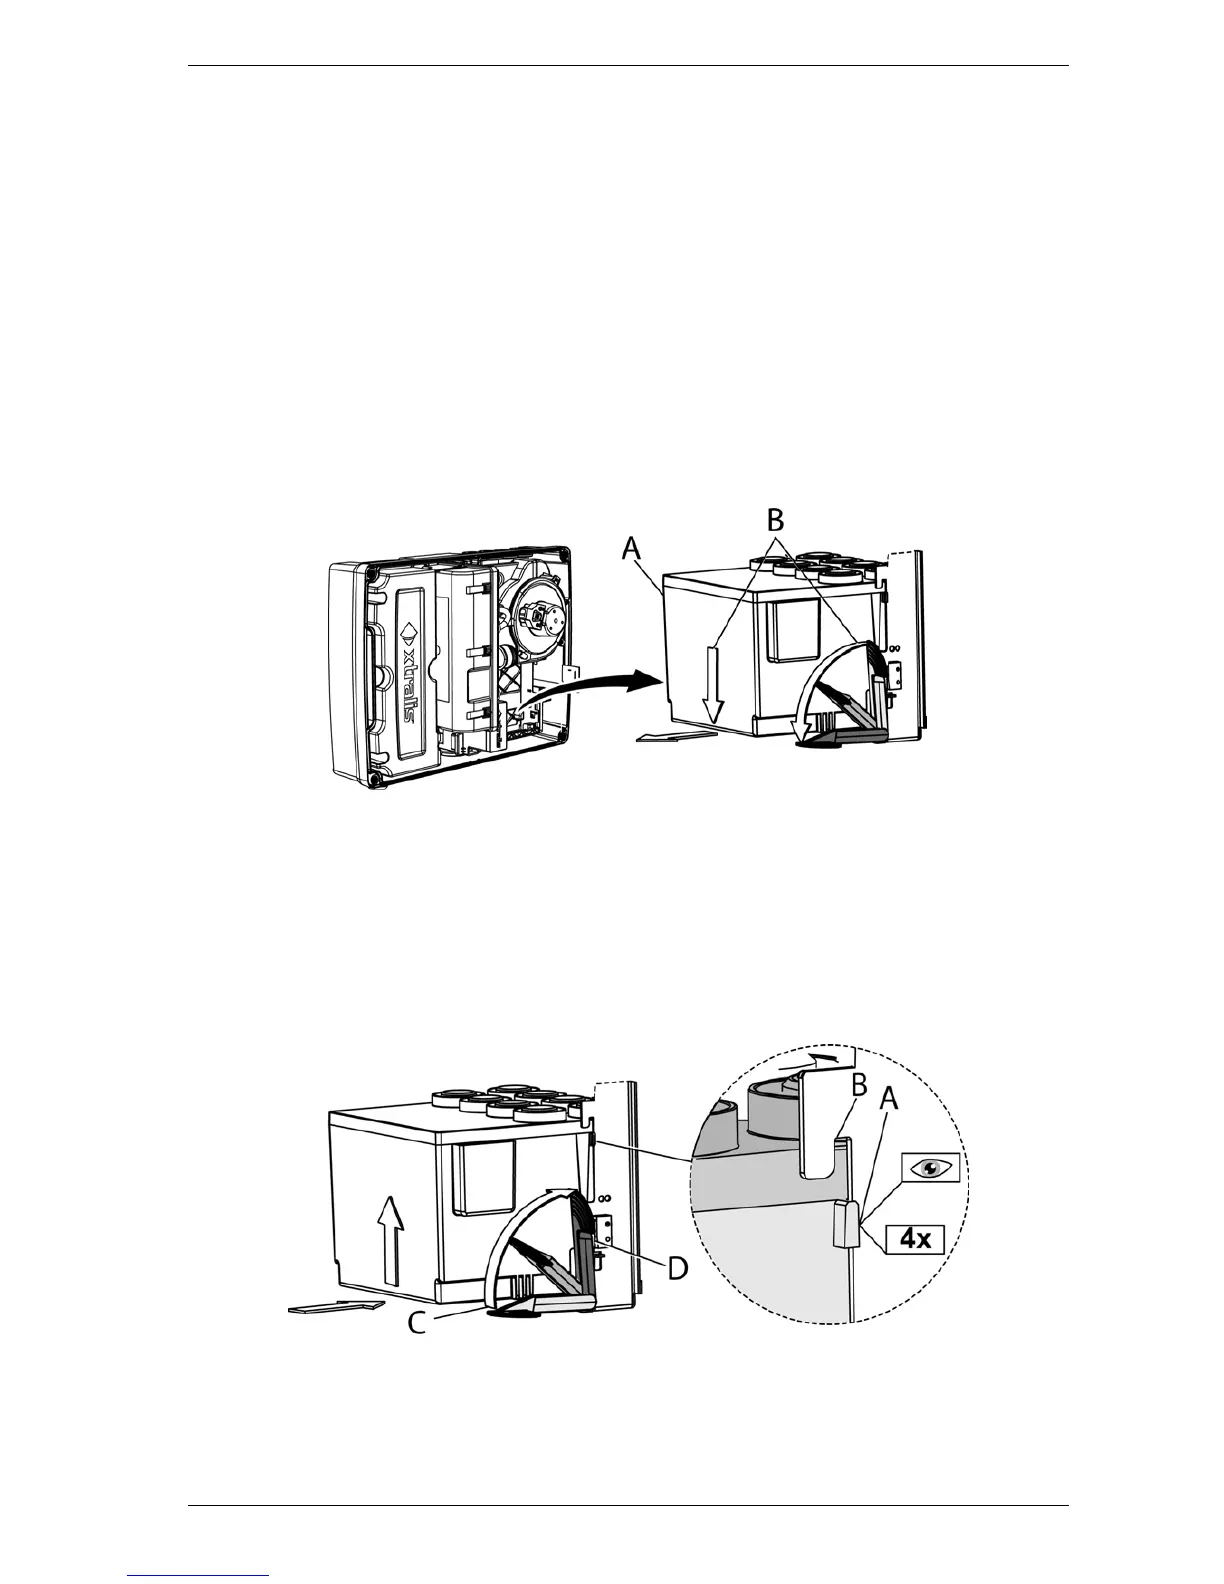
Remove the Intelligent Filter
1. Set the detector to Standby mode. Refer to section 7.1 for further information.
2. Remove the front cover. Refer to section 7.2 for further information.
3. Unclip the Intelligent Filter (A)by pulling the locking lever outward (B).
4. Remove the Intelligent Filter.
Figure 7-2: Intelligent Filter Removal
Reinstall the Intelligent Filter
1. Position the Intelligent Filter inside the detector, aligning the locking tabs (A) to the slots (B).
2. Push the locking lever in the direction of arrow(C) until it clicks into the locked position and the
Intelligent Filter Present Switch (D) is actuated.
3. Execute the "Reset Intelligent Filter Life" command using Xtralis VSC. Refer to section 5.3 for
further information on this command.
Note: Do not reinstall a used filter.
Figure 7-3: Intelligent Filter Installation