VESDA VLI Product Guide VESDA by Xtralis
48 www.xtralis.com
7.6 Replacing the Chamber Assembly
Remove the Chamber Assembly
1. Set the detector to Standby mode. Refer to section 7.1 for further information.
2. Remove the front cover. Refer to section 7.2 for further information.
3. Power down the detector.
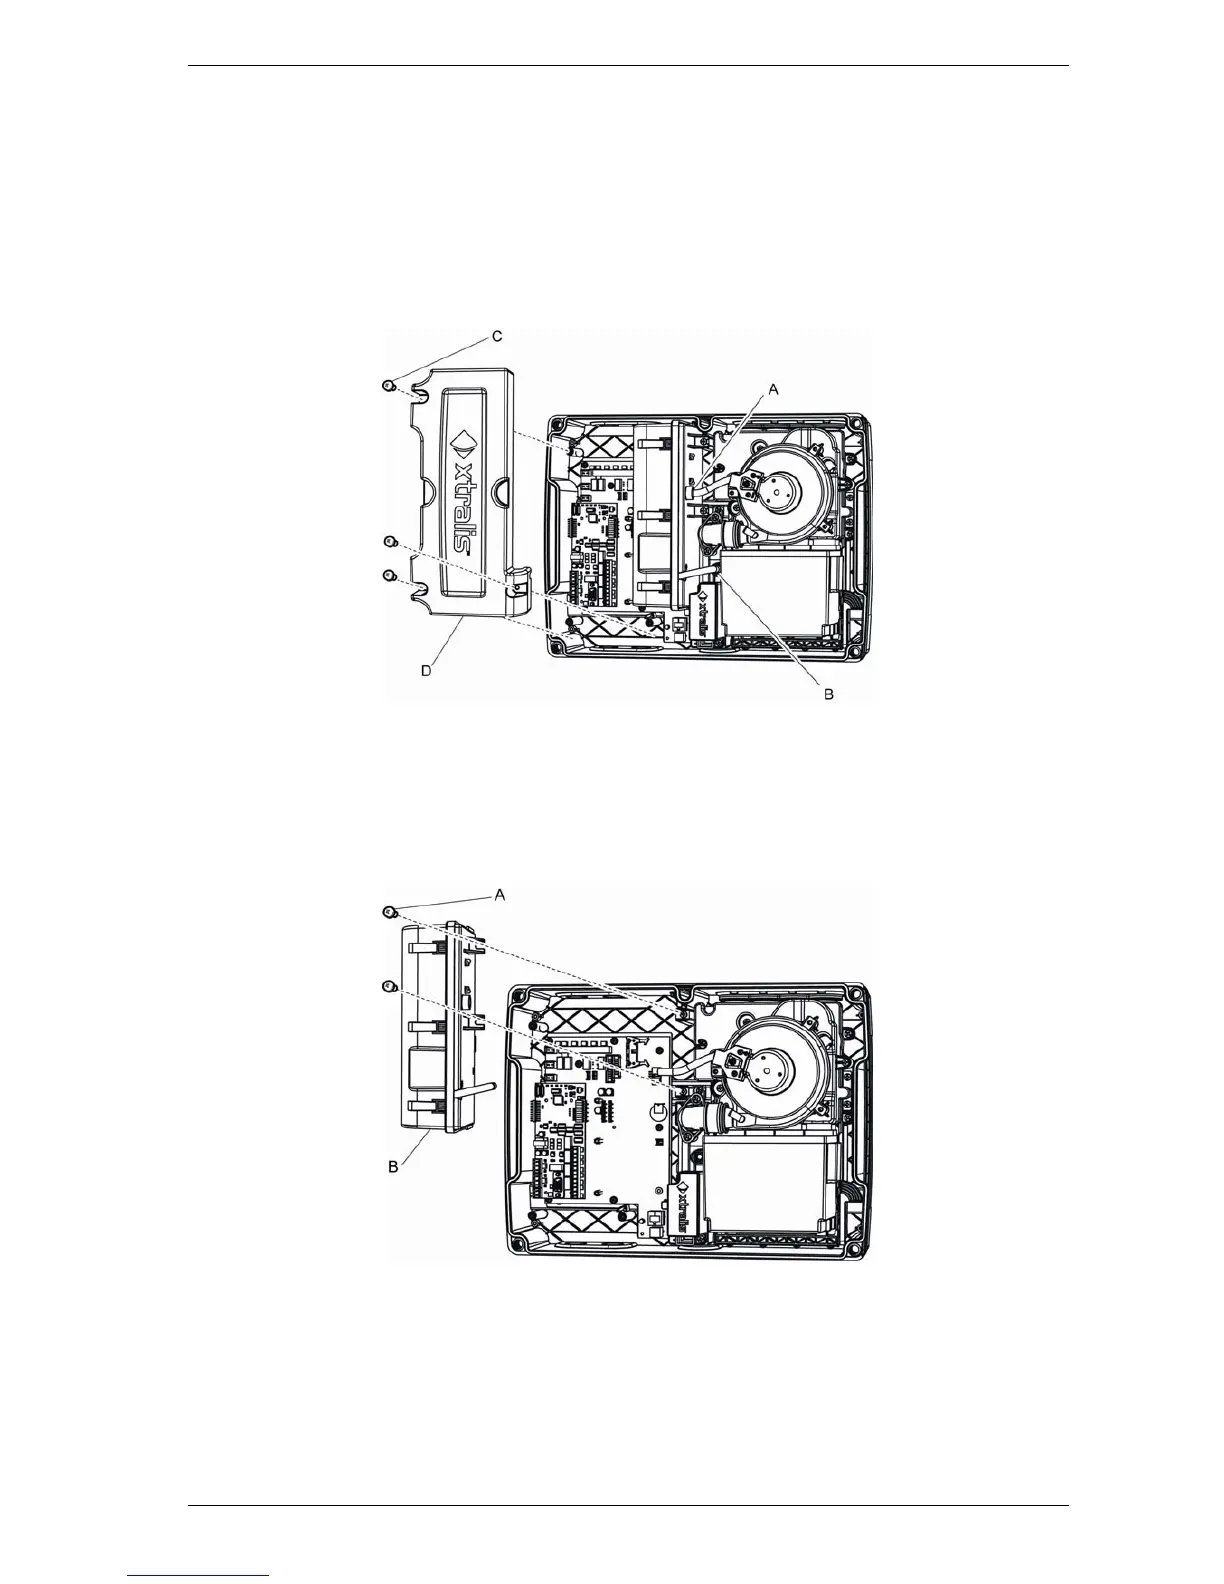
4. Remove the three ESDCover screws (Figure 7-6A).
5. Remove the ESDCover (Figure 7-6B).
Figure 7-6: Chamber Assembly Replacement - ESDCover
4. Disconnect the cable.
5. Remove the two chamber assembly screws (Figure 7-7: A).
6. Disconnect the air inlet (Figure 7-6) and the exhaust tube (Figure 7-6D) while sliding the
chamber out.
7. Remove the chamber assembly (Figure 7-7: B).
Figure 7-7: Chamber Assembly Replacement - Chamber Assembly
Reinstall the Chamber Assembly
To reinstall the Chamber Assembly, follow the removal procedure in reverse order.