M7CL Owner’s Manual
Connecting SB168-ES units to the M7CL-48ES using the STAGE BOX SETUP function
44
1
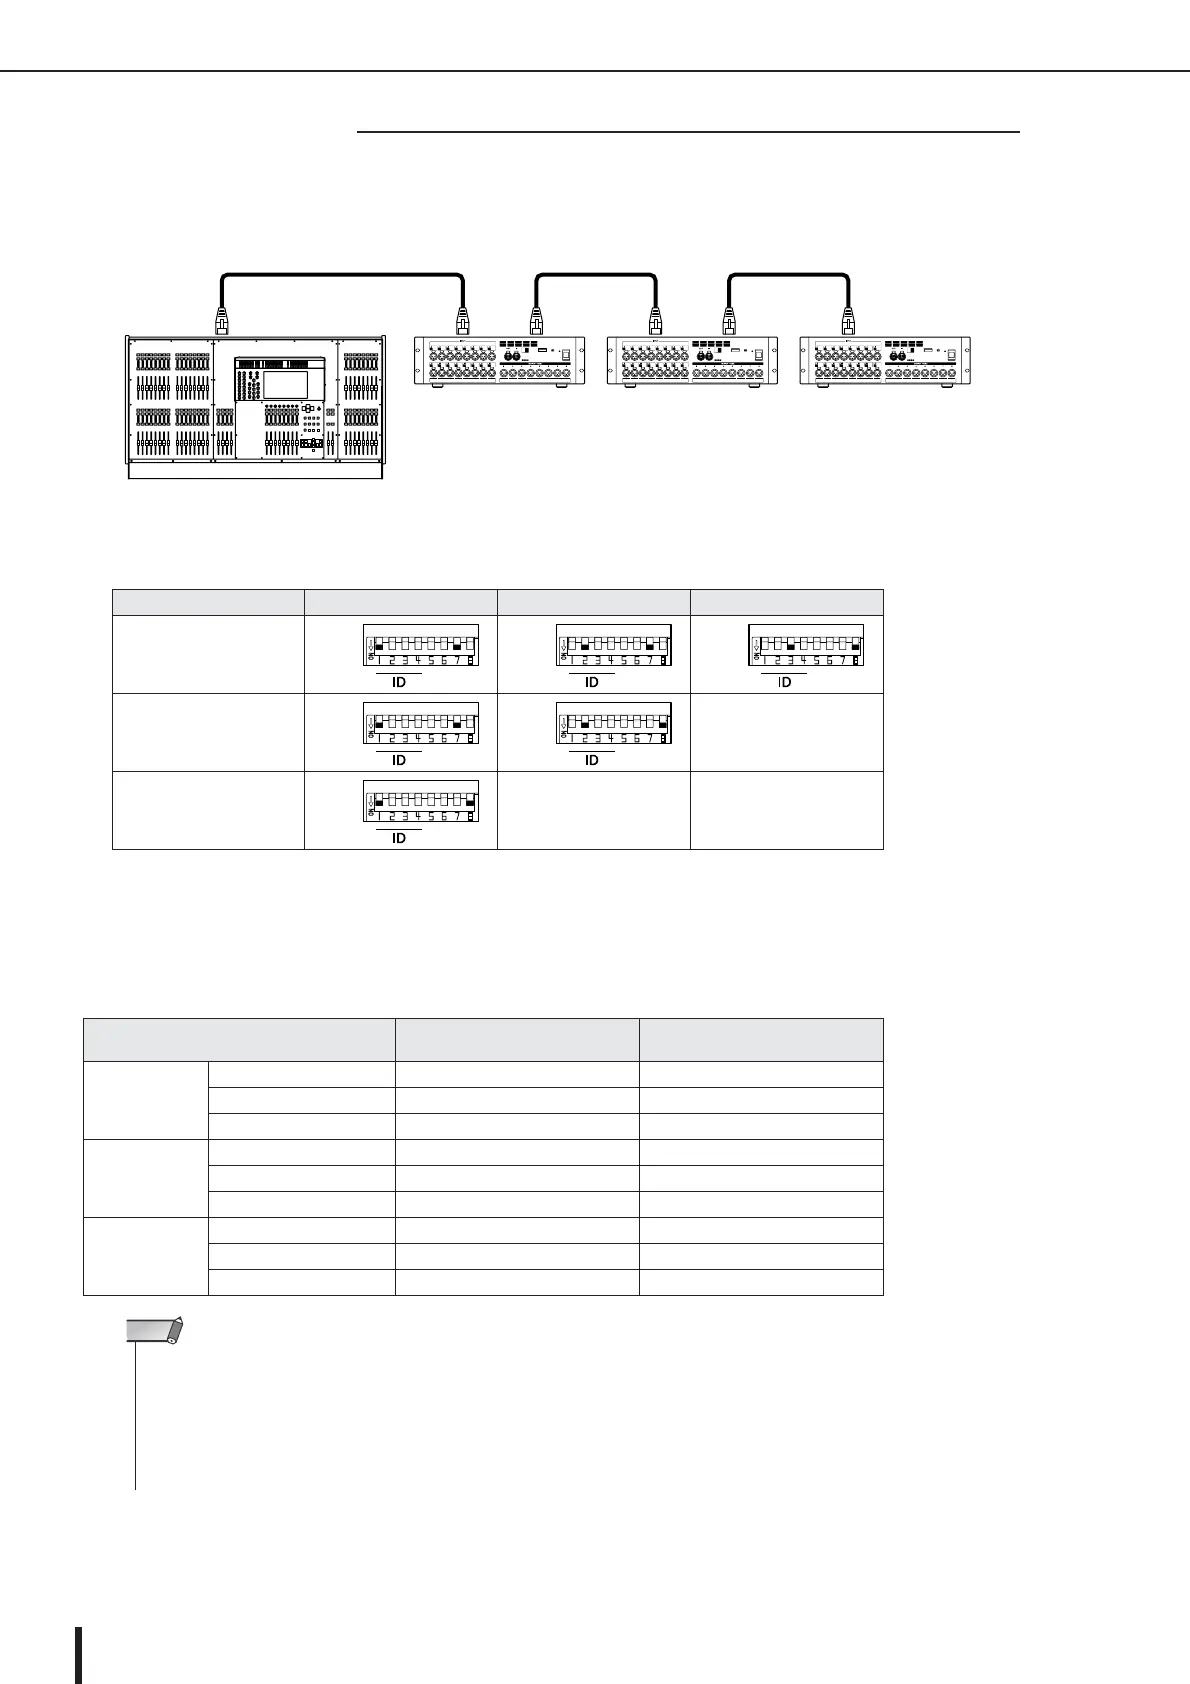
Connect the EtherSound [OUT] connector on the M7CL-48ES to the [IN] connector of the first
SB168-ES unit, and daisy chain subsequent units as shown in the diagram.
2
Set the dip switches on the SB168-ES units as shown in the table below.
3
Turn on the power to the M7CL-48ES and the SB168-ES units. If M7CL-48ES’s scene #000 is not
selected, recall scene #000. p. 138
After the steps above are completed, patches are assigned as follows:
Number of SB168-ES units
ID #1 ID #2 ID #3
Three 1&7 2&7 3&8
Two 1&7 2&8
—
One 1&8
——
SB168-ES
EtherSound patches set via
the Auto Configure
M7CL-48ES patches set via
scene 000
ID #1
INPUT 1–16 jacks ES IN 1–16 CH 1–16
OUTPUT 1–6 jacks ES OUT 1–6 MIX 1–6
OUTPUT 7/8 jacks ES OUT 7/8 STEREO L/R
ID #2
INPUT 1–16 jacks ES IN 17–32 CH 17–32
OUTPUT 1–6 jacks ES OUT 9–14 MIX 7–12
OUTPUT 7/8 jacks ES OUT 15/16 STEREO L/R
ID #3
INPUT 1–16 jacks ES IN 33–48 CH 33–48
OUTPUT 1–6 jacks ES OUT 17–22 MATRIX 1–6
OUTPUT 7/8 jacks ES OUT 23/24 STEREO L/R
■ Daisy chain connection
M7CL-48ES
SB168-ES (ID #1)
OUT IN
SB168-ES (ID #2) SB168-ES (ID #3)
OUT IN OUT IN
EtherSound
•To change the input or output channel patches on the M7CL-48ES, access M7CL-48ES’s PATCH/NAME popup window.
• If you want to change the EtherSound patches from AVS-ESMonitor, refer to “Changing the EtherSound settings from
AVS-ESMonitor (M7CL-48ES)” (
→
p. 243).
• The word clock setting cannot be changed if the AUTO CONFIGURE button is turned ON.
•For more information on the AUTO CONFIGURE button, please refer to “Connecting SB168-ES units to the M7CL-48ES
using the Stage Box Setup function” (
→
p. 242).
NOTE