80
9
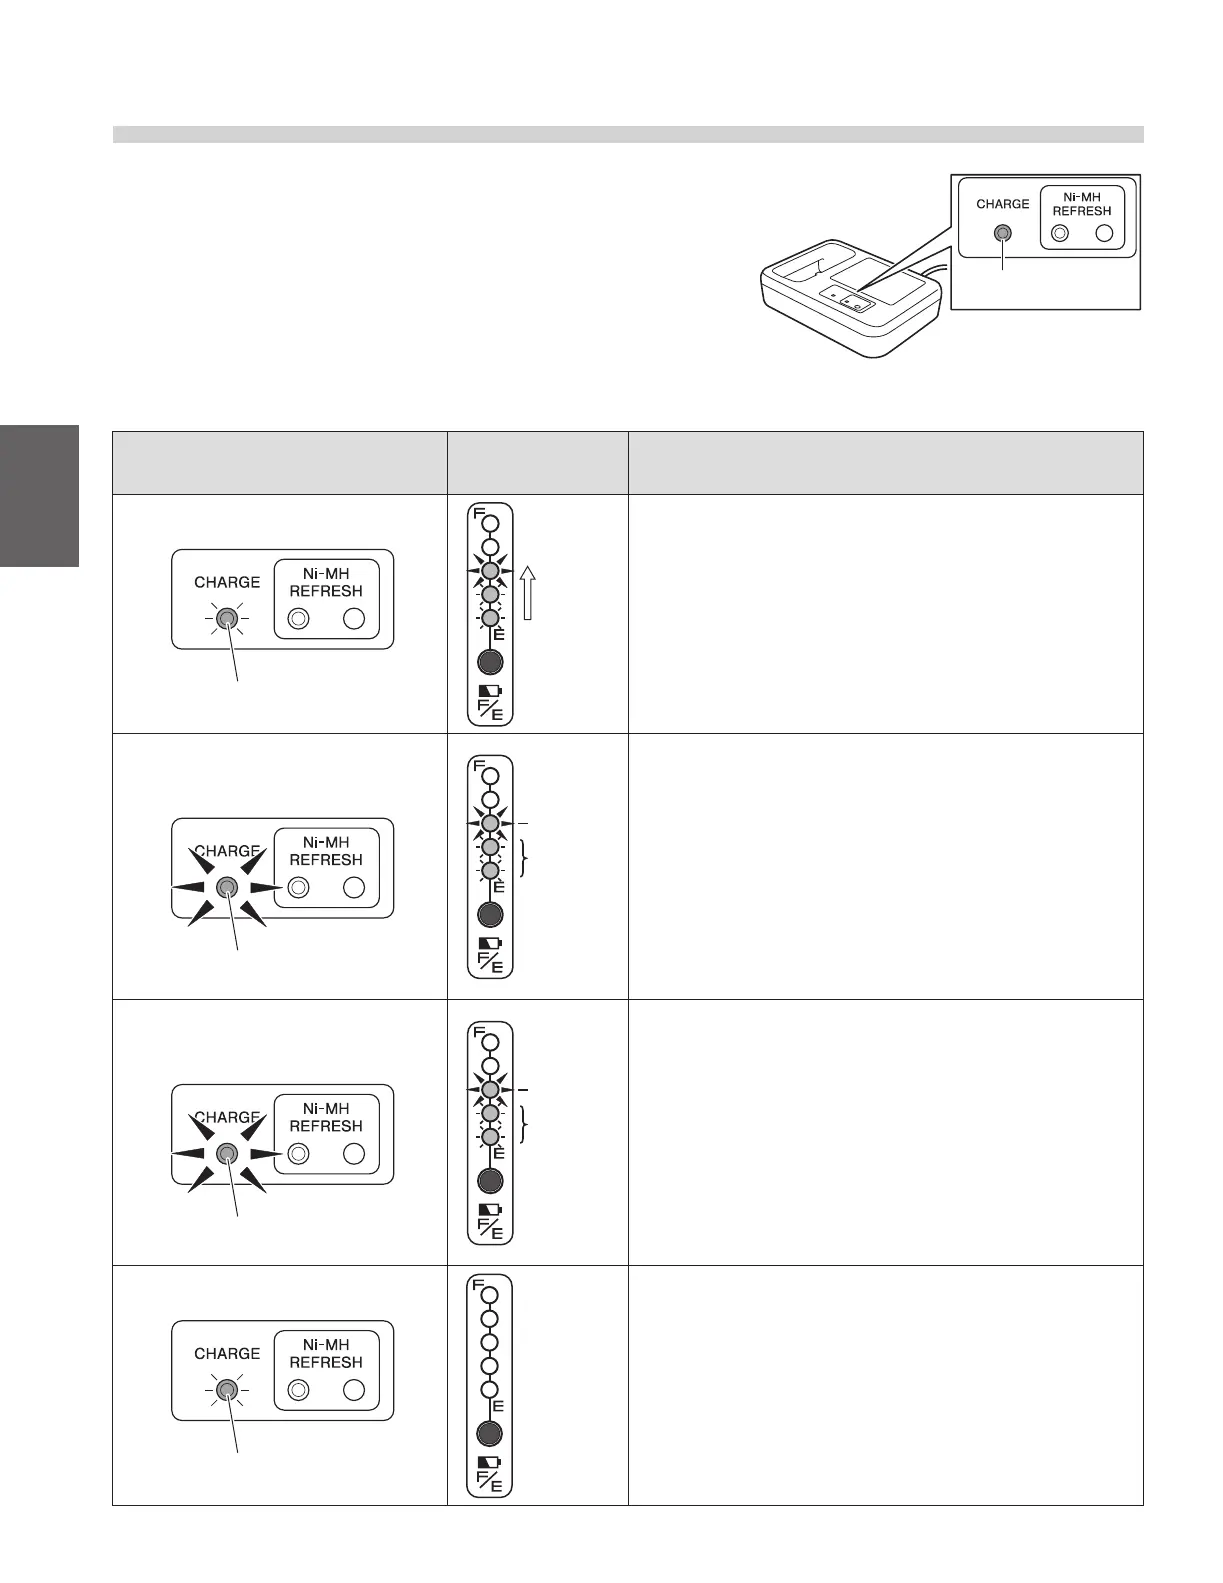
9.6. Charger (ESC3) Indicator Lamps
The charger (ESC3) for the lithium ion battery has a charge
lamp to indicate the battery and charging conditions accord-
ing to the lamp’s color and whether it is on or ashing.
The lamp indications are explained in the following table.
Charger lamp indication
Battery capacity
indicator lamps
Description
Lit green
Charge lamp (green)
Turn on
succes-
sively
Indicates normal charging.
The charge lamp will turn o after charging has completed.
Flashing green
(once per second)
Charge lamp (green)
Flashing
On
Indicates charge standby.
• When the temperature of the battery is not within the chargeable
range 32 to 104°F (0 to 40°C), the charger enters a standby state
and the charge lamp starts ashing in green.
• Once the battery temperature falls within the chargeable range
during standby, charging will start automatically and the charge
lamp (green) changes from a ashing to an “on” state. However, if
the charge standby condition continues for a long time, charging
will end. When this happens, the charge lamp ashes rapidly in
green.
Flashing green
(5 times per second)
Charge lamp (green)
Flashing
On
Indicates timeout of charge standby.
• The charger has remained in standby mode for a long time and
has stopped charging the battery. Re-locate the charger and try to
charge the battery again
Lit or ashing red
Charge lamp (red)
O
The charger has detected a problem in the charger or the battery, and
is unable to charge. Stop charging by disconnecting the charger plug
and the power plug. Check the battery, charger, and cord connection
for any problem, and then try charging again.
If the charge lamp light comes on or ashes in red again, an equipment
failure may have occurred. Stop charging by disconnecting the char-
ger plug and the power plug, and have the equipment inspected by a
dealer.
Charge lamp