ELECTRICAL COMPONENTS (YUM2E)
8-77
REMOVING AND REPLACING THE
BATTERY
• Secure the vehicle and discharge the con-
troller capacitor. Refer to “SAFETY LOCK-
OUT PROCEDURE” on page 1-2.
• Always remove the negative (-) battery ca-
bles first and ensure they are stowed in a
manner to prevent arching.
1. Put tow switch in TOW position.
2. Loosen the battery hold-down nuts with an in-
sulated 12 mm wrench, then remove the
hold-down plates.
Battery removal requires the ability to lift at least
28.1 kg (62 lb) and the use of one (1) battery-lift-
ing strap.
3. Attach a battery-lifting strap to each battery
and remove, remembering to use proper lift-
ing techniques.
4. Clean and dry the battery tray and surround-
ing area.
5. Inspect and replace any worn or corroded
battery hold-down rods.
When installing batteries:
• Carefully position the cables and hold-
downs making sure the cables do not lay
across the battery vent caps.
• Install the negative (-) battery cable last.
6. Using one battery-lifting strap, install each
battery.
Do not over-tighten the battery hold-down
nuts. Excessive force will damage the bat-
tery casing.
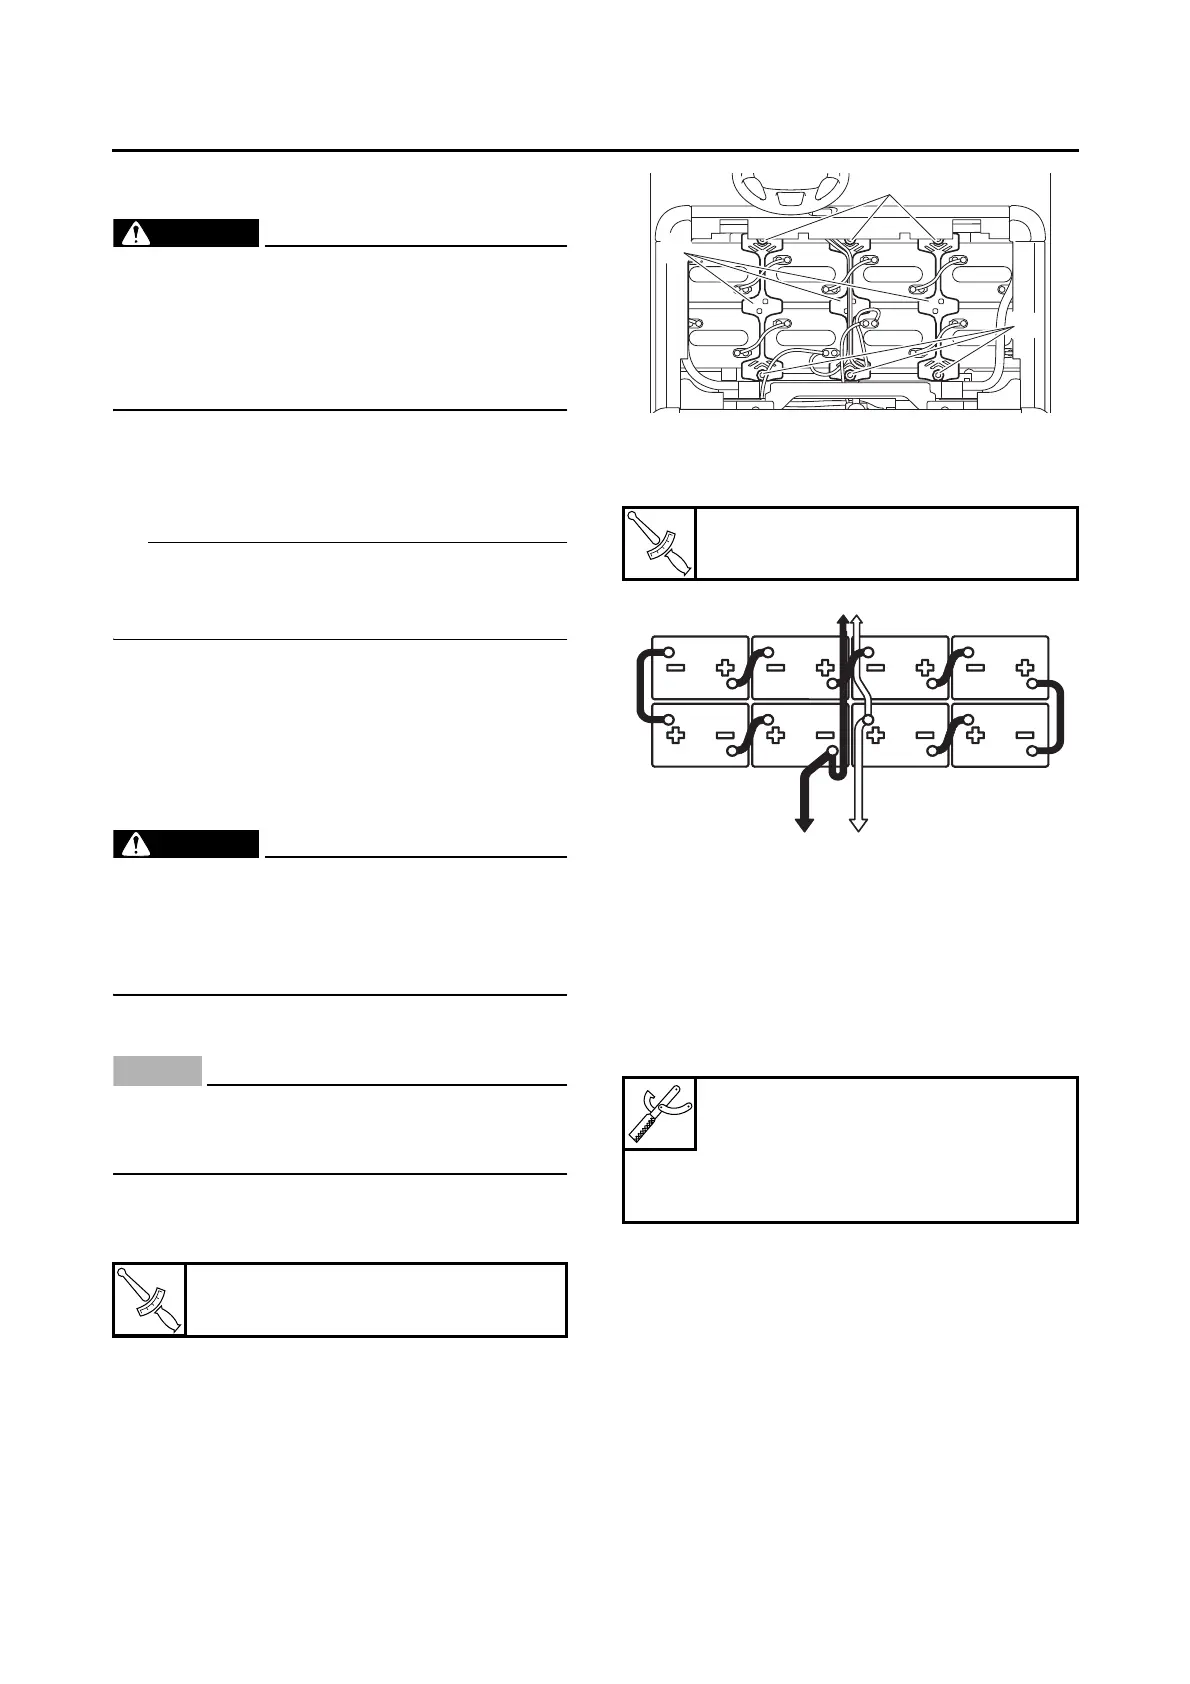
7. Install the battery hold-down plates “1” and 12
mm nuts “2”. The battery hold-downs should
be tightened to specification.
8. Connect the battery cables and wire leads as
shown. Tighten battery clamps to specifica-
tion.
CHECKING THE RELAYS
Check each switch for continuity with the digital
circuit tester. If the continuity reading is incor-
rect, replace the relay.
1. Disconnect the wire harness from the relay.
2. Connect the digital circuit tester and battery
(12 V) to the relay terminal as shown.
Check the relay operation.
Out of specification → Replace.
Battery hold-down plate nut
6 N·m (0.6 kgf·m, 4.4 lb·ft)
Battery cable clamp screw
10 N·m (1.0 kgf·m, 7.4 lb·ft)
A. To relay
B. To MCU
C. To charging receptacle
Digital circuit tester (CD732)
90890-03243
Model 88 Multimeter with ta-
chometer
YU-A1927