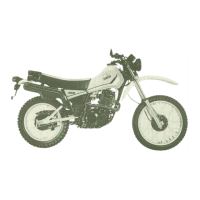
1. 1/
4tooth
3.
Roller
2.
Correct
4.
Sprocket
1.
Slip
off
2.
Bent teeth
B.
Driven
Sprocket
With the rear wheel removed, proceed
as
follows:
1.
Using a blunt chisel, flatten the securing
nuts lock-washer tabs.
Remove the securing nuts. Remove the
lock washers and sprocket.
2.
Check the sprocket wear using pro-
cedures for the drive sprocket.
3.
Check the sprocket
to
see
that
it runs
true.
If bent, replace.
4.
During reassembly, make sure
that
sprocket and sprocket seat are clean.
Tighten the securing nuts in a crisscross
pattern.
Bend the tabs
of
the lock washers fully
against the securing
nut
flats.
Driven Sprocket Securing
Nut
Torque:
30
Nm (3.0 m
'kg,
21.7
ft-lb)
5-6
1. Lock washer
2. Nut
C.
Chain
Inspection
1.
With
the chain installed on the machine ,
excessive wear may
be
roughly deter-
mined by attempting
to
pull the chain
away from the rear sprocket.
If
the chain
will lift away more than one-half the
length
of
the sprocket teeth, remove
and inspect.
If
any portion
of
the chain shows signs
of
damage or
if
either sprocket shows
signs
of
excessive wear, remove and in-
spect.
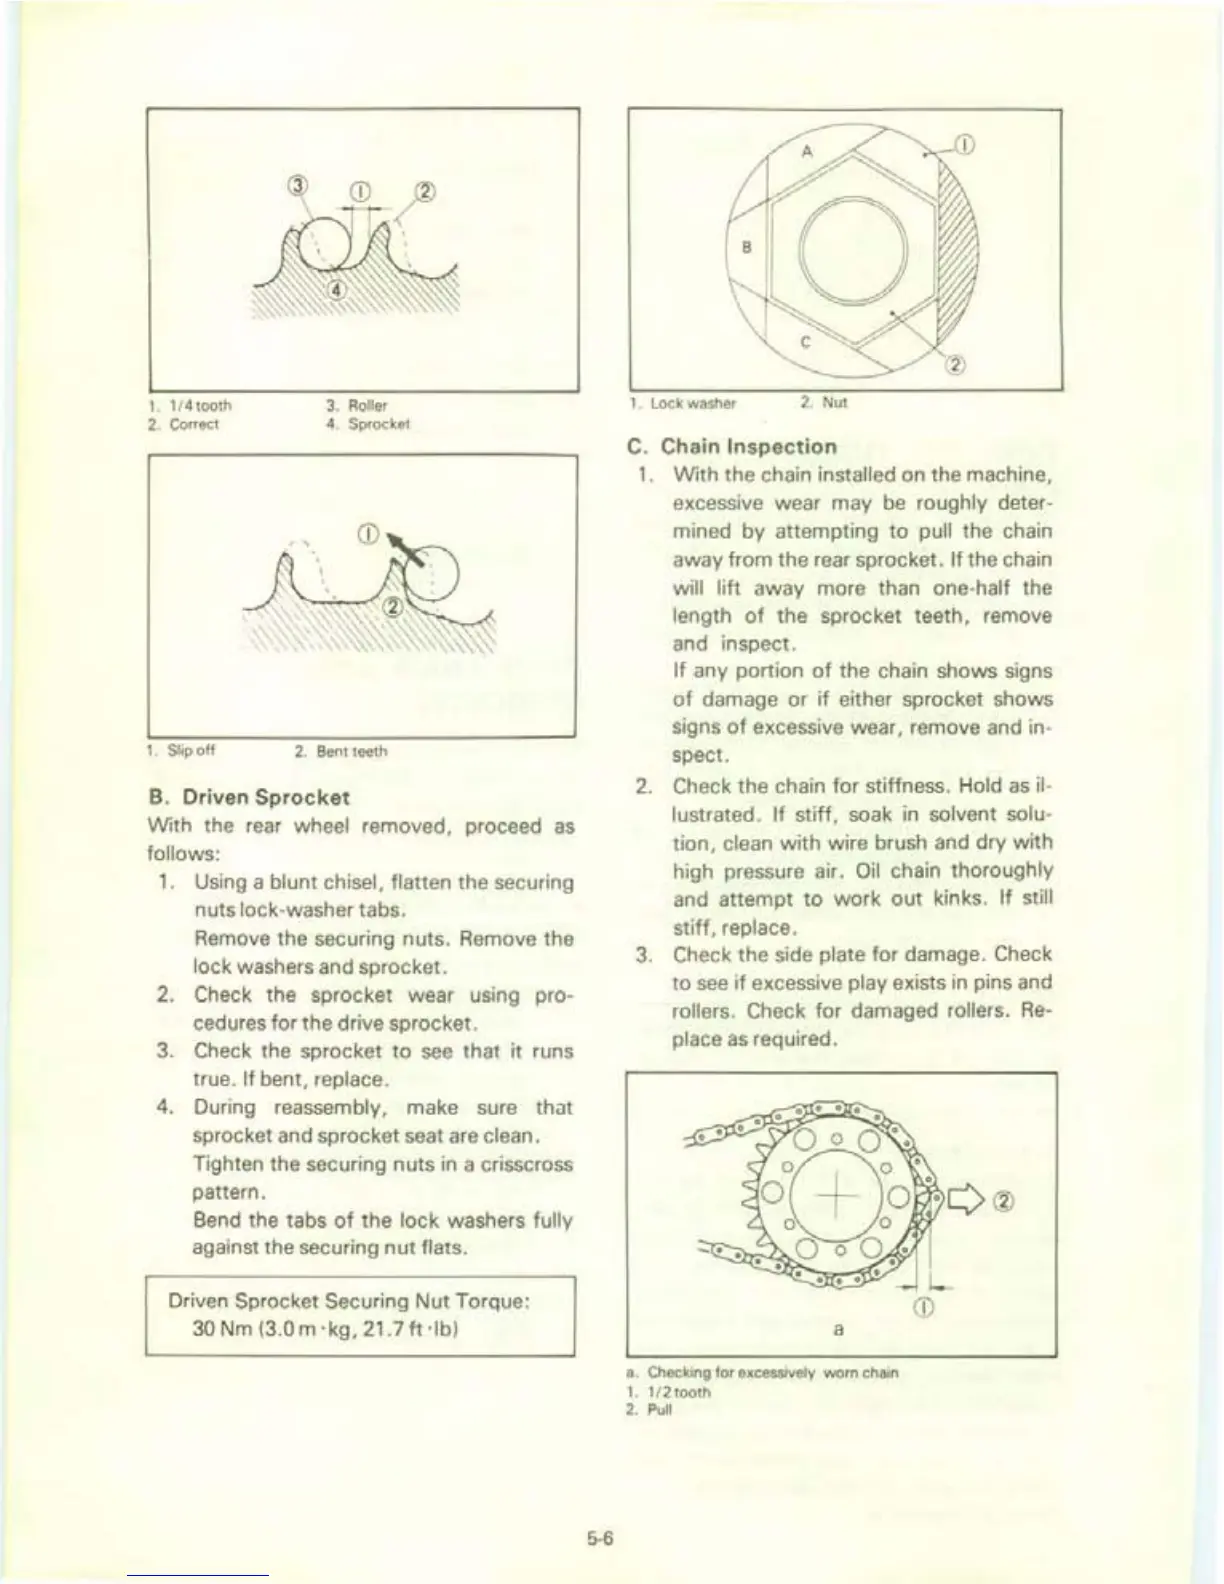
2. Check the chain
for
stiffness. Hold
as
il
-
lustrated. If stiff, soak
in
solvent solu-
tion, clean
with
wire brush and dry
with
high pressure air.
Oil
chain thoroughly
and attempt
to
work
out
kinks. If still
stiff
, replace.
3.
Check the side plate for damage. Check
to
see
if
excessive play exists in pins and
rollers. Check
for
damaged rollers.
Re-
place
as
required.
a
a. Checking for excessively worn chain
1. 1/
2tooth
2. Pull
 Loading...