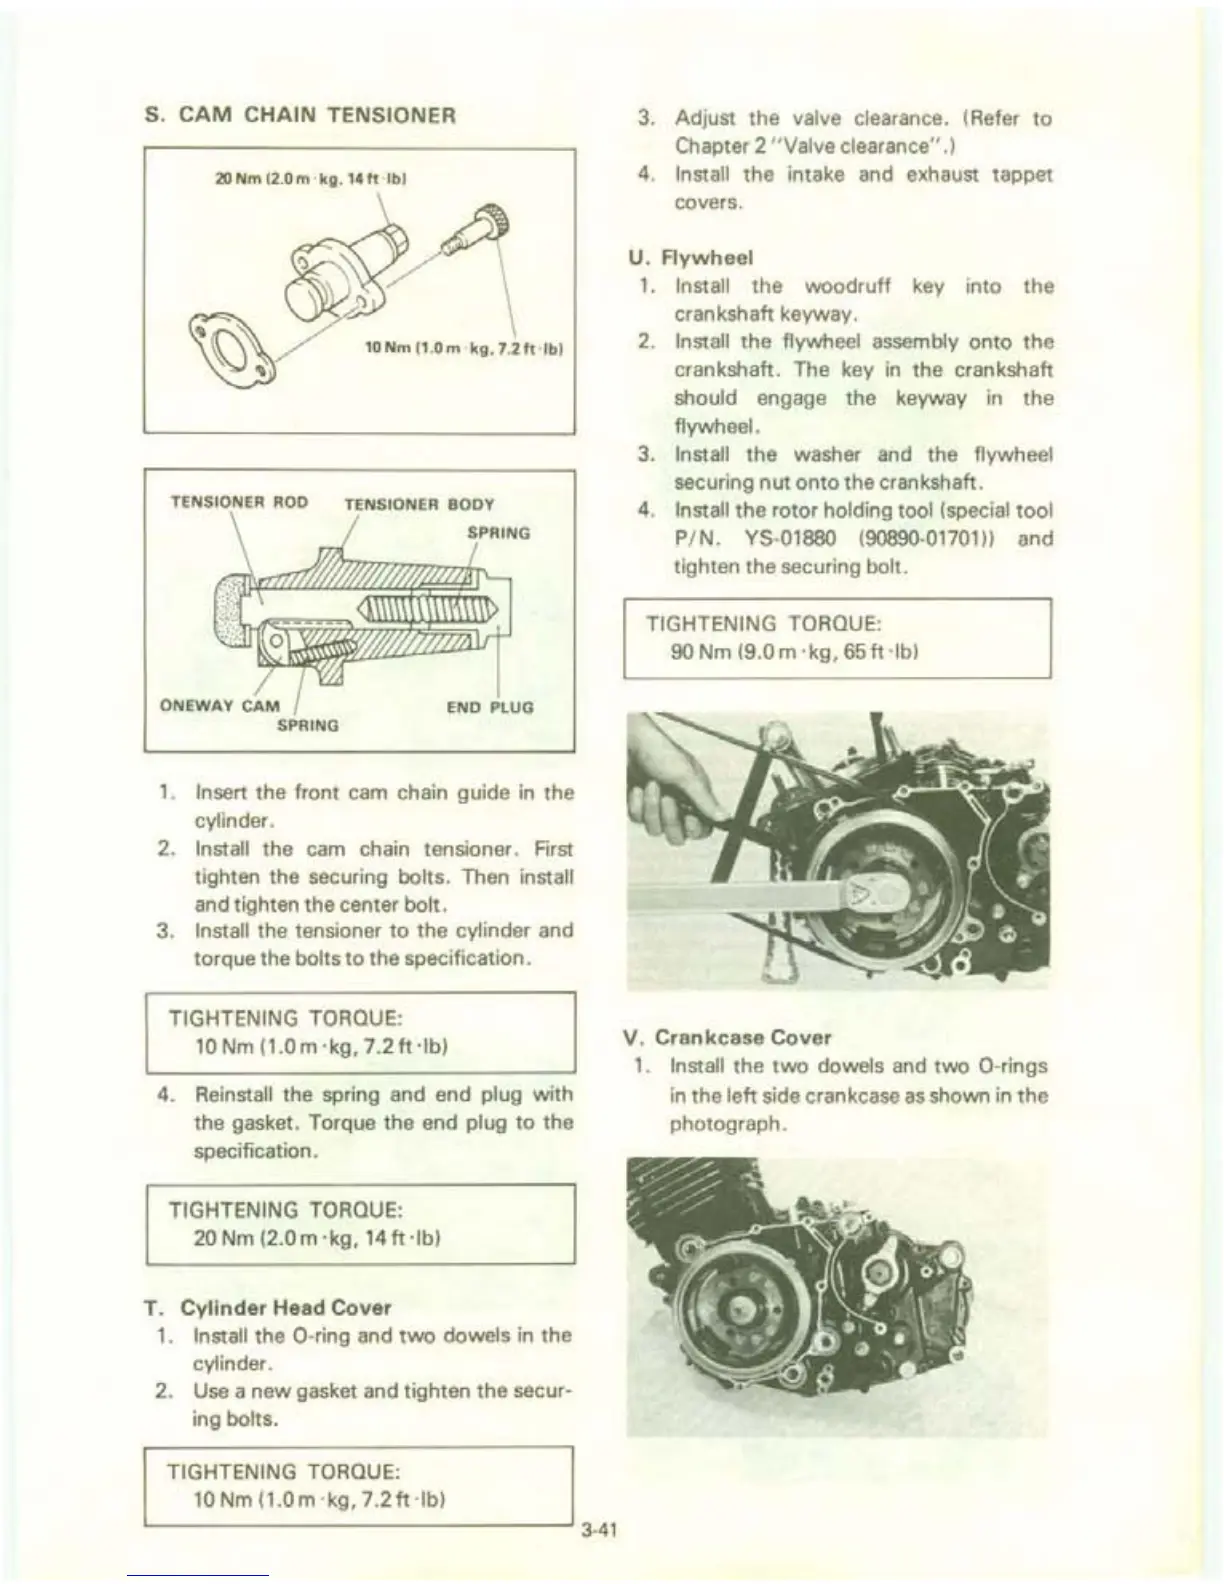
S.
CAM
CHAIN
TENSIONER
20 Nm
(2
.0 m .
kg.
14
ft
'Ib)
!)
W'ONmll.Om
..
g
.7.2fHb'
TENSIONER ROD TENSIONER
BODY
END PLUG
1.
Insert the front cam chain guide
in
the
cylinder.
2.
Install the cam chain tensioner. First
tighten the securing bolts. Then
install
and tighten the center bolt.
3.
Install the tensioner
to
the cylinder and
torque the bolts
to
the specification.
TIGHTENING TORQUE:
10
Nm
(1.0 m
'kg,
7.2
ft
'Ib)
4.
Reinstall the spring and end plug with
the gasket. Torque the end plug
to
the
specification.
TIGHTENING TORQUE:
20Nm
(2.0m·kg,
14ft'lb)
T.
Cylinder
Head
Cover
1.
Install the O-ring and
two
dowels
in
the
cylinder.
2.
Use
a new gasket and tighten the secur-
ing bolts.
TIGHTENING TORQUE:
10
Nm
(1.0 m
'kg,
7.2
ft
'Ib)
L...-
______________
---'
3-41
3.
Adjust the valve clearance. (Refer
to
Chapter 2 " Valve clearance".)
4.
Install the intake and exhaust tappet
covers.
U.
Flywheel
1. Install the woodruff key into the
crankshaft keyway.
2.
Install the flywheel assembly onto the
crankshaft. The
key
in
the crankshaft
should engage the keyway
in
the
flywheel.
3.
Install the washer and the flywheel
securing
nut
onto the crankshaft.
4.
Install the rotor holding tool (special
tool
PIN.
YS-01880 (90890-01701)) and
tighten the securing bolt.
TIGHTENING TORQUE:
90
Nm
(9.0m
'kg,65ft
'lb)
V.
Cran
kcase
Cover
1.
Install the
two
dowels
and
two
O-rings
in
the left side crankcase
as
shown
in
the
photograph.
 Loading...