58 support@yardistrystructures.com
Hardware
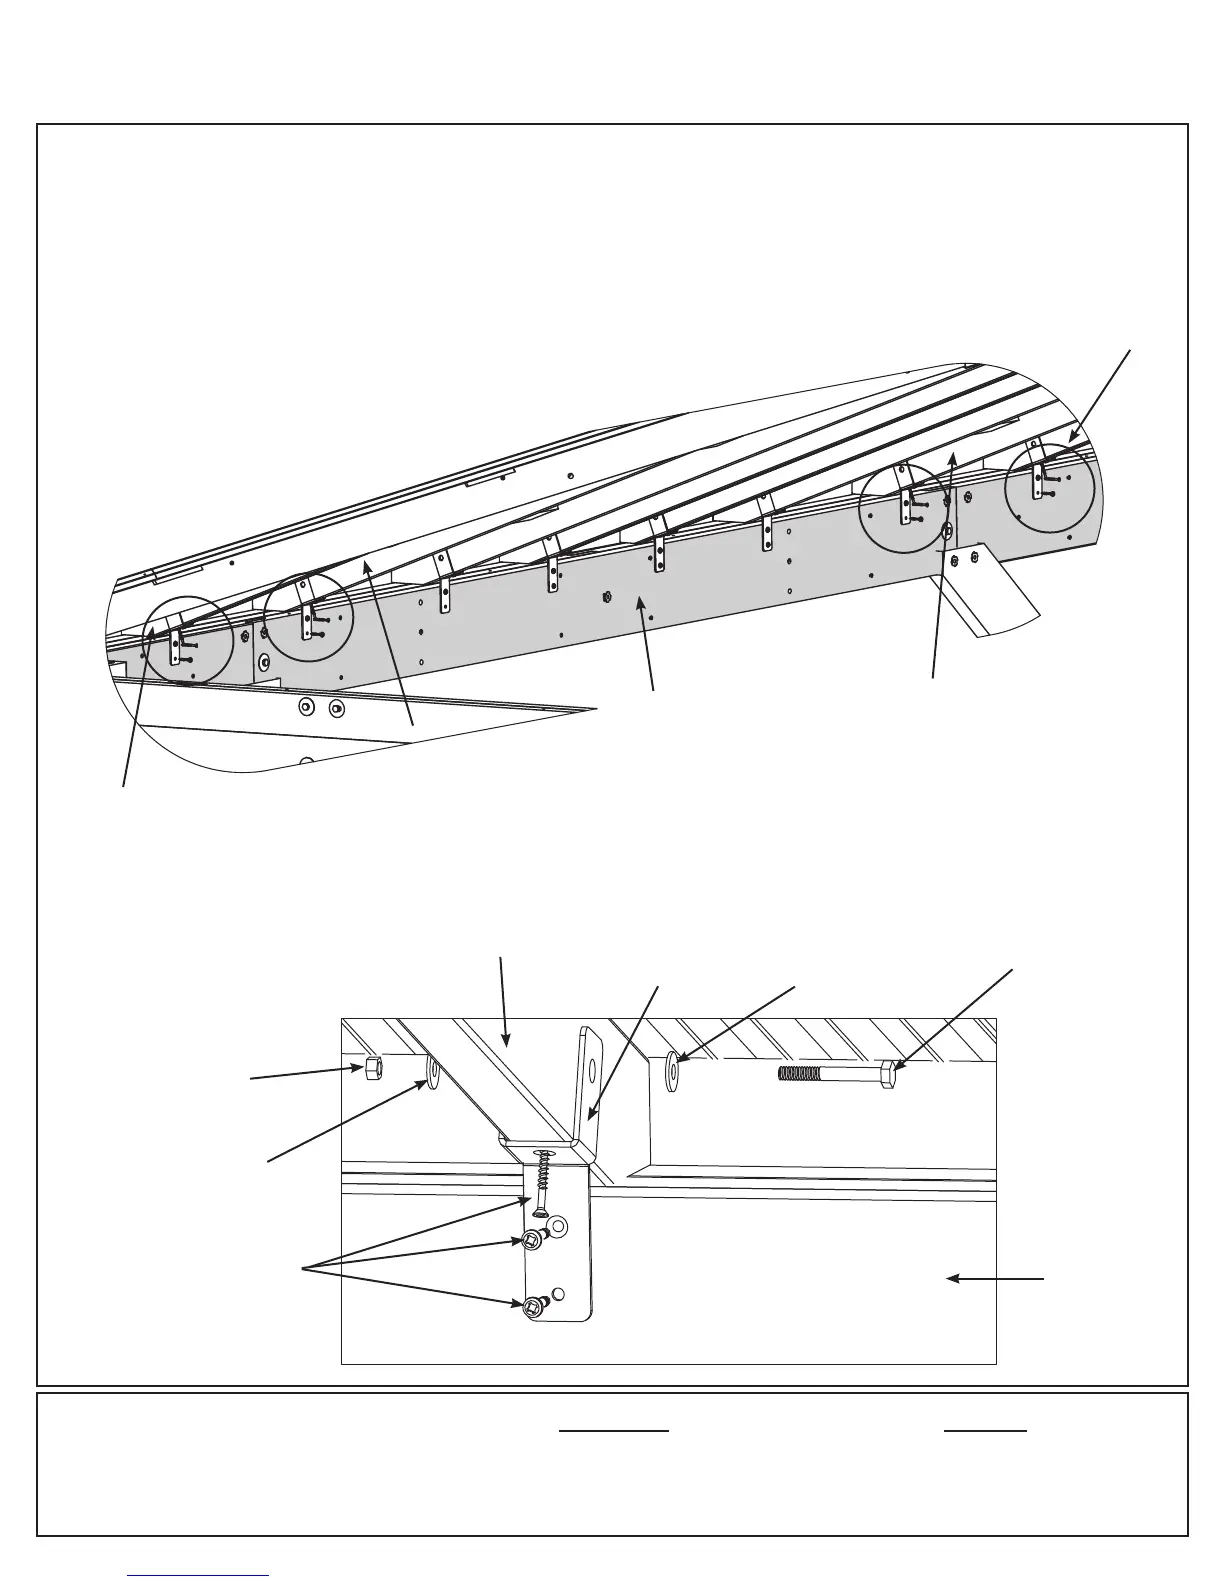
Fig. 22.1
Fig. 22.2
A: On both Large Roof Assemblies, through the bolt hole at the bottom of the board, loosely attach one Roof
to Beam Bracket to each (629) Rafter Short RT, (630) Rafter Short LT, (631) Rafter Centre LT and (632) Rafter
Centre RT with one 1/4 x 2” Hex Bolt (with two 1/4-5/16” large washers and one 1/4” lock nut) and three #12
x 1-1/2” Pan Screws per bracket. Install top screw into the rafter rst then install the other two into the beam.
(g. 22.1 and 22.2)
B: Tighten all Roof to Beam Bracket bolts in both Large Roof Assemblies.
Step 22: Attach Roof to Beam Brackets -
Large Roof Assembly
(629) Rafter
Short RT
(630) Rafter
Short LT
Large Beam
Assembly
8 x 1/4 x 2” Hex Bolt
(1/4-5/16” large washer x 2, 1/4” lock nut)
24 x #12 x 1-1/2” Pan Screw
Inside View
Inside View
1/4 x 2” Hex Bolt
1/4”
Lock
Nut
1/4-5/16”
Large Washer
Rafter
Roof to Beam
Bracket
#12 x 1-1/2”
Pan Screw
Components
8 x Roof to Beam Bracket
Large Beam
Assembly
1/4-5/16”
Large Washer
(632) Rafter
Centre RT
(631) Rafter
Centre LT