38 support@yardistrystructures.com
HardwareWood Parts
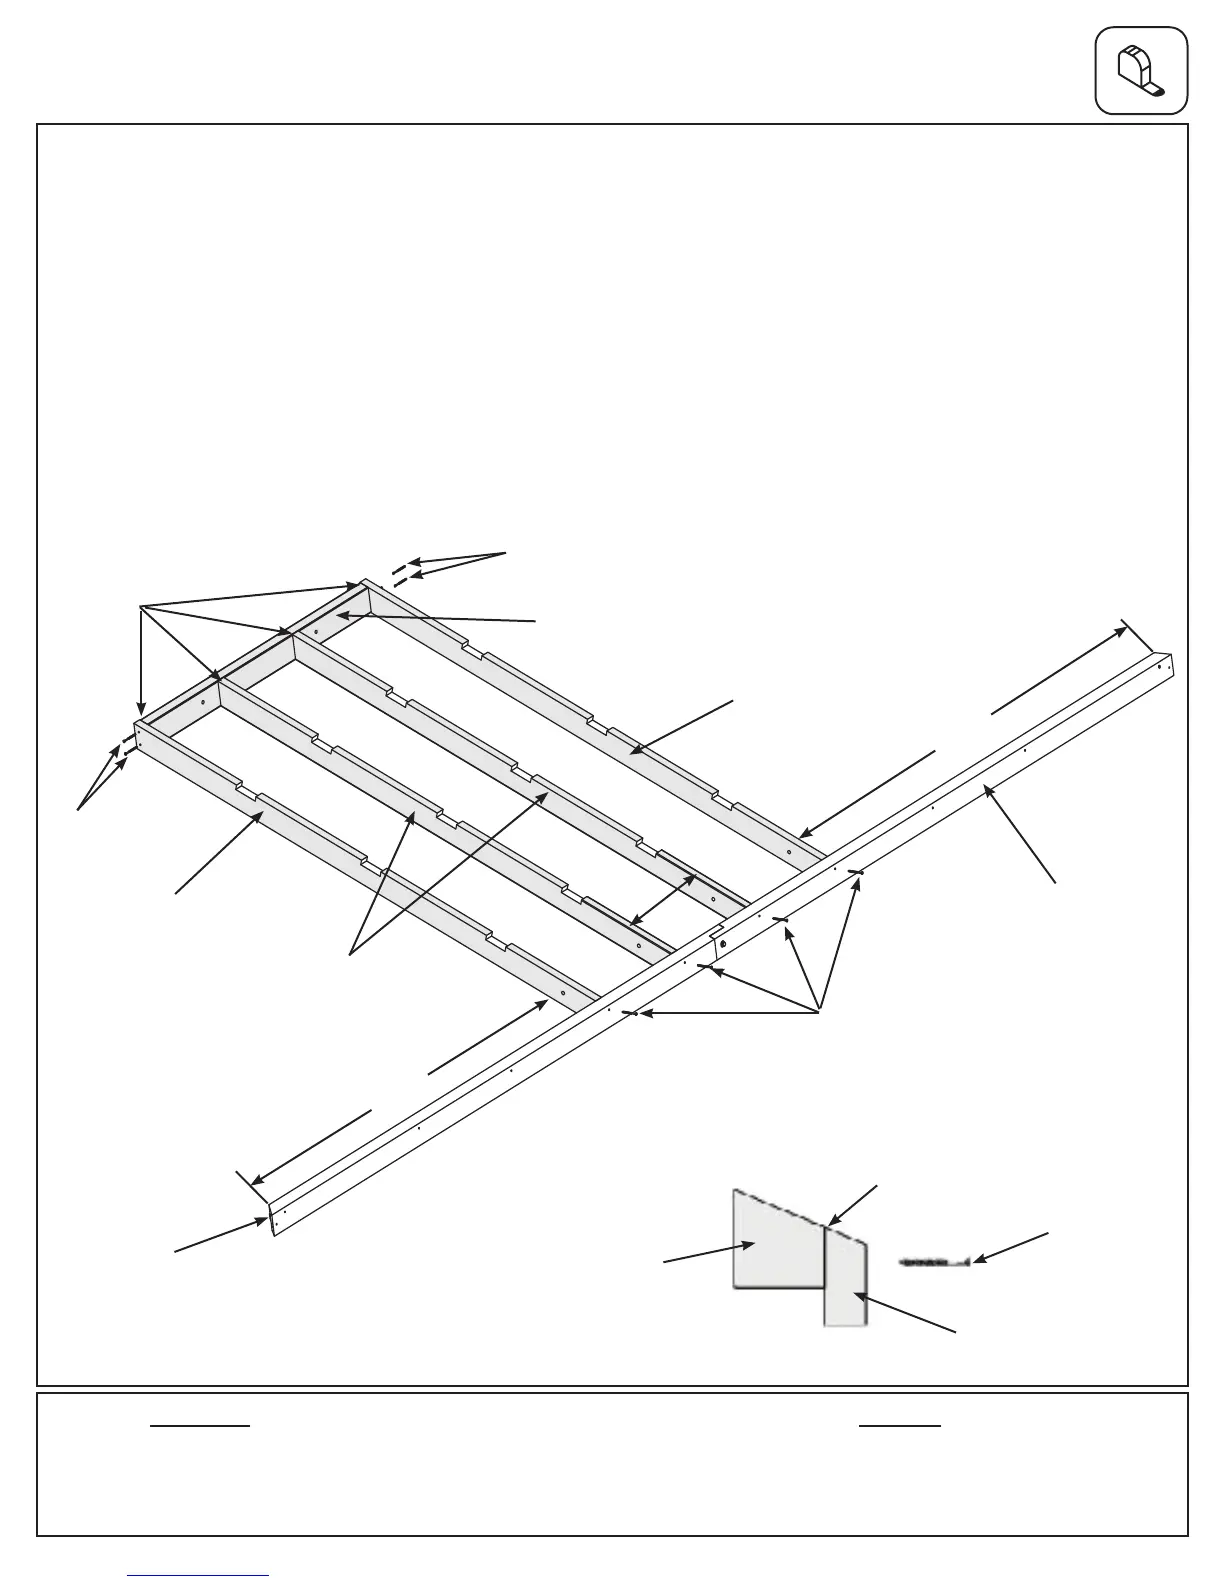
Fig. 12.1
16 x #8 x 2-1/2” Wood Screw
4 x (633) Centre Rafter
4 x (634) Rafter
2 x (635) Long Roof Top
A: Place one (635) Long Roof Top in between both (634) Rafters. (635) Long Roof Top to be ush to the tops
to the ends of each (634) Rafter. Attach each (634) Rafter to (635) Long Roof Top with two #8 x 2-1/2” Wood
Screws per Rafter. (g. 12.1)
B: Measure 69-7/16” (1.764 m) from the inside ends of the Large Fascia Beam Assembly then place one (634)
Rafter over each pilots hole, ush to the top of the Large Fascia Beam Assemby and attach with one #8 x 2-1/2”
Wood Screw per rafter. (g. 12.1 and 12.2)
C: In between both (634) Rafters place two (633) Centre Rafters so the tops are ush to the top of the Large
Fascia Beam Assemby and the distance between (633) Centre Rafters measures 14-5/8” (37.15 cm) then attach
with one #8 x 2-1/2” Wood Screws per rafter. (Fig. 12.1 and 12.2)
D: Repeat Steps A - C to make a second Large Roof Assembly.
(635) Long
Roof Top
(634) Rafter
#8 x 2-1/2”
Wood Screws
Step 12: Large Roof Assembly
Part 1
Flush
Rafter
#8 x 2-1/2”
Wood Screws
Large Fascia
Beam Assembly
Fig. 12.2
#8 x 2-1/2”
Wood Screws
Flush
(634) Rafter
(633) Centre
Rafter
#8 x 2-1/2”
Wood Screws
69-7/16”
1.764 m
69-7/16”
1.764 m
Large Fascia
Beam Assembly
Note notches
facing up
Note angle
side up
14-5/8”
37.15
cm