39 support@yardistrystructures.com
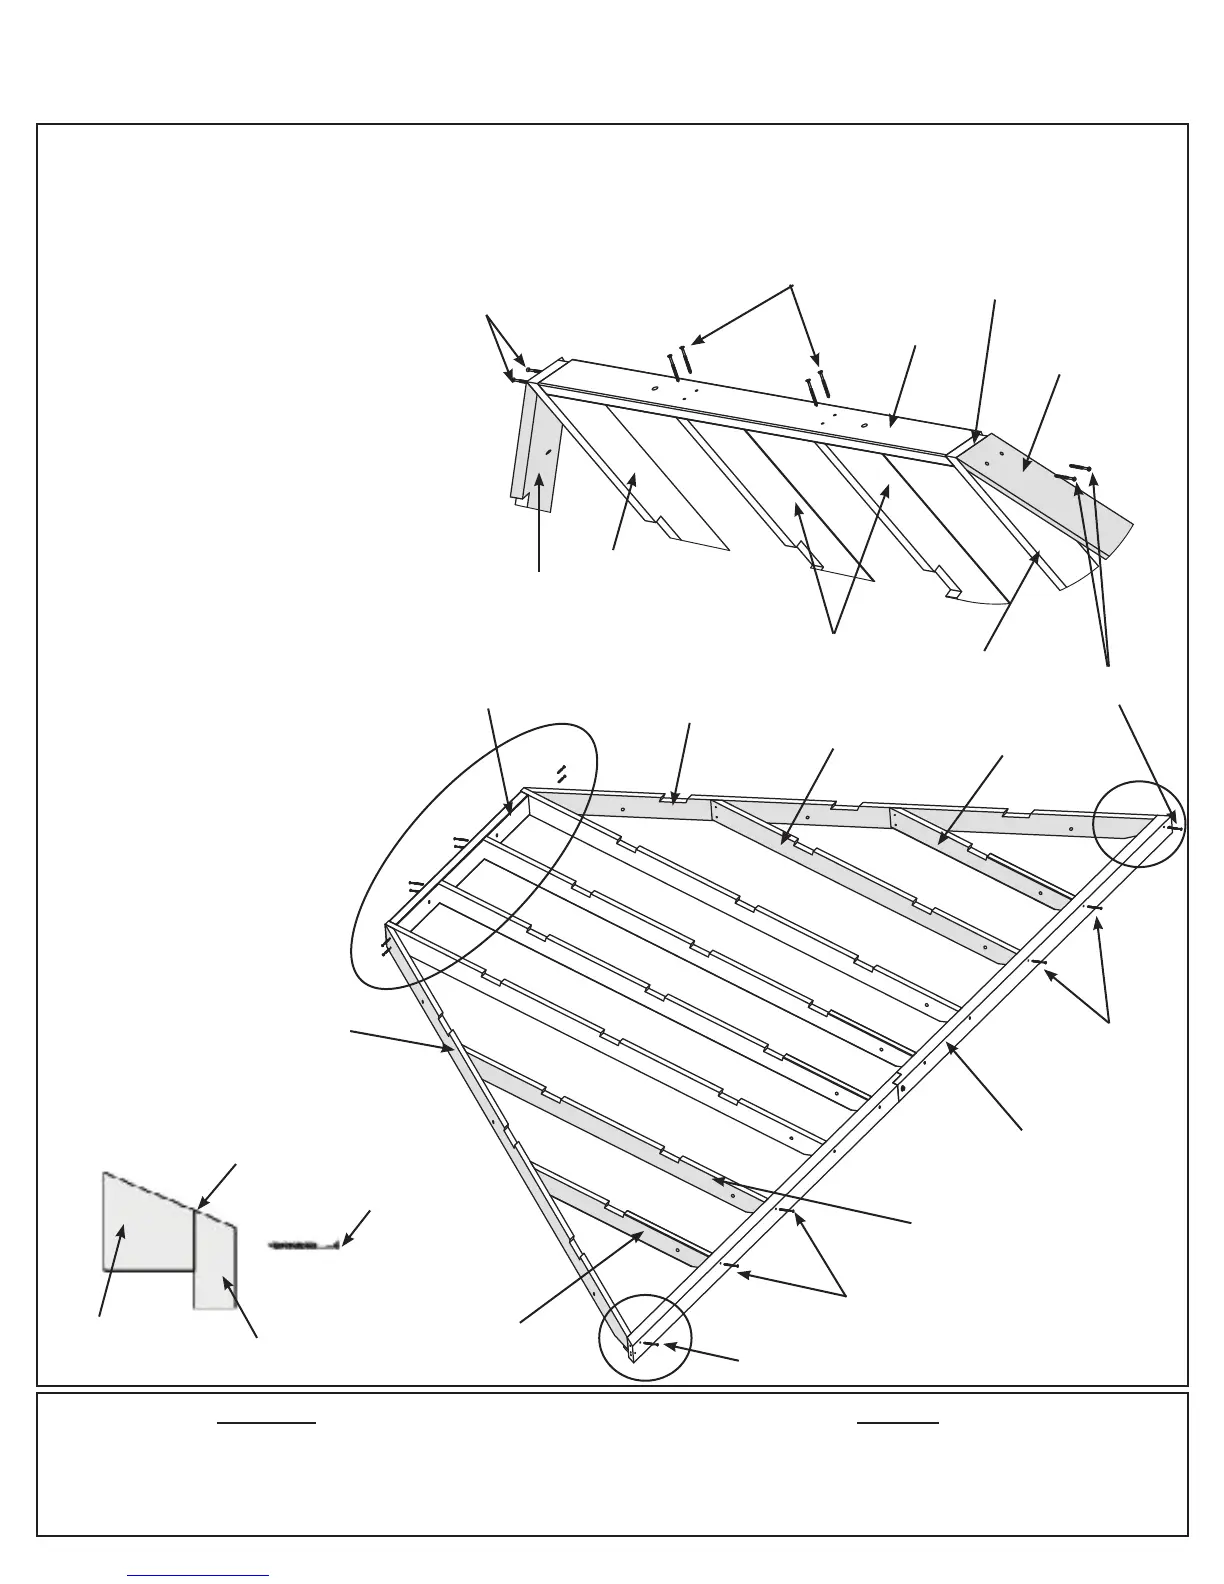
E: On the sides of Large Fascia Beam Assembly place one (624) Rafter Corner Left and one (623) Rafter Corner
Right so the tops and edges are ush then attach to (634) Rafters with two #8 x 2-1/4” Wood Screws per board
and to Large Fascia Beam Assembly with one #8 x 2-1/4” Wood Screw per board. (Fig. 12.3, 12.4 and 12.5)
HardwareWood Parts
20 x #8 x 2-1/4” Wood Screw
8 x #8 x 2-1/2” Wood Screw
2 x (623) Rafter Corner Right
2 x (624) Rafter Corner Left
2 x (629) Rafter Short RT
Note notches
facing up
Large Fascia
Beam Assembly
(634)
Rafter
#8 x 2-1/4”
Wood Screw
(624) Rafter
Corner Left
(623) Rafter
Corner Right
Flush
#8 x 2-1/2”
Wood Screw
Step 12: Large Roof Assembly
Part 2
Flush
Rafter
#8 x 2-1/2”
Wood Screw
Large Fascia
Beam Assembly
Fig. 12.5
F: Place one (629) Rafter Short
RT, one (632) Rafter Centre
RT, one (631) Rafter Centre LT
and one (630) Rafter Short LT
over the pilot holes in the Large
Fascia Beam Assembly so
they are ush to the top of the
assembly and tight to both (623)
Rafter Corner Right and (624)
Rafter Corner Left, as shown in
g. 12.3. Attach Large Fascia
Beam Assembly to rafters with
one #8 x 2-1/2” Wood Screw per
rafter. (g. 12.3 and 12.5)
G: Attach (635) Long Roof Top
to (633) Centre Rafters with two
#8 x 2-1/4” Wood Screws per
rafter. (g. 12.4)
H: Repeat Steps E - G for
second Large Roof Assembly.
#8 x 2-1/2”
Wood Screw
(635) Long
Roof Top
#8 x 2-1/4” Wood
Screw x 4
#8 x 2-1/4”
Wood Screw
(635) Long
Roof Top
(623) Rafter
Corner Right
(633) Centre
Rafter
(634) Rafter
(624) Rafter
Corner Left
Fig. 12.4
Fig. 12.3
(629) Rafter
Short RT
(632) Rafter
Centre RT
(630)
Rafter
Short LT
(631) Rafter
Centre LT
2 x (630) Rafter Short LT
2 x (631) Rafter Centre LT
2 x (632) Rafter Centre RT
#8 x 2-1/4”
Wood Screw