60 support@yardistrystructures.com
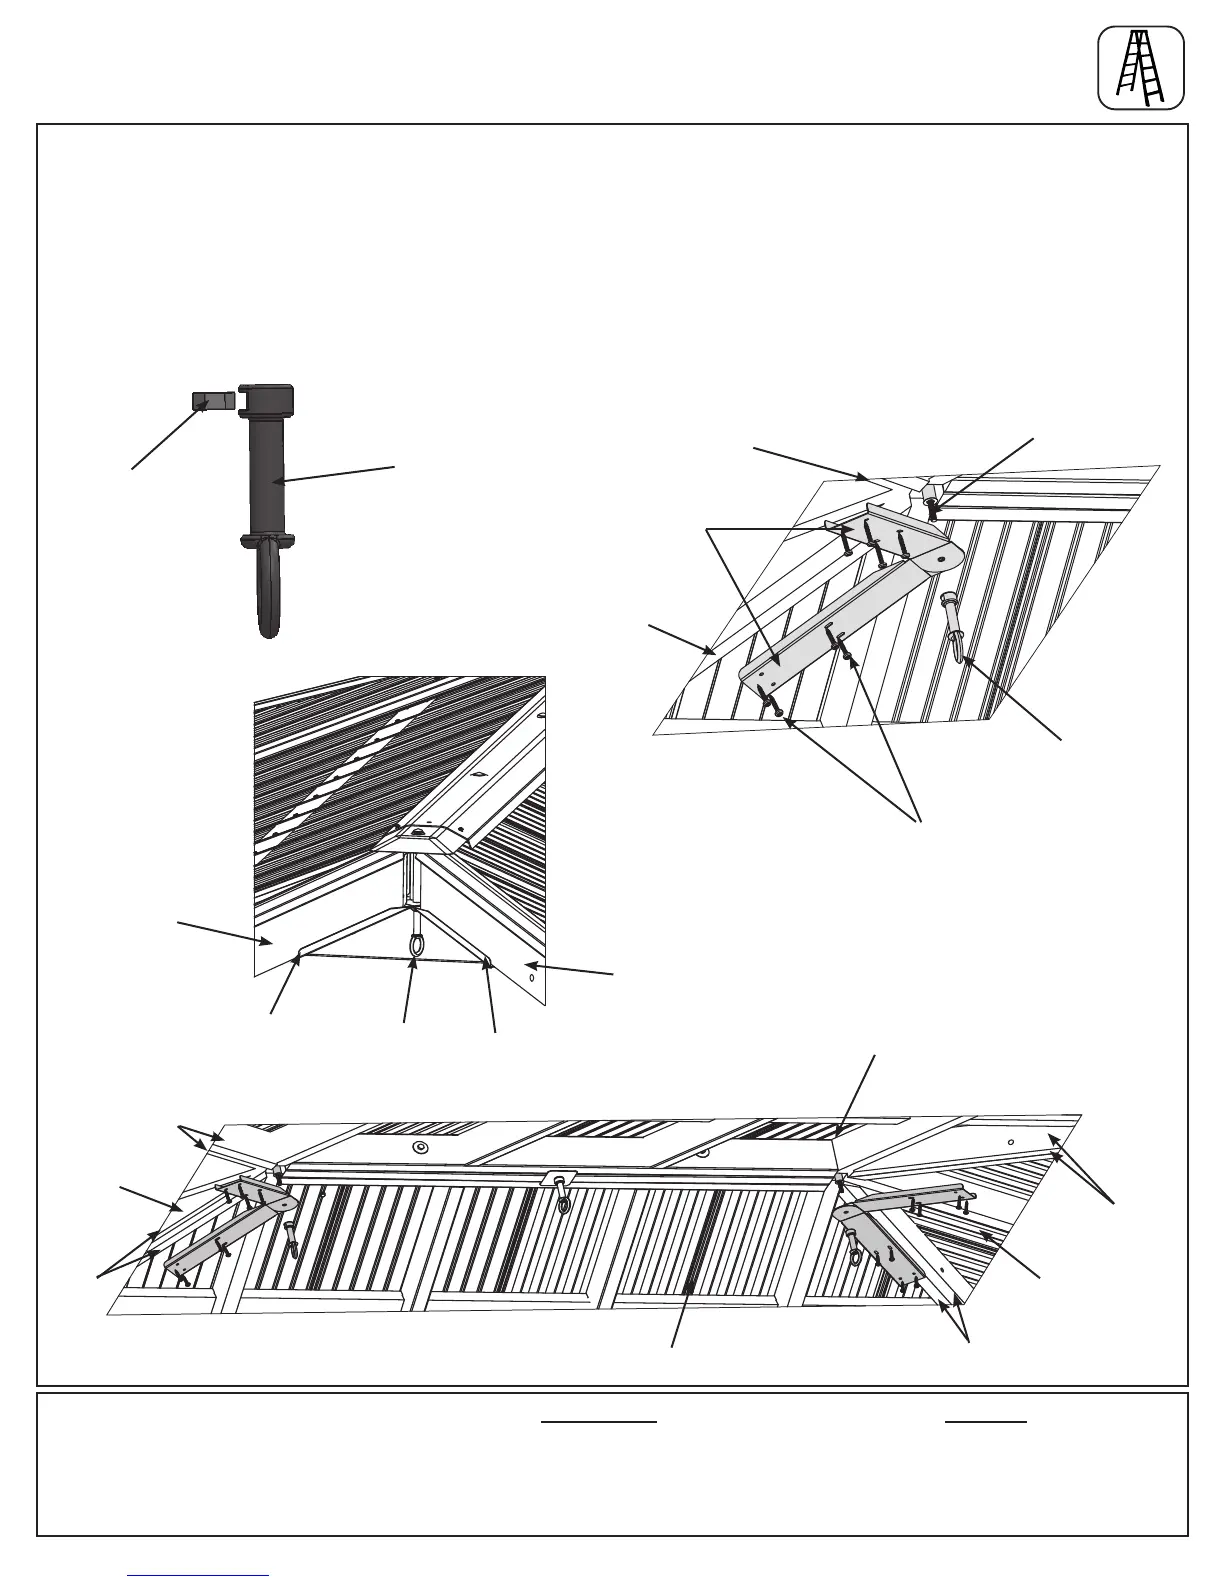
Peak
Loop
1/4” Nut
A: Insert one 1/4” Nut into two Peak Loops. Be careful nut is loose and will fall out until attached to Carriage
Bolt. (g. 24.1)
B: Insert two Roof Peak Brackets through each end Carriage Bolt, so they t over the Rafter Corners, and attach
Peak Loops to Carriage Bolts then twist to tighten. (g. 24.2, 24.3 and 24.4)
C: Attach each set of Roof Peak Brackets to the Rafter Corners of the connected Large and Small Roof
Assemblies in the slotted holes with four #10 x 1-1/4” Pan Screws per bracket. (g. 24.2, 24.3 and 24.4)
Fig. 24.1
Components:
2 x Peak Loop
2 x 1/4” Nut
4 x Roof Peak Bracket
Step 24: Secure Roof Peak Detail
Fig. 24.3
Fig. 24.4
Fig. 24.2
Carriage Bolt
Peak
Loop
Rafter
Corner
Rafter
Corner
Rafter
Corner
Rafter
Corner
Peak
Loop
Roof Peak
Bracket
Roof Peak
Bracket
Roof Peak
Bracket
#10 x 1-1/4” Pan Screw
x 4 per bracket
Rafter
Corner
Rafter
Corner
Rafter
Corner
Rafter
Corner
Small
Roof
Assembly
Hardware
16 x #10 x 1-1/4” Pan Screw
Small Roof
Assembly
Large Roof Assembly
Large Roof
Assembly