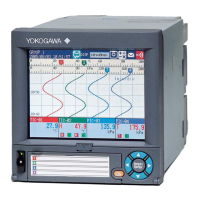
GX60 Dimensions
Power supply terminal type
127.8 (5.03)
148 (5.83)
412.5 (16.2)
162 (6.38)48 156 (6.14)
164.7 (6.48)
6-Φ5 hole
(1.89)
8.7
(6-Φ0.2) hole
Power inlet type
127.8 (5.03)
148±0.4
162±0.2
156±0.2
6-Φ4.5 hole or M4
(6.14±0.0078)
(6.38±0.0078)
(5.83±0.0157)
(6-Φ0.18) hole or M4
148 (5.83)
412.5 (16.2)
162 (6.38)48 156 (6.14)
8.7
(0.34)
164.7 (6.48)
6-Φ5 hole
Mounting hole dimensions
(1.89)
(6-Φ0.2) hole
With modules
147 (5.79)
48
(1.89)
412.5 (16.2)
162 (6.38)156 (6.14)
6-Φ5 hole
(6-Φ0.2) hole
148 (5.83)
164.7 (6.48)
8.7
(0.34)
Unit: mm (approx. inch)
Unless otherwise specified, tolerance is ±3% (however,
tolerance is ±0.3 mm when below 10 mm).
Connect an GX60
Installing an Expansion Module into the GX/GP
When installing an expansion module into the GX/GP or
setting dipswitches, turn off the GX/GP and the GX60.
1
Install an expansion module into slot 9 or 2 of the
GX/GP.
2
Set dipswitch 8 of the expansion module to “ON”
(master).
Set the unit number to 0.
(Default: 0)
1
2
3
4
5
6
7
8
Setting the Unit Number of the GX60
The factory default unit number of the expansion module
is 0. Use dipswitches 1 to 4 to set the unit number (1 to 6).
1
2
3
4
5
6
7
8
Unit number and dipswitch setting
Unit number
Dipswitch
1 2 3 4
6 OFF ON ON OFF
5 ON OFF ON OFF
4 OFF OFF ON OFF
3 ON ON OFF OFF
2 OFF ON OFF OFF
1 ON OFF OFF OFF
0
1
OFF OFF OFF OFF
1 The factory default setting. Unit number “0” is
reserved for the expansion module that is installed
into the GX/GP.
Fixing the Data Rate to 10 Mbps
To fix the data rate to 10 Mbps, set dipswitch 7 to “ON”.
1
2
3
4
5
6
7
8
ON
7-segment LED for
10 Mbps fixed mode
Dot indication
Power Specialties, Inc. | www.powerspecialties.com | (816) 353-6550
 Loading...