Do you have a question about the YOKOGAWA WT210 and is the answer not in the manual?
Verifies all included items are present and undamaged.
Lists items supplied with the instrument.
Lists optional accessories available for purchase.
Lists spare parts available for purchase.
Explains warning symbols and signal words used for safety.
Explains symbols used to indicate hazards and important information.
Describes how characters are displayed on the 7-segment LED.
Explains symbols used in flow diagrams for procedures.
Details on connecting the instrument and circuit for measurement.
How to select the correct wiring system for measurement matching.
Procedures for setting voltage and current measurement ranges.
How to configure displays for measured values on primary/secondary sides.
Steps to set up and display the calculated efficiency.
Overview of the instrument's system configuration and block diagram.
Explanation of the signal flow and processing within the instrument.
Description of the various functions of the WT210/WT230 power meter.
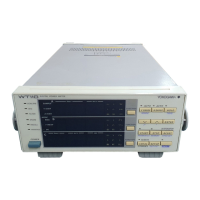
Identification and description of the instrument's physical parts.
Explanation of operation keys and their functions on WT210 and WT230.
Details on auto range, overrange, and error indications during measurement.
Essential precautions for safe and proper handling of the instrument.
Guidelines for installing the instrument in a suitable environment and position.
Critical safety precautions for wiring the measurement circuits correctly.
Tips for wiring the circuit to minimize effects on measurement accuracy.
Instructions for connecting the power cord and ensuring proper power supply.
Procedure for powering the instrument on/off and understanding the opening message.
Wiring examples for directly connecting circuits to the instrument.
Wiring examples using external potential or current transformers.
Wiring examples using external sensors for current measurement.
How to select the appropriate wiring system for the WT230 model.
How to select measurement modes like RMS, VOLTAGE MEAN, or DC.
Procedure for selecting the signal source for measurement synchronization.
How to enable or disable the line and frequency input filters.
Steps for manually or automatically selecting measurement ranges.
How to set scaling constants when using external PT or CT.
Procedures for setting ranges and scaling with external sensors.
How to use exponential or moving averaging to stabilize readings.
How to hold maximum measured values of various parameters.
Steps to compute and display efficiency using multiple input elements.
How to compute and display the crest factor for voltage and current.
How to use the instrument for basic arithmetic operations on measured values.
How to compute average active power during an integration period.
How to set the number of digits and the update rate for displayed values.
How to select the crest factor setting for measurement.
Procedures for displaying voltage, current, and active power measurements.
How to display apparent power, reactive power, and power factor.
How to display the phase angle between voltage and current.
How to display voltage and current frequencies.
How to display computed results like efficiency, crest factor, and peak values.
Explanation of active power and current integration capabilities.
Description of manual, standard, and continuous integration modes.
Explains the computing equations for power and current integration.
Important precautions for using the integration function, including power failures and restrictions.
Explains how measurement results are displayed based on function settings.
Details on auto range behavior during harmonic measurements.
Explains overrange and error displays specific to harmonic measurements.
Procedures for setting target element, PLL source, and distortion calculation method.
How to enable or disable the harmonic measurement function.
How to set the order of harmonics and display measured values.
Procedures for storing and recalling measurement and computation data.
Procedures for storing and recalling instrument setup parameters.
Details on the connector pin layout and signal assignments for external I/O.
How to control the instrument remotely using timing signals.
Procedures for setting up and configuring D/A output channels and items.
Explanation of the comparator function for setting limits and outputting results.
How to set the comparator to single or dual mode.
Procedures for setting limit values for comparator channels.
How to display set limits alongside measurement data.
How to enable or disable the comparator function.
How to output data to external plotters or printers.
Overview of GP-IB interface capabilities and specifications.
Explains instrument responses to interface messages and switching modes.
Description of the status byte format for communication.
Details on output formats for measured data, setup parameters, and error codes.
How to set the GP-IB address and communication mode.
How to select specific output items for communication.
List and description of communication commands.
Overview of serial interface capabilities and specifications.
Instructions for connecting the serial interface cable.
How to configure serial communication parameters.
Explanation of the serial data format.
Information on selecting data terminators for serial communication.
Details on output data formats and serial commands.
Lists setup parameters that are protected by the lithium battery.
Procedure for initializing all setup parameters to factory defaults.
How to perform zero-level compensation for accurate measurements.
How to enable or disable the front panel key lock function.
List and description of communication commands.
Overview of the IEEE 488.2 standard and its support.
Explanation of program message structure and syntax.
Comprehensive list and description of IEEE 488.2 commands.
Procedures for adjusting voltage, current, and D/A output.
Steps for calibrating AC voltage, current, power, and D/A output.
Troubleshooting guide for common instrument malfunctions.
List of error codes and their corresponding corrective actions.
Instructions for safely replacing the instrument's fuse.
Information on recommended replacement parts and their lifespan.
Specifications for input terminals, format, range, and impedance.
Detailed accuracy specifications for voltage, current, and power measurements.
Overview of the instrument's main functions including measurements and calculations.
| Type | Digital Power Meter |
|---|---|
| Frequency Range | DC, 45 Hz to 65 Hz |
| Voltage Ranges | 15V, 30V, 60V, 100V, 150V, 300V, 600V, 1000V |
| Current Ranges | 1A, 3A, 10A, 30A |
| Accuracy | ±0.1% of reading ±0.1% of range (voltage and current) |
| Basic Accuracy | ±0.1% of reading ±0.1% of range |
| Display | LCD |
| Communication Interface | RS-232, USB |
| Power Supply | 100V to 240V AC, 50/60Hz |
| Input Elements | Voltage and Current Inputs |
| Harmonic Measurement | Up to 50th order |