<11. Inspection and Maintenance>
11-3
IM 11M12G01-02EN 1sh Edition : Mar. 25, 2021-00
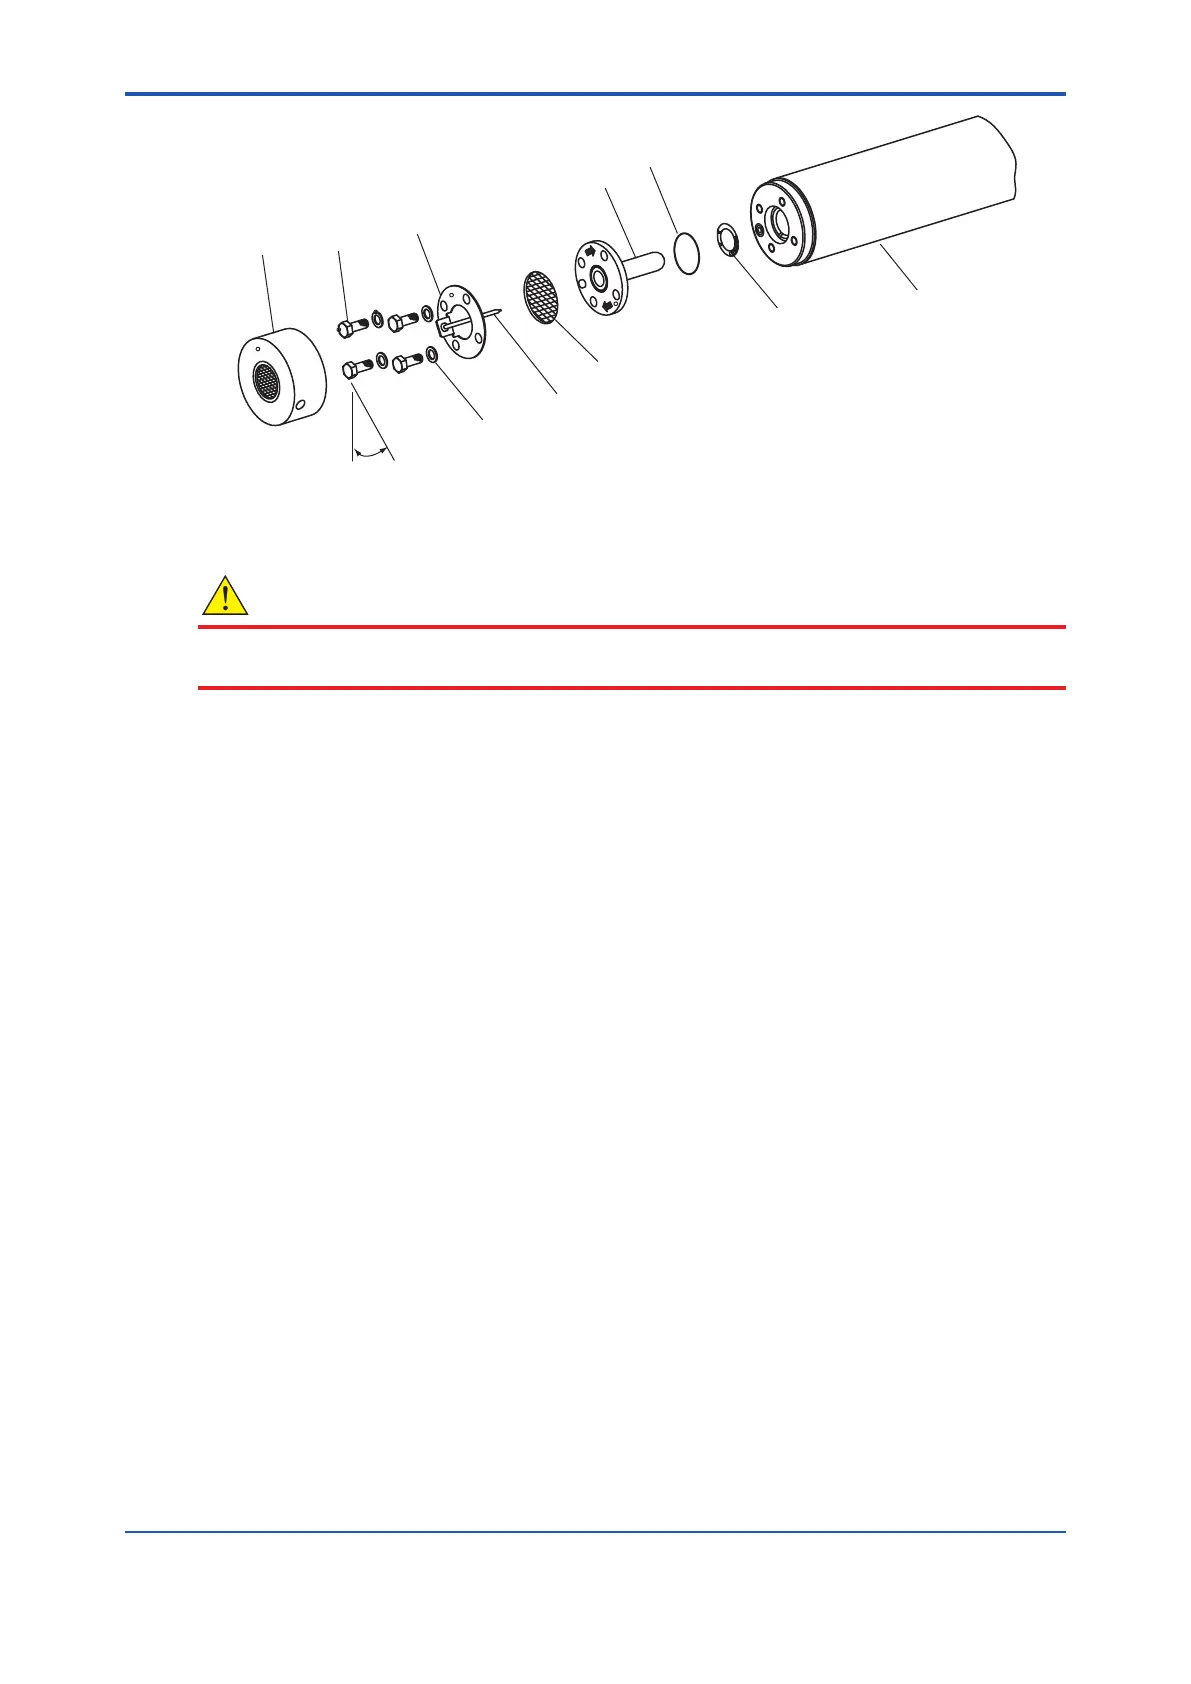
Dust filter
(optional)
Bolts (four)
Washers
(four)
Sensor
U-shaped pipe
Filter
Metal O-ring
Contact
Probe
1/8 turn – tighten bolts 1/8 turn
(approximately 45°) each
U-shaped pipe
support
Figure 11.2 Exploded View of Sensor Assembly
CAUTION
1. Identifying parts to be replaced
In order not to lose or damage disassembled parts, identify the parts to be replaced from among
all the parts in the sensor assembly. Normally, replace the sensor, metal O-ring and contact
spring washers.
2. Removal procedures
(1) Remove the four bolts and associated washers from the tip of the detector probe.
(3) Pull the sensor assembly toward you while turning it clockwise. Also, remove the metal
(When replacing the assembly, be careful not to scratch or dent the tip of the probe with
comes in contact). Otherwise, the sample gas will not be sealed.)
(4) Use tweezers to pull the contact out of the groove in the tip of the probe.
(5) Clean the sensor assembly, especially the metal O-ring contact surface to remove any
contaminants adhering to that part. If you can use any of the parts from among those
removed, also clean them up to remove any contaminants adhering to them.
(Once the metal O-ring has been used, it can not be reused. So, be sure to replace it.)
3. Part assembly procedure
(1) First, install the contact. Being careful not to cause irregularities in the pitch of the coil spirals
(i.e., not to bend the coil out of shape), place it in the ringed groove properly so that it forms
a solid contact.
 Loading...