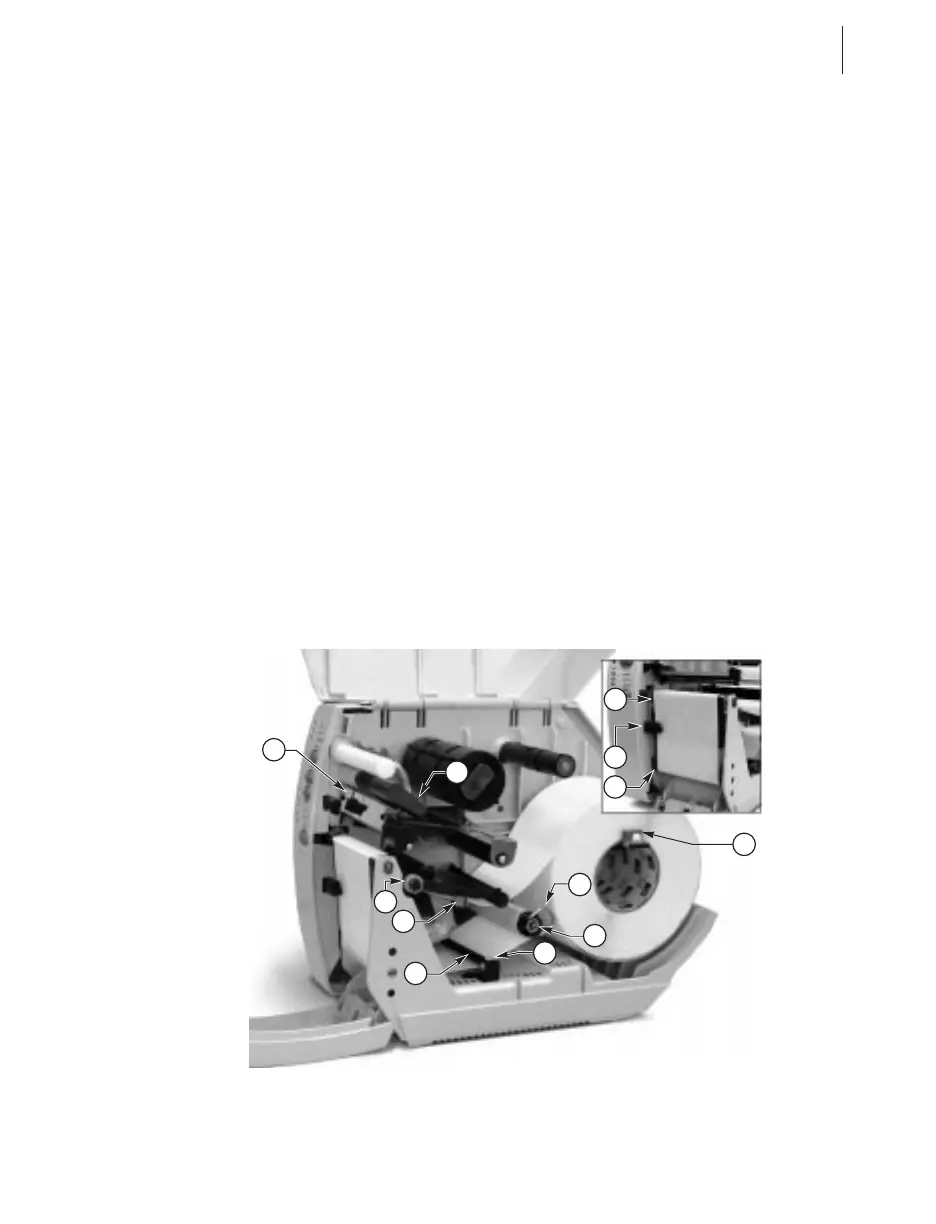
Peel-Off Mode (Optional)
Refer to Figure 9 and follow the procedure below.
1. Slide the media supply guide (a), media guide (b), and the outer edge
guides on both the platen guide rod (c) and the lower guide rod (d) as far
out from the printer frame as possible.
2. Open the head open lever (e) to raise the printhead (f).
3. Remove the hold down hook (g).
4. Thread the media through the printhead as shown in Figure 9.
5. From the front of the printer, pull the media through the printhead until
approximately 24" of media extends out from the printer. Remove the
labels from the backing of the 24" of media that extends from the front
of the printer.
6. Align the inside edge of the media with the edge guide mark (h) near the
left side of the tear-off/peel-off plate, then close the head open lever.
(See Figure 25 for a detailed illustration.)
7. Thread the label backing behind the lower label available sensor (i),
through the slot under the rewind power roller (j), and below the lower
guide rod (k) to the backing rewind spindle (l). Then, wind the backing
material around the backing rewind spindle three or four times in a
counterclockwise direction. To insure proper winding, press the edge of
the backing material against the round plate at the far end of the spindle.
S400 & S600 User’s Guide 9
a
b
k
l
j
c
i
h
e
f
d
g
Figure 9
17