OPERATION
Carl Zeiss Activate / Deactivate Auto Focus Auto Focus equipment
28 425131-7044-001 06/2013
4.4 Activate / Deactivate Auto Focus
• Lay the sample on the stage.
• Use the focus drive of the microscope to move the speciment into the capture range of the objective
and operate the Auto Focus once or continuously. For this puropse press the Home / Microscope
button on the TFT display. Then press XYZ and select the Auto Focus tab.
• Press the On / Standby button to activate / deactivate the Auto Focus.
− "Work / Load" can also be used at smaller magnifications and for reflective surfaces (see section
4.7 on page 30). Note the restrictions given in section 4.7 on page 30.
To avoid errors, the surface of the sample
should always be within the capture range of the
objective and be sufficiently reflective. See also Table 3 on page 26, Surface of sample and
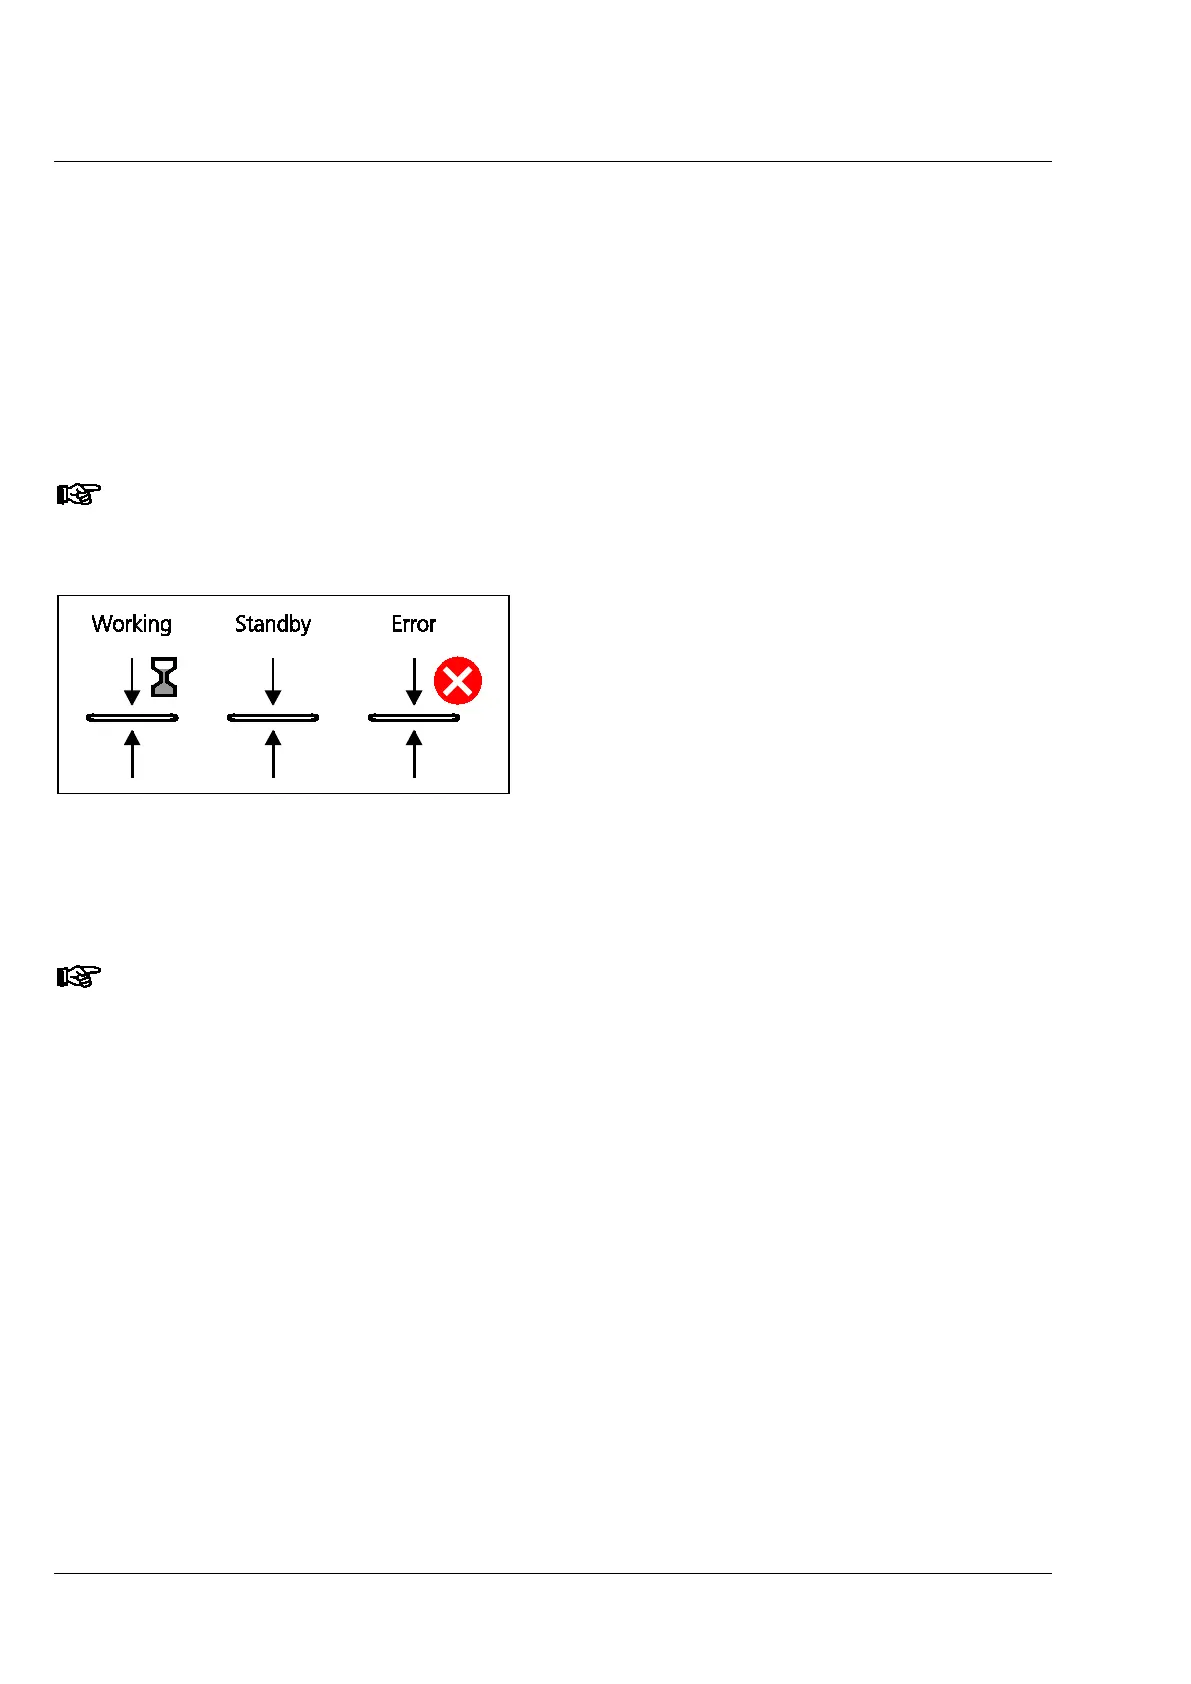
The two statuses Working / Standby are shown
by a variable status icon (Fig. 14) on the TFT
display. During this time the controller shows the
status message Working 'xx' s / Standby.
Error messages are visualised by means of a red
dot with a white "X" next to the status icon.
If the Auto Focus cannot find a clear focal plane
during focusing once, it will discontinue the
focusing procedure after 6 attempts and an error
message will be displayed on the controller.
If error messages appear, consult the
Troubleshooting section on page 33.
The Auto Focus can alternatively be activated / deactivated in accordance with the specifications
or the menu of the imaging software (Axio Vision, version 4.9.1 or later).
Fig. 14 Display forms of the status icons for
Auto Focus on the TFT display in On /
Standby status (left and central) and
visualization of error messages.