If you are patching a fixture for the first time, and you have RigSync
enabled, you will receive a pop-up after clicking Finish (pictured). This
will ask you whether you would like to leave RigSync enabled, so thatit
will continue to keep RDM fixtures synchronised with your console,or
whether you would like to disable RigSync so that you can continue
patching your console manually.
You will not receive this message again, however you can
enable/disable RigSync at any point by tapping Setup -> Universes,
and use the RigSync options under Remote Device Management.
Multi-Part Fixtures
Some fixtures, can have multiple "parts", with each fixture part
requiring its own start address. Common examples of these are
dimmers channels with a scroller, movers with a separate dimmer, or
LED fixtures where the pixels can be addressed separately. These are
indicated in the first page of add fixtures, with the channel count
displayed as "(x + y Chans)", where "x" is the channel count of the first
part, and "y" is the channel count of the second part.
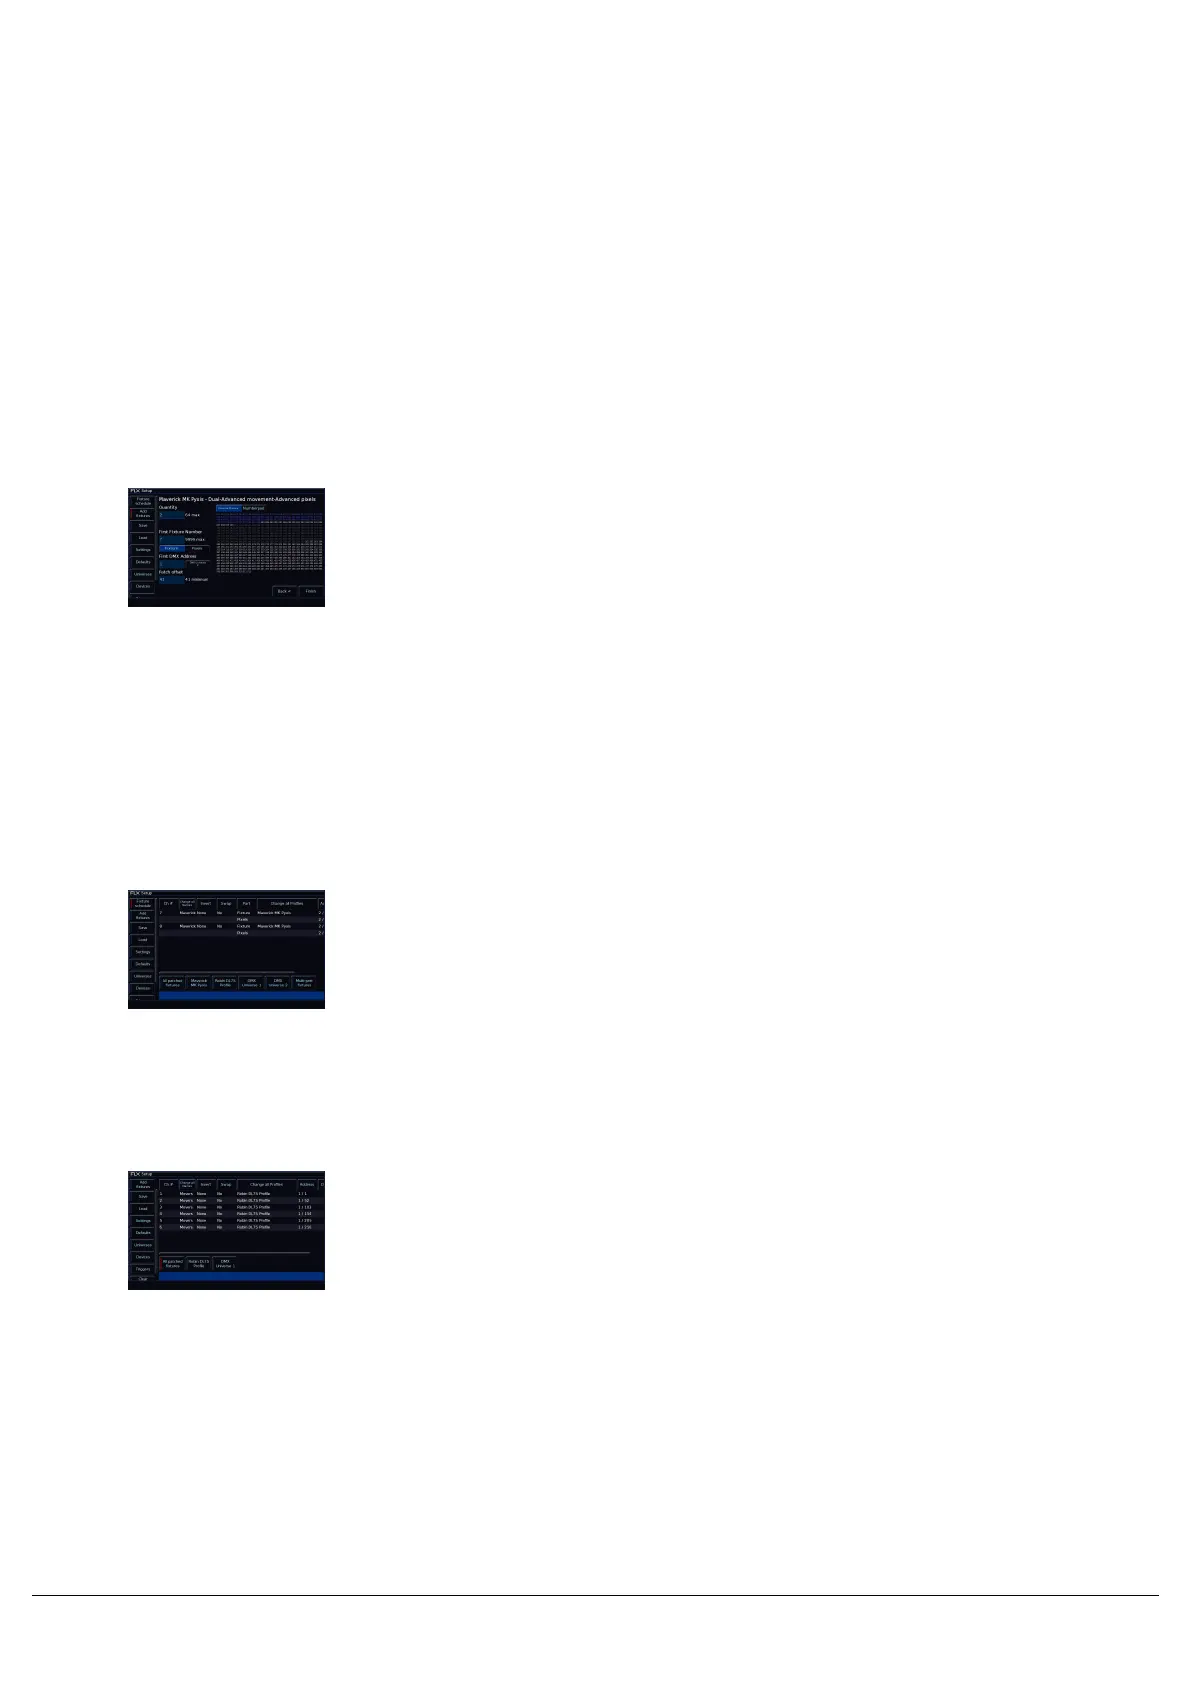
In the second page of Add Fixtures (pictured), there will be a new
"Part" switch below the fixture number field, allowing you to input the
DMX information in for the first part, then switch to the next part, and
fill that part's DMX information in. You can then repeat this process for
multiple parts. The channels used by the part you are working on will
be displayed in blue in the Universe Preview.
After clicking Finish, you will then be taken to the Fixture Schedule,
showing your newly patched multi-part fixtures. You will see a new
"Part" column in the fixture schedule, identifying the information and
addresses for each part.
Fixture Schedule
The fixture schedule, lists all of the fixtures currently in your show, and
allows you to edit them in various ways. The fixture schedule is
automatically displayed after patching fixtures, and is the first window
that opens upon tapping Setup, which opens ZerOS Setup.
By default, the fixture schedule will display your fixtures in fixture
number order. However the fixture schedule can also be sorted, by
holding the Shift key, and tapping the column headers. This will sort
them numerically/alphabetically, and a second tap will reverse the
order. For example hold Shift and tap "Address" to sort in order of
DMX address.
Zero 88 - ZerOS - Page 45 of 233 Printed: 23/11/2020 12:50:03 JH