Recording the first track
After connecting instruments and completing all recording preparation, we can prepare the recorder and
start recording the first track.
Track recording
1
Press and hold [EXIT] for more than 2
seconds.
Return to the top screen.
NOTE
• Recorded audio les in a track will be recorded
over. If you rewind the counter back to the head,
a new recording will overwrite the previous one.
During playback the files stored on the tracks will
be played.
If you want to record a new file, do not assign a file
to the track.
Ref. : Assigning files to tracks
Mark
P.23
P. 31
Ref. : New project creation
Insert effect
P.17
P.48
Adjusting the input level
Starting from the top screen of
the new project
Playing back the first track
2
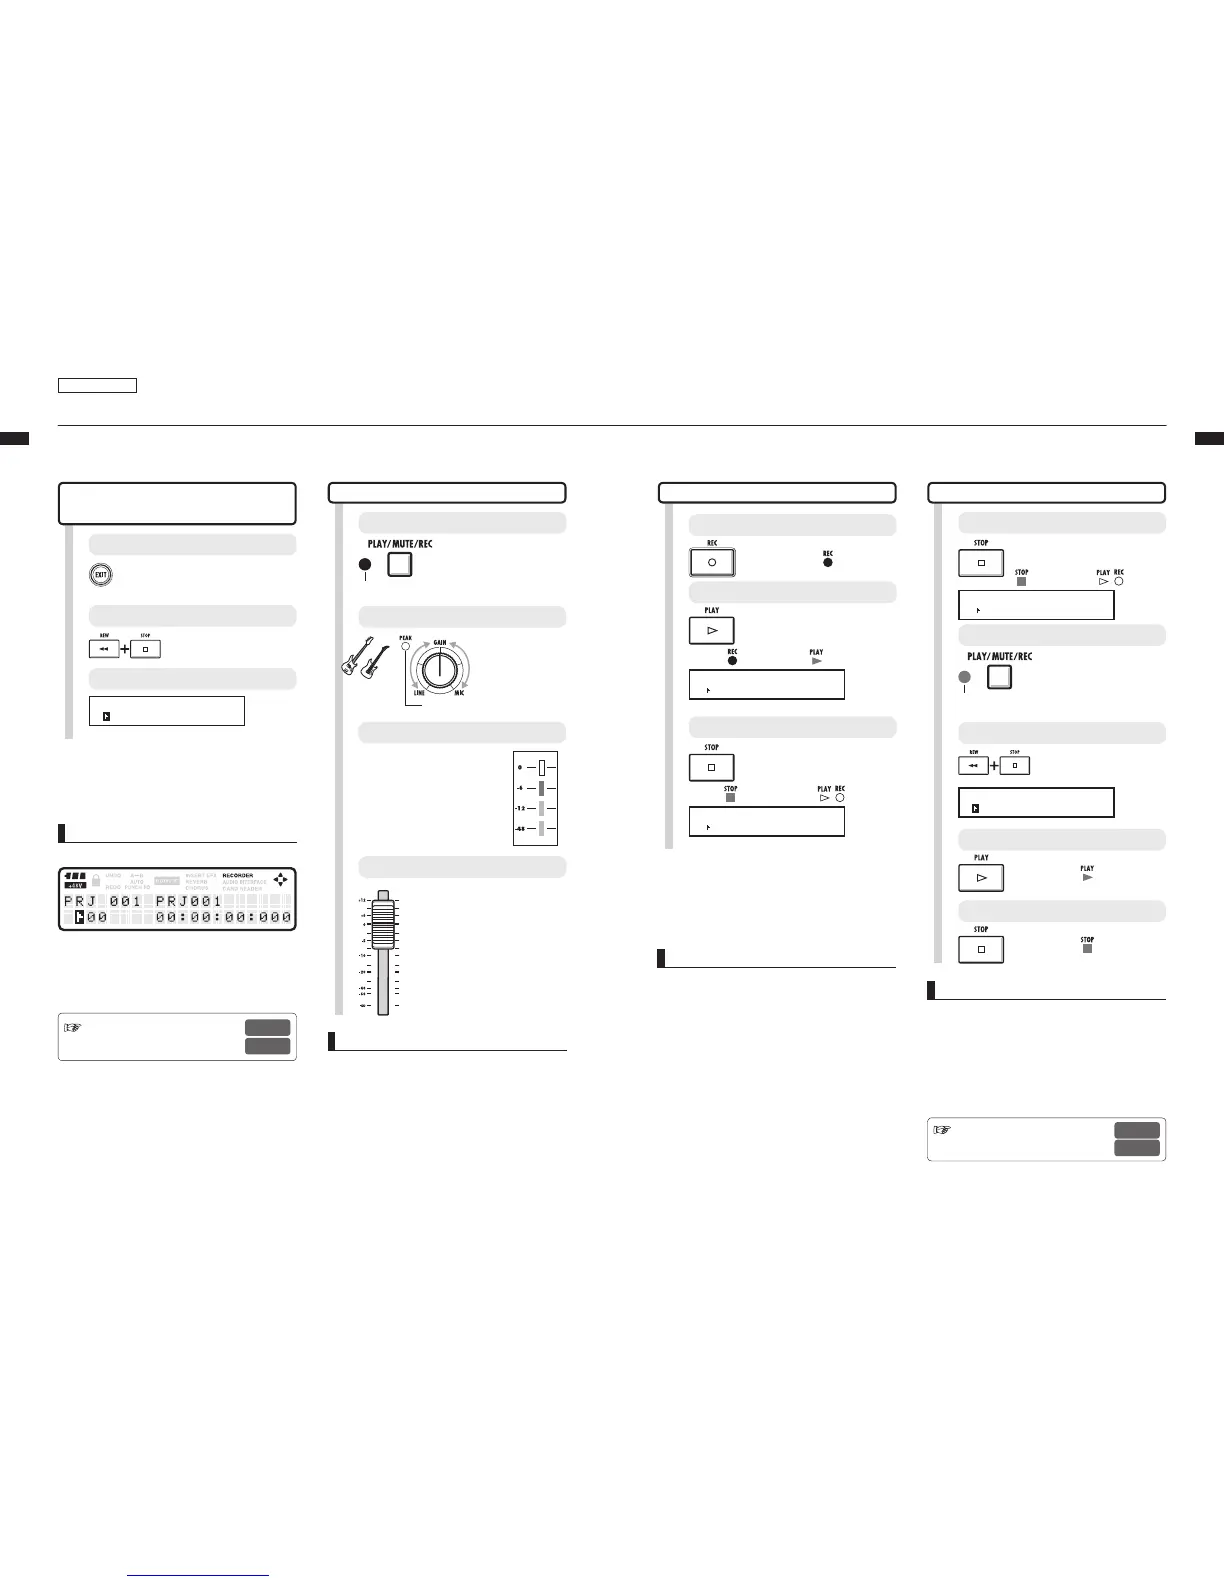
The top screen should look like this.
Return the counter to its head.
Press [REW] & [Stop] at
the same time to return the
counter to its head.
The counter is at the head position (mark 00).
PRJ 001 PRJ001
ト00 00:00:00:000
HINT
The top screen display of the new project
Counter at the head position (mark 00)
Batteries and phantom power active
After setting the input (Step 5 and after), you
can process input signals with the INSERT
EFFECT.
6
Adjust the monitoring system
14
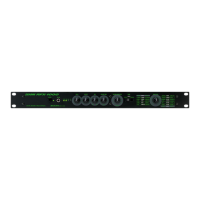
Press [STOP].
Stop.
Green light on
13
Press [PLAY].
Play.
Green light on
10
Stop.
Press [STOP].
The counter
stops moving.
PRJ 001 PRJ001
00 00:04:31:153
Lights off
Green light on
HINT
• Press [UNDO/REDO] to cancel the recording.
Recording again
• If you record on the same track again, the
previous recording will be overwritten.
• The three ways to record a new le or re-record
are:
• Press the [UNDO/REDO] key to execute the
undo-action (cancel the recording).
• Through PROJECT>FILE, set the recorded
track assignment to “NOT ASSIGN.” (Ref.: P.23)
• Through PROJECT>FILE>EDIT>DELETE,
delete the FILE (AUDIO DATA). (Ref. : P.62)
4
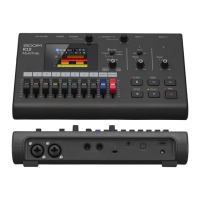
Adjust the input sensitivity (GAIN).
Adjust the
recording level
and monitor.
Sounds
start.
Should light occasionally when
the volume reaches maximum
3
Arm the track for recording.
Press 1-2 times until the
track light turns red.
Red light on: recording enabled (REC).
Using the recording track fader,
adjust the monitoring level of
the instrument being recorded.
(INPUT 1 is track 1 or 9).
If an INSERT EFFECT is
applied to an INPUT, make
adjustments to the patch
level, for example, to prevent
the LEVEL METER red light
(0dB) from turning on.
5
Adjust the recording level.
Recording the first track
7
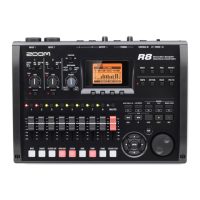
Start record standby.
Press [REC].
Red light on
9
Stop recording.
Press [STOP].
The counter stops moving, but does not return to 0.
PRJ 001 PRJ001
00 00:02:04:247
Lights off
Green light on
8
Start recording.
Press [PLAY].
The counter starts to move.
PRJ 001 PRJ001
00 00:00:00:123
Red light on
Green light on
11
Green light on: playback
enabled [PLAY]
Play the track.
Press the [PLAY/MUTE/
REC] key of the TRACK to
playback 1–2 times until
the green light is on.
12
Return the counter to its head.
PRJ 001 PRJ001
ト00 00:00:00:000
Press [REW] & [Stop] at
the same time to return the
counter to its head.
NOTE
Red lights on PEAK indicators and Level meters
• A PEAK indicator turns red when the input
signal exceeds the maximum detectable level
of 0 dB, resulting in input clipping. The red light
on a Level meter means that the signal being
recorded (signal after passing through the insert
effect) is clipping. If clipping happens, the
recorded sound will be distorted. You should
reduce the recording level.