or
NOTE
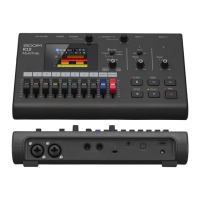
Hi-Z is only on INPUT 1, and the built-in stereo
microphones function only on tracks 7 & 8.
Tracks 7 & 8 correspond to INPUT 7 & 8 and are
set up as 2 mono tracks by default. When you
are using the built-in mics for a stereo recording,
make a stereo link to create one stereo track.
Turn input source
switches on.
STEP 3
Using the built-in microphones
(Stereo recording)
To record an electric guitar
(High impedance/monaural input)
Turn the [MIC] switch on
for INPUT 7 & 8.
1
Turn the [Hi-Z] switch on
for INPUT 1.
2
Connect the guitar to INPUT 1.
1
Press the status keys of INPUT 7 & 8
until their indicators light red.
2
Press the status key of INPUT 1 until the
indicators lights red.
3
Insert an SD card and turn
the power on.
STEP 1
Create a new project.
STEP 2
1
Press and hold until you return to the main
screen.
PROJECT
>SELECT
2
Press [PROJECT].
Cursor keys
Press the
right and left
cursor keys
to change the
selection.
Select the item with the
cursor, and press [ENTER].
5
Select [CONTINUE].
SETTING?
[CONTINUE] RESET
Confirm the name
and press [ENTER].
Name the new project.
4
PROJECT No.003
PRJ003
The new project name
The new project number
Confirm the creation of your new
project and press [ENTER].
6
Execute.
No.003:PRJ003
Create?
This screen shows your new
project name and number.
Return to the main screen.
PRJ 003
00 00:00:00:000
Ref: Project
P.56
Search the menu with the
cursor and press [ENTER].
3
Select
PROJECT
>NEW [SD]003:22:52]
Cursor keys
>NEW
.
When lit red, you can
start recording.
Press the [PLAY/
MUTE/REC] key one
or two times.
When lit red, you can
start recording.
Press the [PLAY/
MUTE/REC] key one
or two times.
Ref: Stereo link
Instrument connection
P.20
P.18 , 19
Adjust the input
sensitivity, monitoring
level and output
STEP 4
3
Adjust the monitoring level.
You can adjust the
monitoring level of an
instrument with the fader
of the track it is being
recorded on. (INPUT 1, for
example, would be TRACK
1 or 9).
Adjust the recording level.
2
The red (0 dB) indicator
of the level meter should
not light when you apply
an insert effect to an
INPUT. You should adjust
the PATCH LEVEL, for
example, if necessary.
Adjust the INPUT sensitivity with
the [GAIN] knob.
You should adjust the
[GAIN] of each INPUT so
that the PEAK indicator
blinks occasionally.
1
Ref: Recording methods in detail
:
How to use the INSERT EFFECT
P.17 —
P.49
NOTE
If the input signals distort during recording, adjust the
input sensitivity or recording level, referring to
Step 4.
After recording has completed, the “wait” bar will
be displayed. Do not turn the power off or take
the SD card out until the “wait” bar disappears. If
you do not follow this procedure, you may dam-
age the data or cause other problems.
Record—Complete—Play
STEP 5
Start recording.
2
Press [REC] & [PLAY]
at the same time.
Press [STOP].
Stop recording.
4
Start performing.
3
PRJ 003 PRJ003
00 00:00:10:152
The counter starts to run.
Move to the beginning.
1
PRJ 003 PRJ003
00 00:00:00:000
Press [STOP] & [REW]
at the same time.
Record
1
Exit record standby mode.
Press the STATUS KEY to turn the green light on.
When the light changes from red to green,
the track status changes from “record
standby” to “playback standby.”
When lit green, you
can play the track.
Press the [PLAY/
MUTE/REC] key one
or two times.
3
PRJ 003 PRJ003
00 00:00:10:152
Start playback.
Press the [PLAY] key.
Press the [STOP] key.
Stop playback.
4
Playback
2
PRJ 003 PRJ003
00 00:00:00:000
Return to the top.
Press [STOP] & [REW]
at the same time.