20 CHAPTER 1: NETWORK INTERFACE CARD INSTALLATION
3 Locate an available ISA or EISA slot and remove the
screw from the corresponding backplate (Figure 2).
Save the screw.
Some PCs have both ISA and PCI slots. Make sure that
you install the EtherLink 10 ISA NIC in either an ISA or an
EISA slot. See Figure 2.
PCI slots, the shortest of the three types of slots, are white.
The longer ISA slots are black. EISA slots, the longest,
are brown.
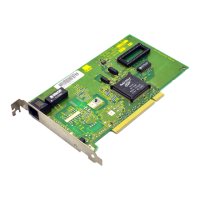
The 3C509B NIC is shipped configured to work in an
ISA slot. If you install the NIC in an EISA slot, see the
instructions in the next section, “Using an EISA Slot.”
Figure 2 Installing the 3C509B NIC
1 Remove slot cover
2 Insert NIC
ISA or EISA slots
Book Page 20 Monday, June 7, 1999 8:55 AM