ProJet
®
x60Pro Series User Guide Setup And Print The Build
3dscentral.3dsystems.com 22 All Rights Reserved
5/12/13
5. Gently lift the Build Plate (and the part) and place it in the Core Recycling Station.
6. When you have cleaned your part and removed it from the Build Plate, clean any remaining Core off
the Build Plate.
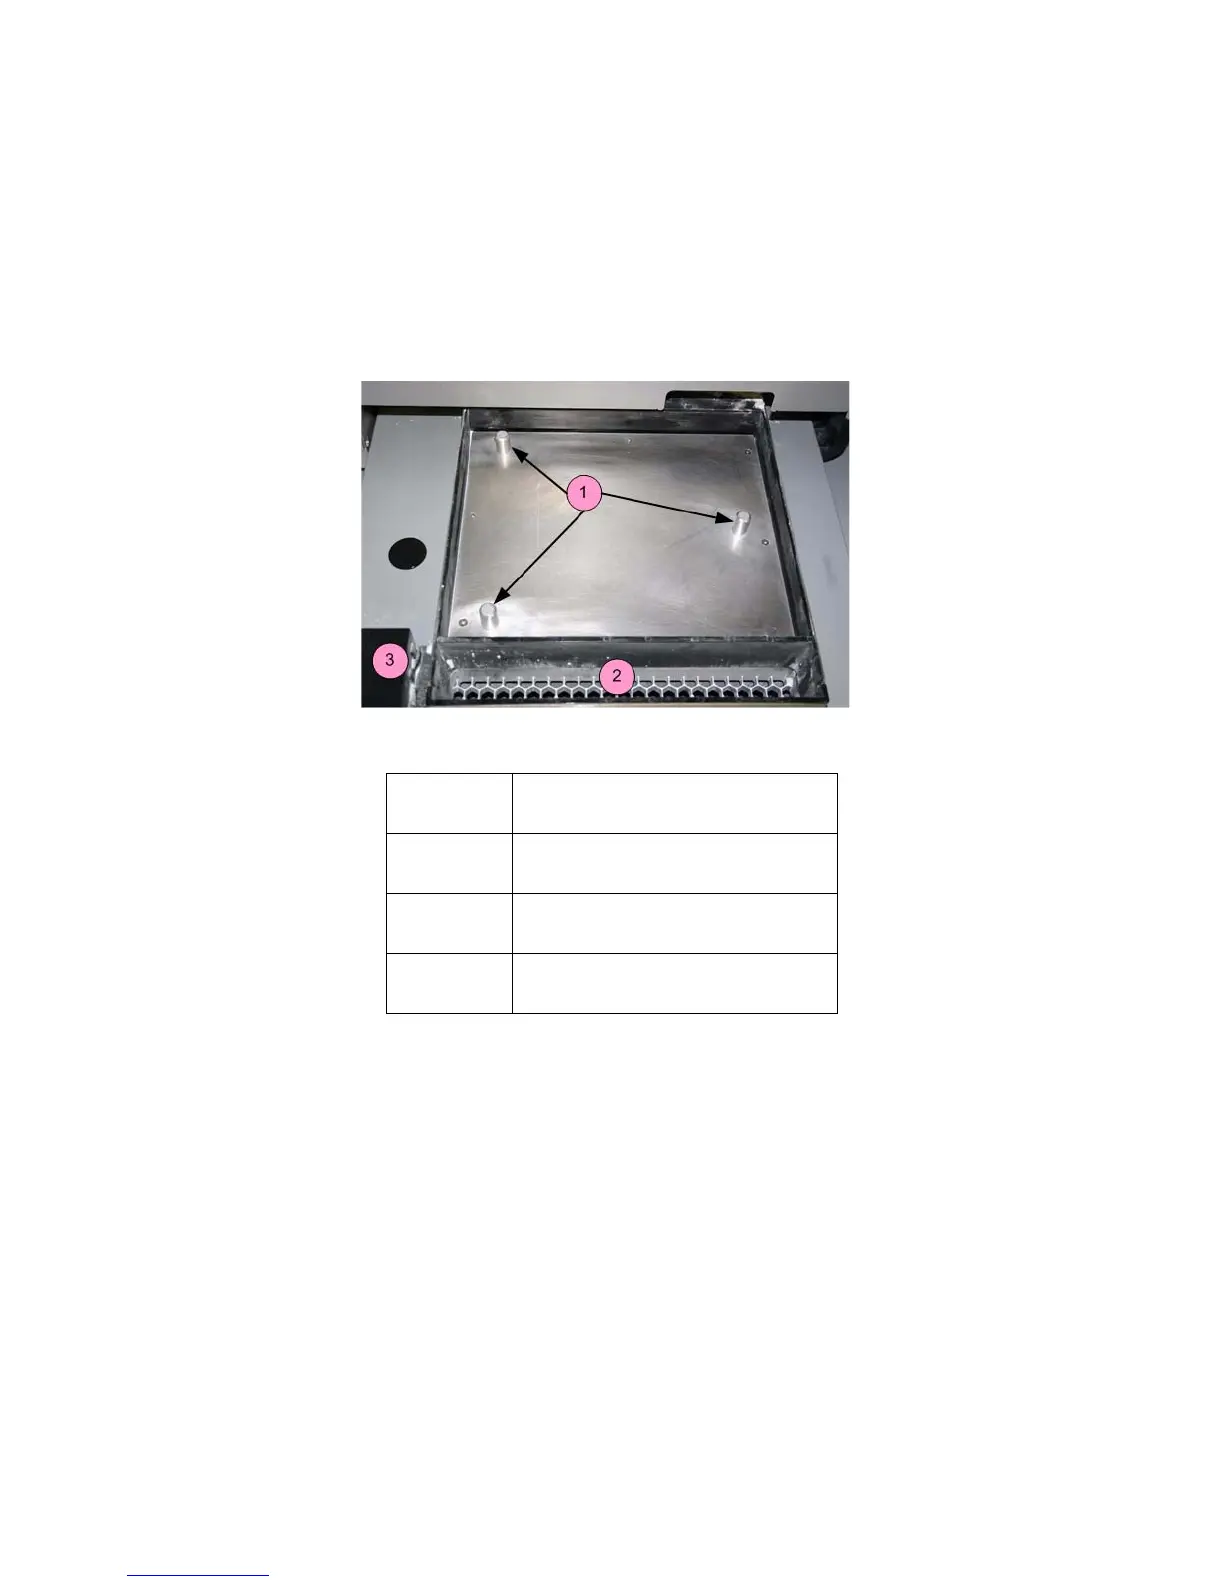
7. Thoroughly clean the underside of the Build Plate to remove any Core from the holes that mate with
the Locating Pins. Also clean any Core off the Locating Pins.
8. Return the Build Plate to the Printer. Be sure to align the Build Plate onto the Locating Pins.
2.9 Next Step: Cleaning the Printer
Right now - after cleaning the part and before post-processing - while the part continues to dry, take a few
minutes and clean the printer.
Regular cleaning and maintenance is the simplest, best way to ensure your parts look their best,
and to keep your printer running trouble-free.
See Section 3, ’Routine Cleaning’ for complete details on how to perform these routine cleaning tasks.
Number Component
1 Locating pins
2 Front overflow
3 Service Station