ProJet
®
x60 Series User Guide Printer Maintenance
3dscentral.3dsystems.com 44 All Rights Reserved
5/12/13
6.4 Slow Axis Bearing Lubrication
Frequency: When prompted in 3DPrint, or when you receive an Error 2303-0.
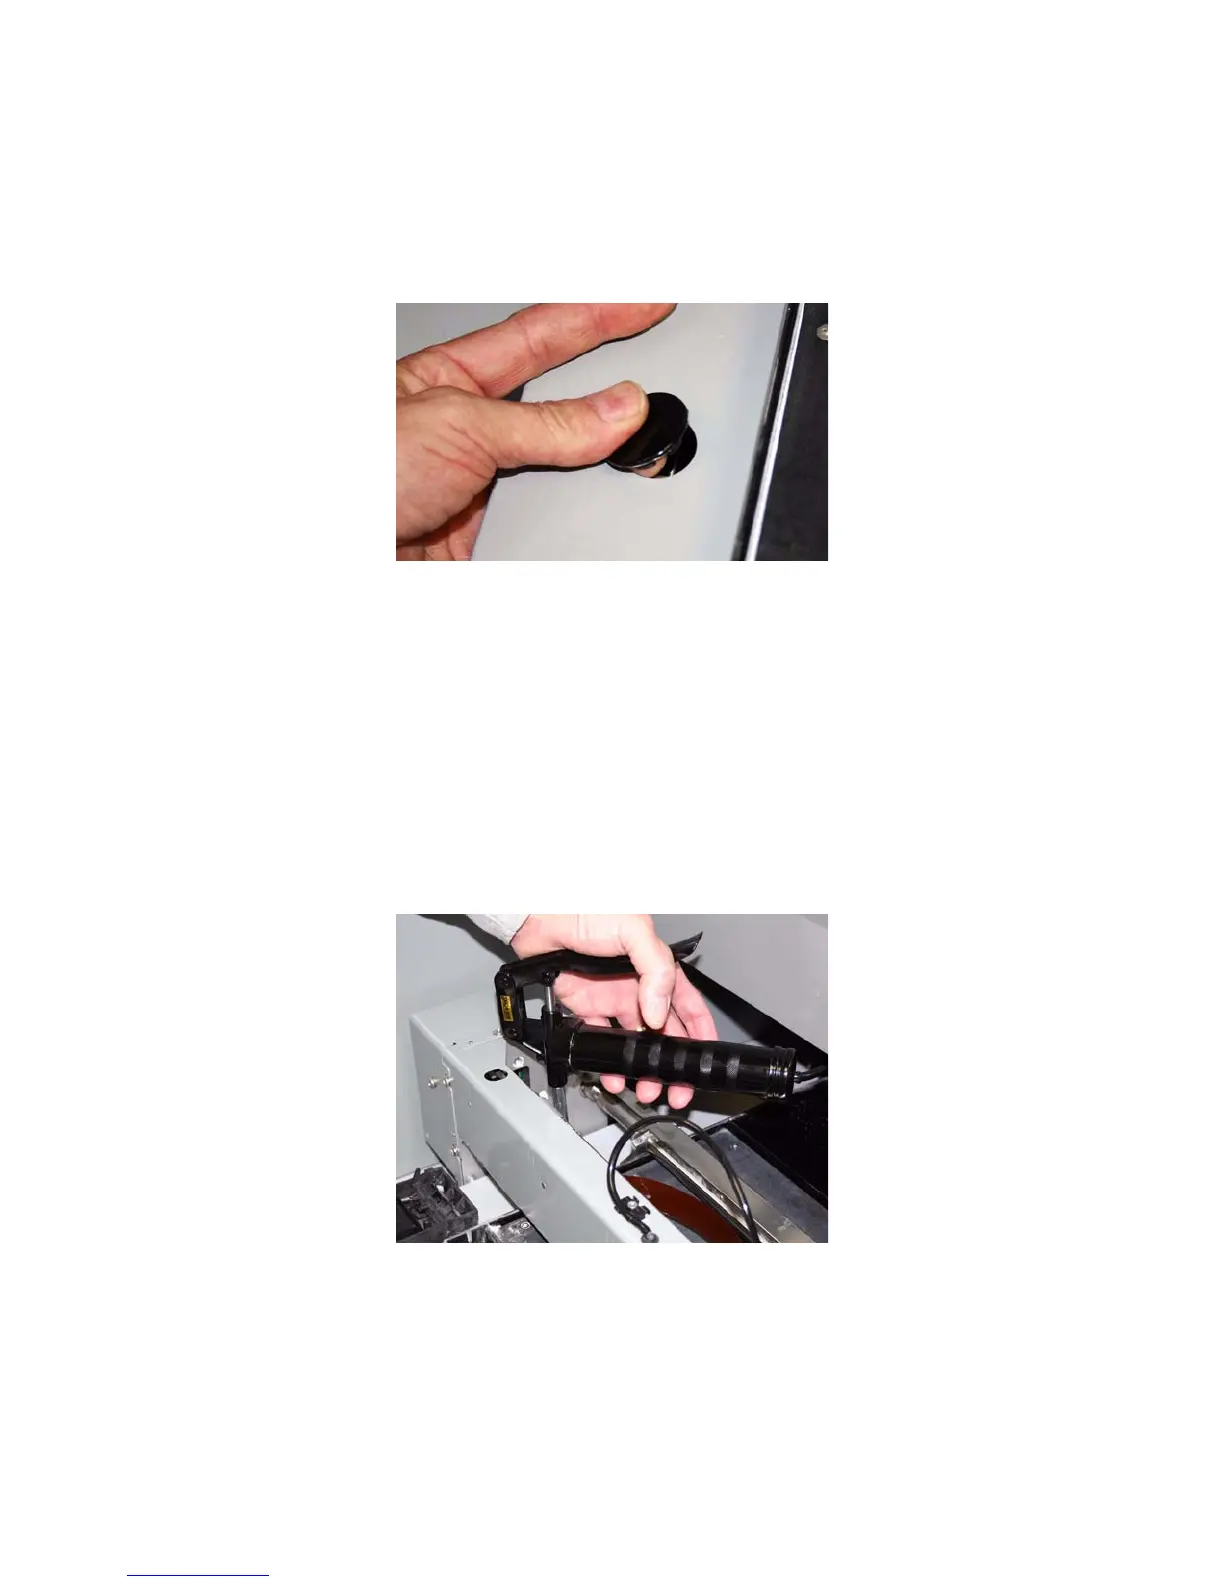
1. Locate the round plastic cover on the Deck to the left of the Build Bed and close to the Service Station.
2. Reach your fingers under the left side of the deck and pop the cover off from underneath.
3. Pull the Fast Axis forward until that hole is visible between the Carriage rails and the Spreader Roller.
You will see the Slow Axis bearing in the hole.
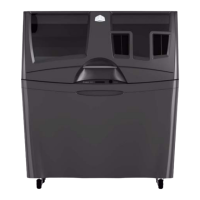
4. Assemble the grease gun that is part of your Accessories Kit according to the instructions found in the
document 09576 Grease Gun Loading Instructions, which is supplied on the software installation
media shipped with the printer. You can also find these instructions on our Web site at
3dscentral.3dsystems.com.
5. Squeeze the handle until grease dispenses from the tip. Wipe clean with a clean paper towel.
6. Place the tip of the grease gun over the grease fitting. Push down to snap the gun into place on the fit-
ting.
7. Squeeze the trigger 2 - 3 times or until you feel the tension change and then STOP. Do not over-
grease.
8. Unsnap the grease gun from the fitting. Replace the plastic cover.
9. Slide the fast axis forward and backward several times to spread the grease on the slow axis surfaces.
10. Reset the Maintenance Counter in 3D Print.