ProJet
®
x60 Series User Guide Printer Maintenance
3dscentral.3dsystems.com 42 All Rights Reserved
5/12/13
6. Slide the Carriage back and forth to distribute the grease evenly over the Top Rail.
7. Clean the excess grease off the Top Rail and Carriage.
8. Reset the Maintenance Counter in 3D Print.
6.3 Piston Screw Lubrication
Frequency: When prompted to in 3D Print.
1. Remove both the rear cover panel of the printer.
2. Remove the left (Build Chamber) side panel.
3. On the LCD display, select
BUILD CHAMBER > LOWER PLATFORM. Hold the Control Knob down
and lower the Build Bed platform as far as you can to expose the entire length of the piston screw.
4. Assemble the grease gun that is part of your Accessories Kit according to the instructions found in the
document 09576 Grease Gun Loading Instructions, which is supplied on the software installation
media shipped with the printer. You can also find these instructions on our Web site at
3dscentral.3dsystems.com.
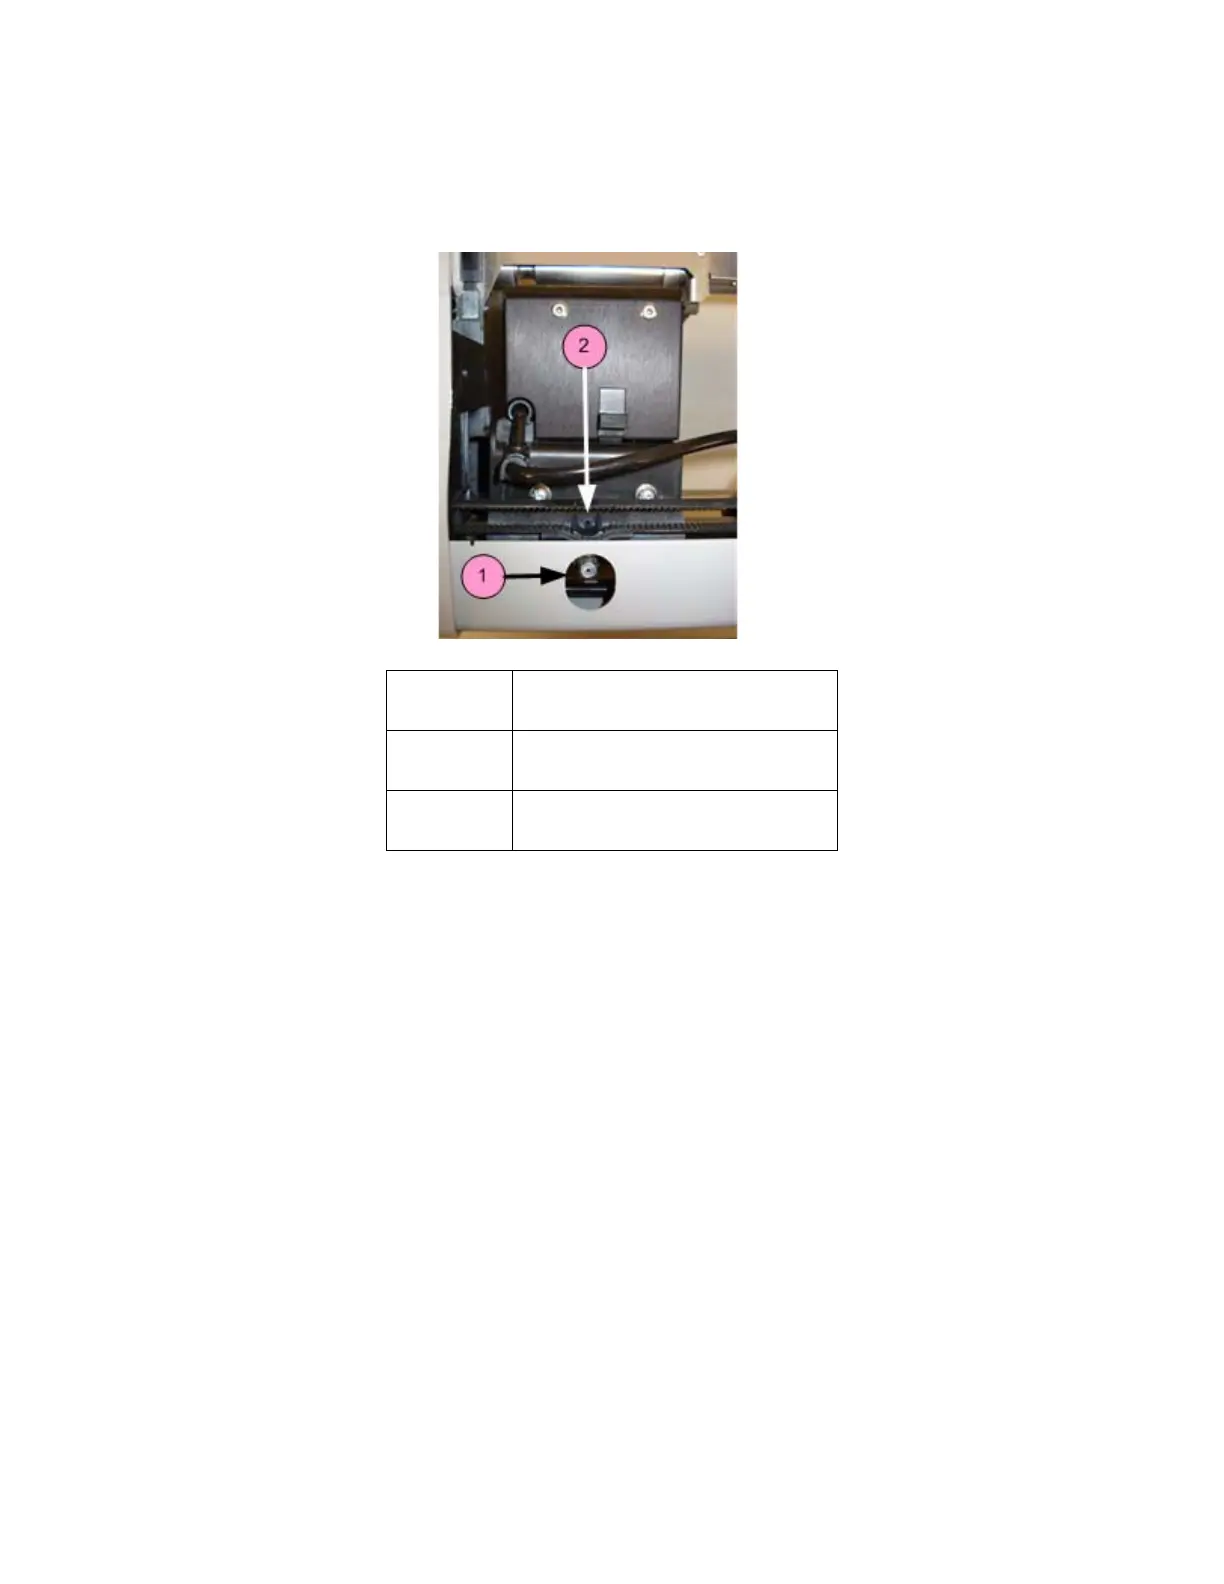
5. Look into the left end of the printer, under the build platform, and locate the piston screw.
Number Component
1 Fast Axis Grease Fitting
2 Relief Hole