1 – Setup the playback mode. (In this part :
Live
Live
)
)
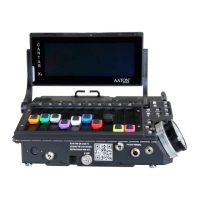
2 – Select the target bank (e.g. a) by pressing the Control + Left or Right buttons.
3 – Select the location of the playback file (by pressing the Left and Righ buttons to select the
Media or Project or Day fields and then Ok buttons to validate)
4 – Highlight the desired file by pressing the Plus(+) and Minus(-) buttons
5 – Assign the selected file to the current bank by pressing the Shift + F3 buttons.
6 – Edit the playback grid by pressing the F4 button. Then the Left and right buttons are used to
move the cursor and the Plus(+) and Minus(-) buttons to choose the source track.
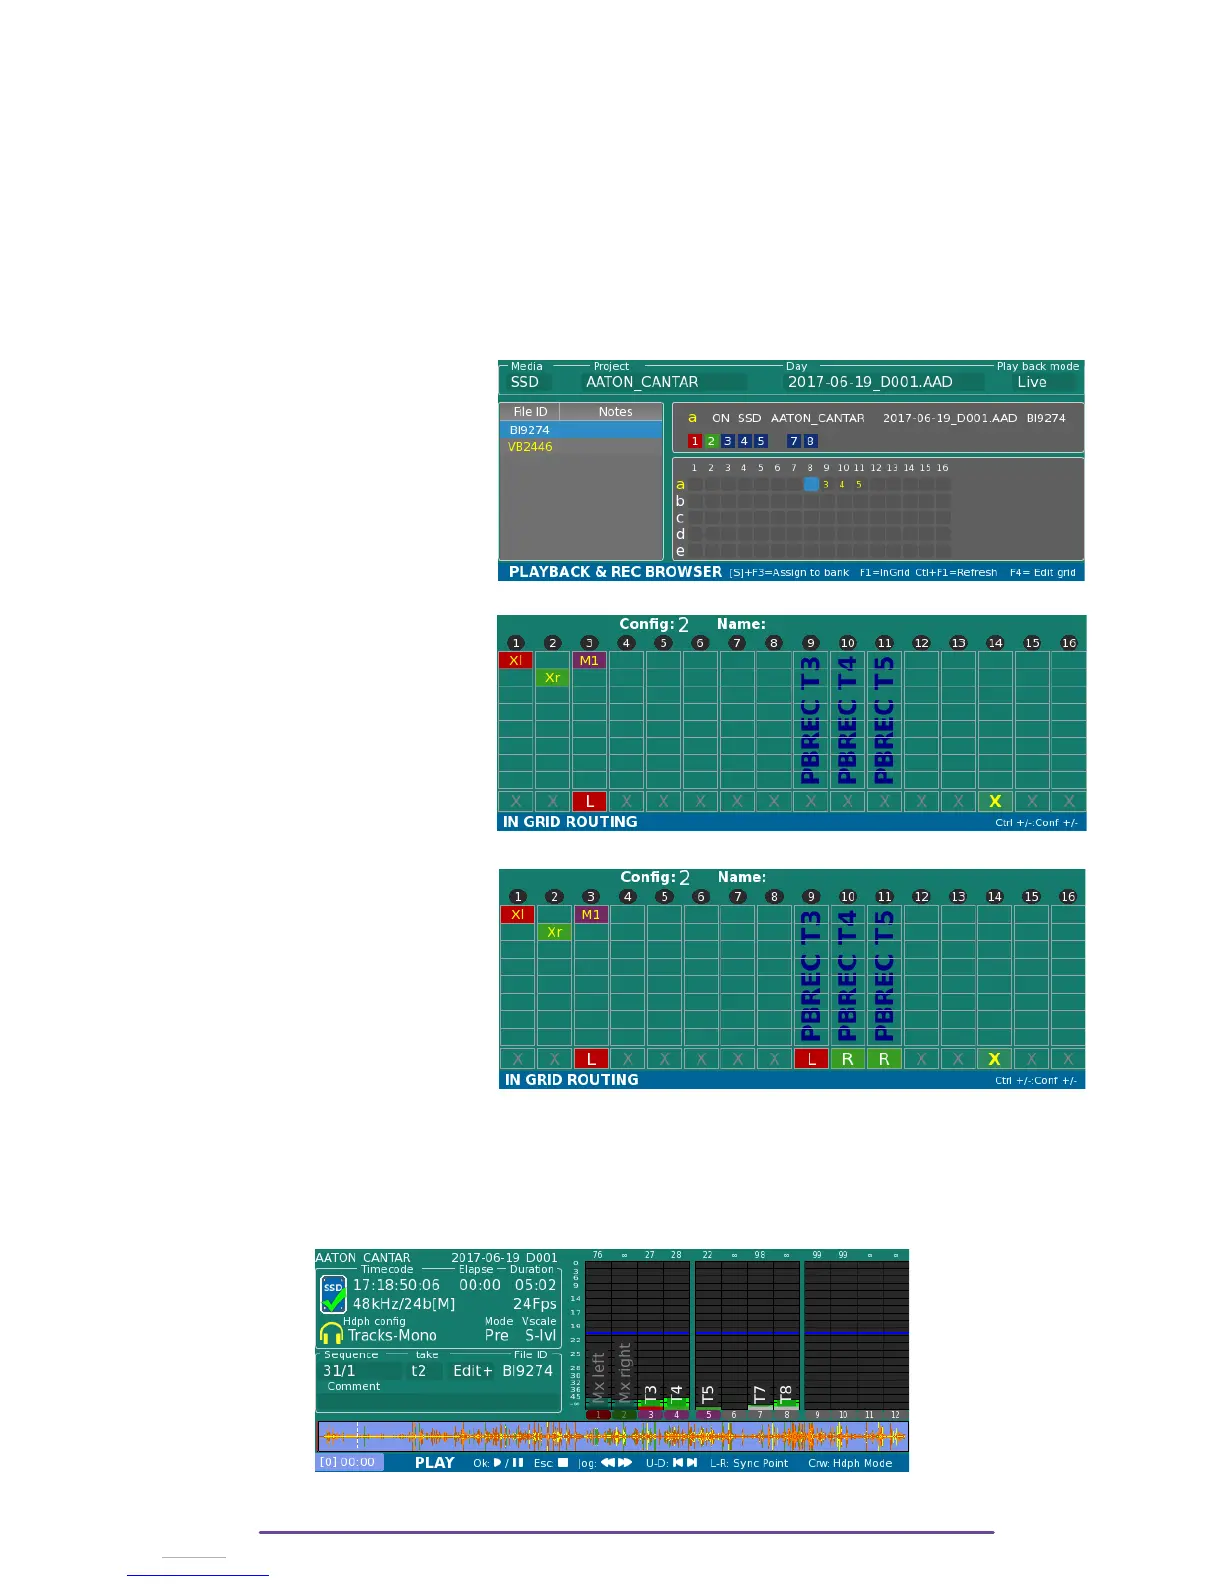
The 1 to 16 columns represents the Record Tracks. When assigning a source track on a column,
you decide which Track of your Bank will be sent into a Track of your Next Record.
This example show sources tracks
T3/T4/T5 being affected to the
new record tracks T9/T10/T11
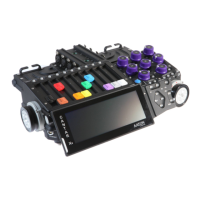
Press F1 to get an overview of the
final InGrid: a merge of the
playback Grid with the regular
Cantar InGrid.
The playback tracks can be
included into the mixdown of the
new recorded file.
(e.g. Playback track T3 recorded on
track 9 will be also mixed into Xl
with Mic 1)
2. Create Play-card
This screen is dedicated to put markers into the playback file, in order to prepare the audio
section (i.e PlayCard) you wish to play during the record.
Open the PLAY Screen dedicated to the PLAYBACK and REC, hold Shift while rotaing the Main
Selector to the Play position (8 o’clock)
Cantar X3
64