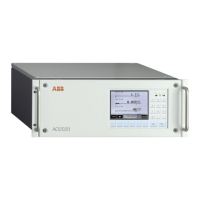
Aztec 600 ISE ammonia and fluoride
Single-stream ion-selective analyzers 13 Maintenance
66 OI/AXM630–EN Rev. I
3. Referring to Fig. 13.2:
a. Press down on pump pressure plate
C, turn pressure
plate locking pin
D
1
/4 turn counter-clockwise and
withdraw the pin. Lift the pump pressure plate clear of
the pump.
b. Disconnect the heated block assembly inlet tube
(Ammonia analyzer only) or mixer assembly inlet tube
(Fluoride analyzers only)
E from tee-piece F and
pull tee-piece, reagent and sample tubes free of slots
in lower support plate.
c. Disconnect sample pump tube G from the valve
manifold connector.
d. Disconnect reagent pump tube H from the in-line
mini barbed nipple connector located below the lower
valve manifold.
e. Remove shims J and sleeves K, complete with
pump tubing and tee-piece from the lower support
plate and discard the complete assembly.
f. Remove pump capstan securing screw and washers
L.
g. Remove nameplate M, front pump capstan, center
spacer and rear pump capstan. Discard the 2 x pump
capstans.
h. Fit new rear pump capstan to pump drive shaft,
followed by the center spacer and the new front pump
capstan, ensuring pump rollers are aligned. Fit
nameplate
M and secure with screw and
washers
L.
i. Fit new sleeves
K to new reagent H and sample
G pump tubing (hold the hole in the sleeves open
with a pair of long-nosed pliers while pushing the
tubes through).
j. Insert sleeves K and pump tubing into the lower
support plate, ensuring the thin (reagent) tubing H is
fitted to the rear location and the thick (sample) tubing
G to the front. Route end of reagent tubing H
through holes in valve manifolds.
k. Fit reagent and sample pump tubing to new tee-piece
part no. 26-1003-B F as shown. Slide tubing into
correct slot in lower support plate.
l. Fit new shims J to the slots in the support plate as
shown.
m. Gently pull the new tubing down through sleeves K
and into contact with pump rollers. Ensure tee-piece
F is positioned under the lower support plate as
shown and reagent tubing H is correctly routed
through holes in valve manifolds.
n. Ensure the tubing is aligned correctly over the rollers.
o. Ensure pump tubing sleeves K and shims J are
located correctly in pump lower plate as shown.
p. Ensure pump pressure plate locking pin D is not
protruding from the rear face of the pump pressure
plate
C.
q. Position the pump pressure plate over the pump
tubing and capstans and press down firmly until fully
home.
r. Press locking pin D fully home and turn
1
/4 turn
clockwise to lock the pump pressure plate in position.
s. Connect sample pump tube G to the valve manifold
connector.
Note. During step q, it is very important to ensure
that:
– the pump tubing is not pinched
– the pump tubing remains correctly located over
the pump capstan rollers
– each tube enters its respective groove in the
pressure plate
– the sleeves and shims remain in position
Note. DO NOT reconnect tubes E and H at this
stage – they are reconnected during steps 3 and 7 or
8 in Section 13.3.2.
 Loading...

