3-24 Machine Maintenance Procedures
Make sure all cables are moved away from the device to avoid damage
during removal.
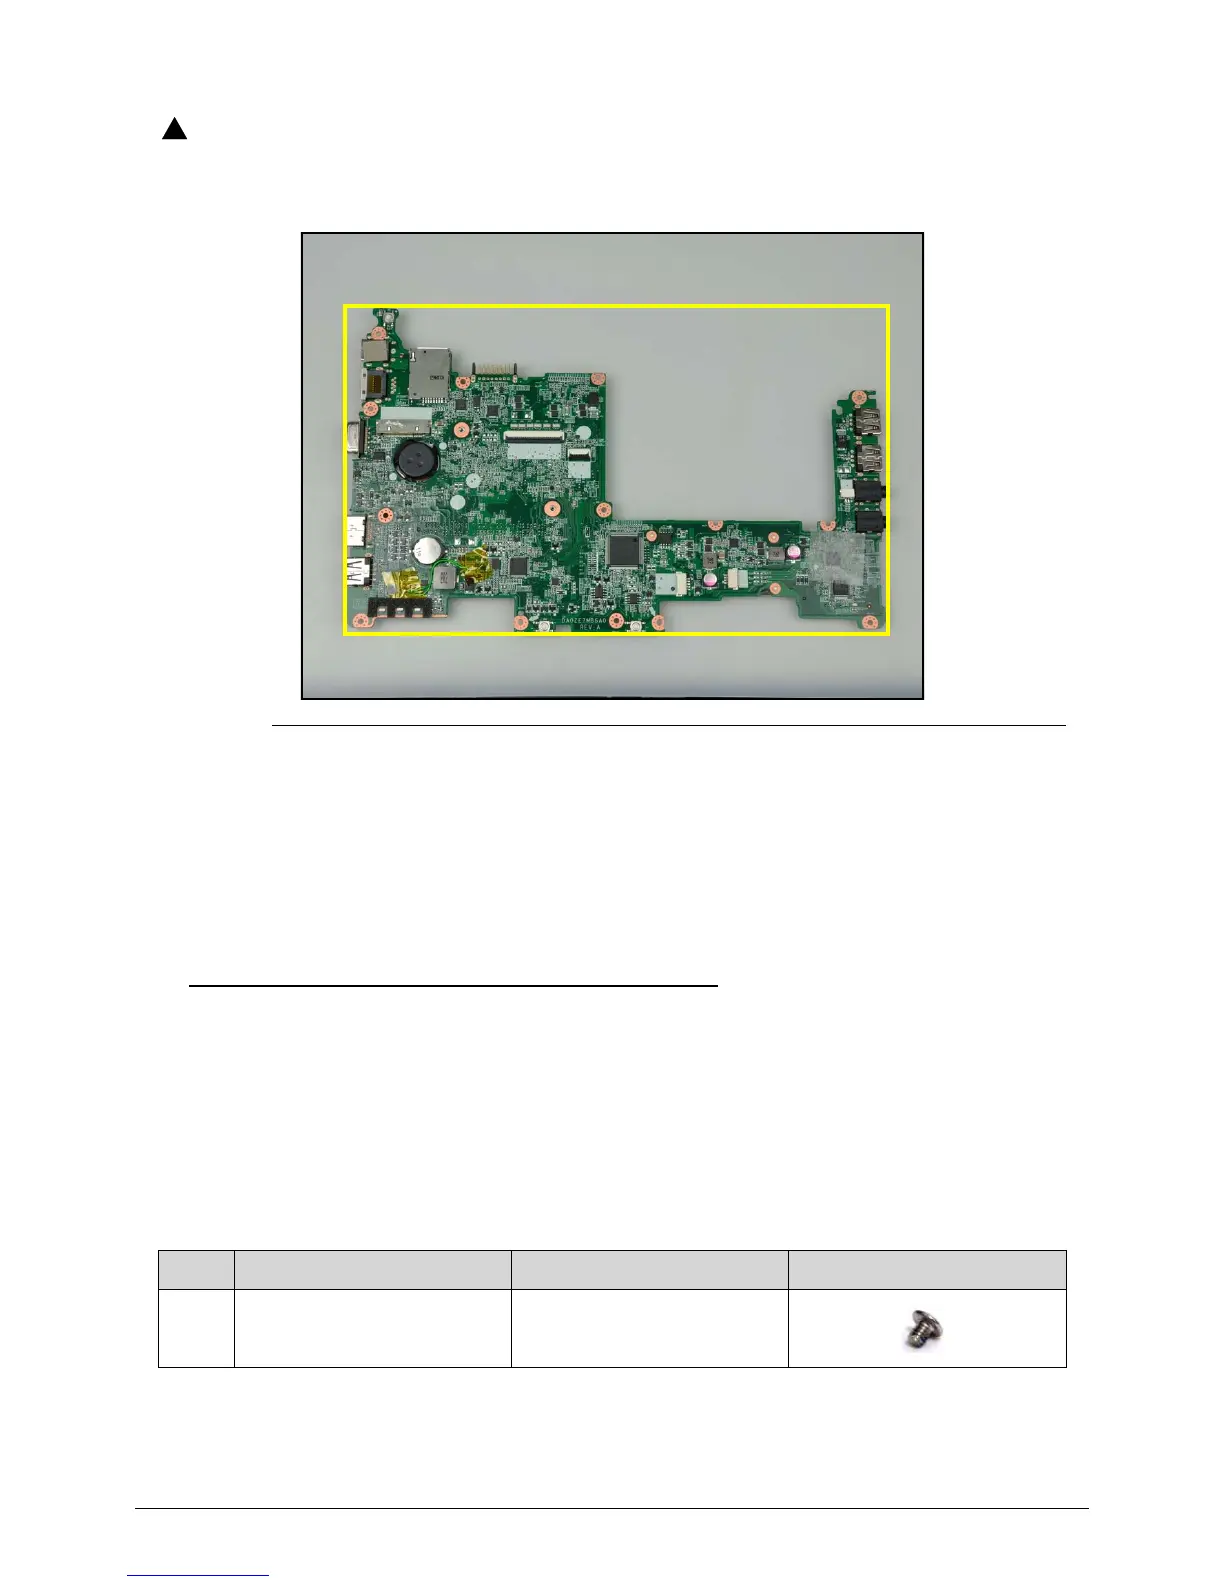
Figure 3-23. Mainboard
Circuit boards > 10 cm
2
have been highlighted with a yellow rectangle as
shown in the above image. Remove the circuit board and follow local
regulations for disposal.
Mainboard Installation 0
1. Place the mainboard (A) onto the lower case (Figure 3-21).
2. Install and secure two (2) screws (E) to the mainboard (Figure 3-21).
3. Connect the microphone cable (D) to the mainboard connector (Figure 3-21).
4. Connect the speaker cable (C) to the mainboard connector (Figure 3-21).
5. Connect the LVDS cable (B) to the mainboard connector (Figure 3-21).
6. Install the Bluetooth module.
ID Size Quantity Screw Type
E M2.0*3.0 NI 2