Chapter 3 39
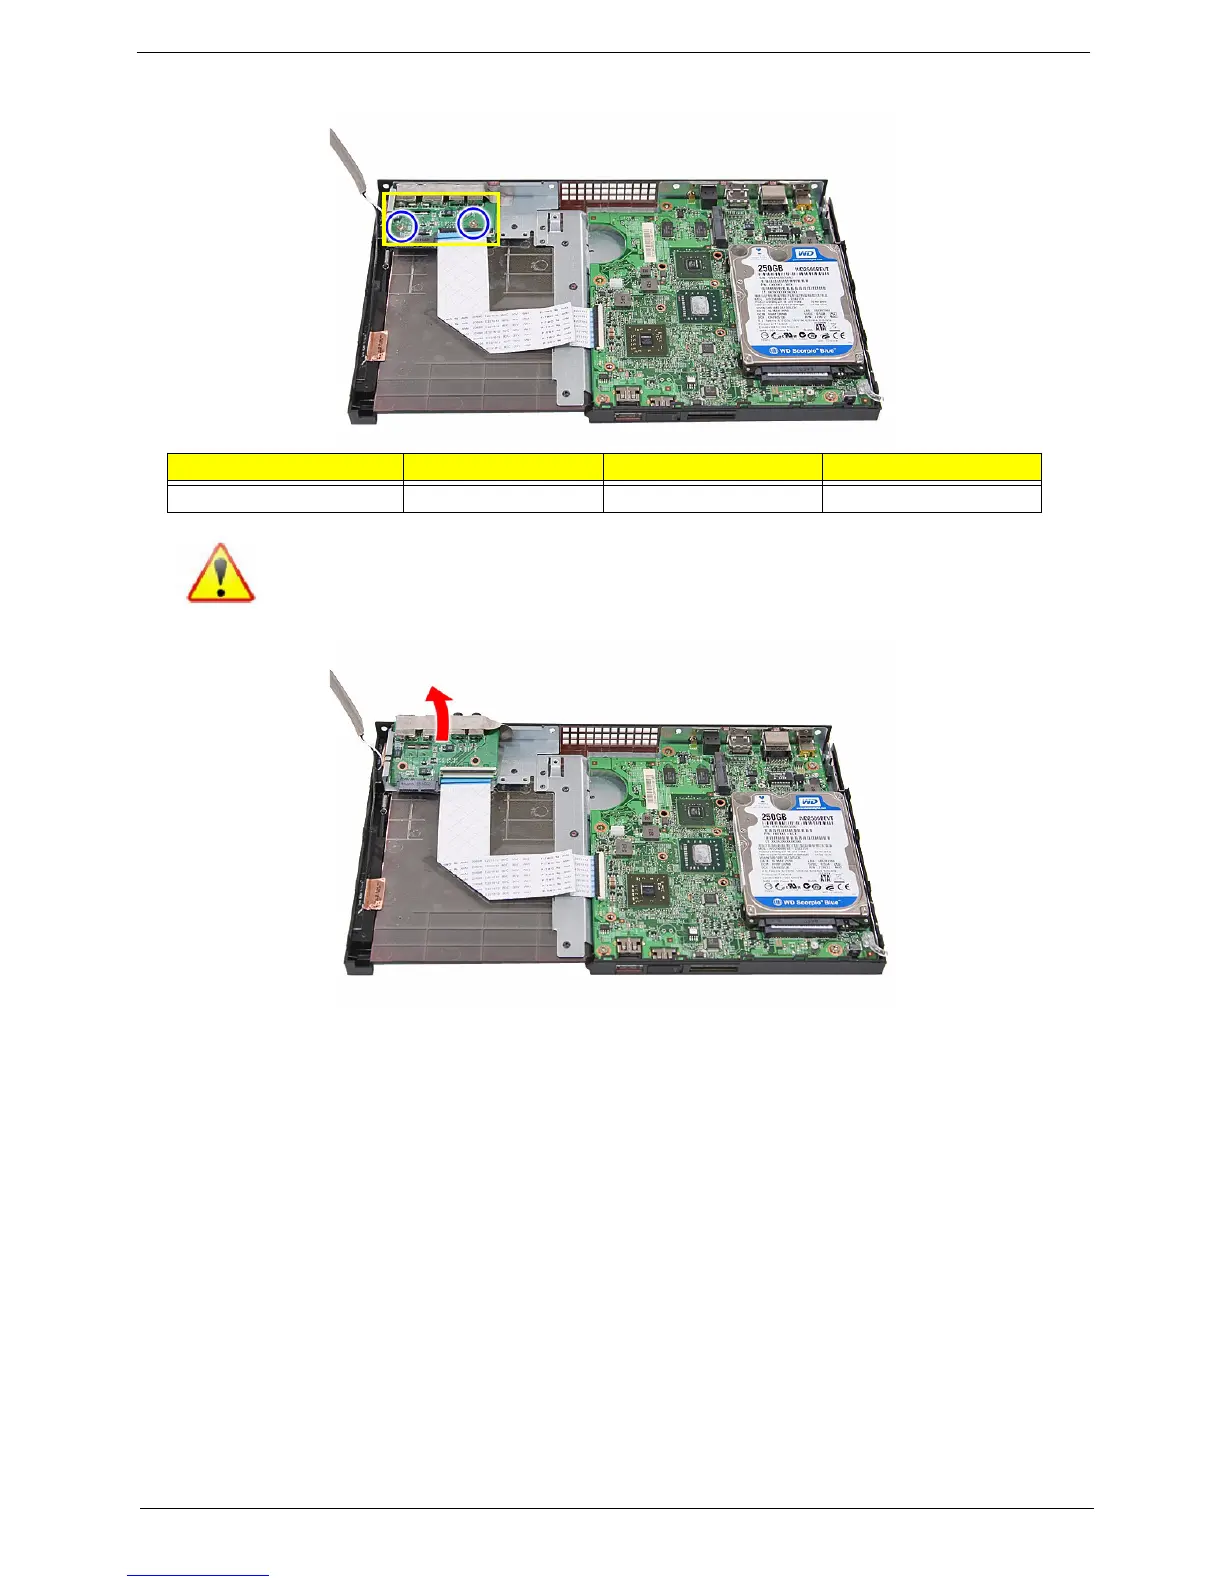
4. Remove the two screws (B) securing the I/O board.
5. Detach the I/O board.
Removing the Mainboard
1. See “Removing the Top Cover” on page 32.
2. See “Removing the Optical Drive” on page 33.
3. See “Removing the Heatsink” on page 35.
4. See “Removing the Fan” on page 36.
5. See “Removing the WLAN Module” on page 37.
6. See “Removing the I/O Board” on page 38.
Screw (Quantity) Color Torque Part No.
MECH TRUSS M3*L4 NI (2) Silver 4.5 0.3 kgf-cm 86.3A534.4R0
NOTE: The I/O board has been highlighted with a yellow rectangle as above image
shows. Please detach the board and follow local regulations for disposal.