This reference sheet describes general Vibration level measurement. It is recommended to calibrate
the meter before you start taking measurement.
Getting Started
Turn on the POWER switch on the side panel.
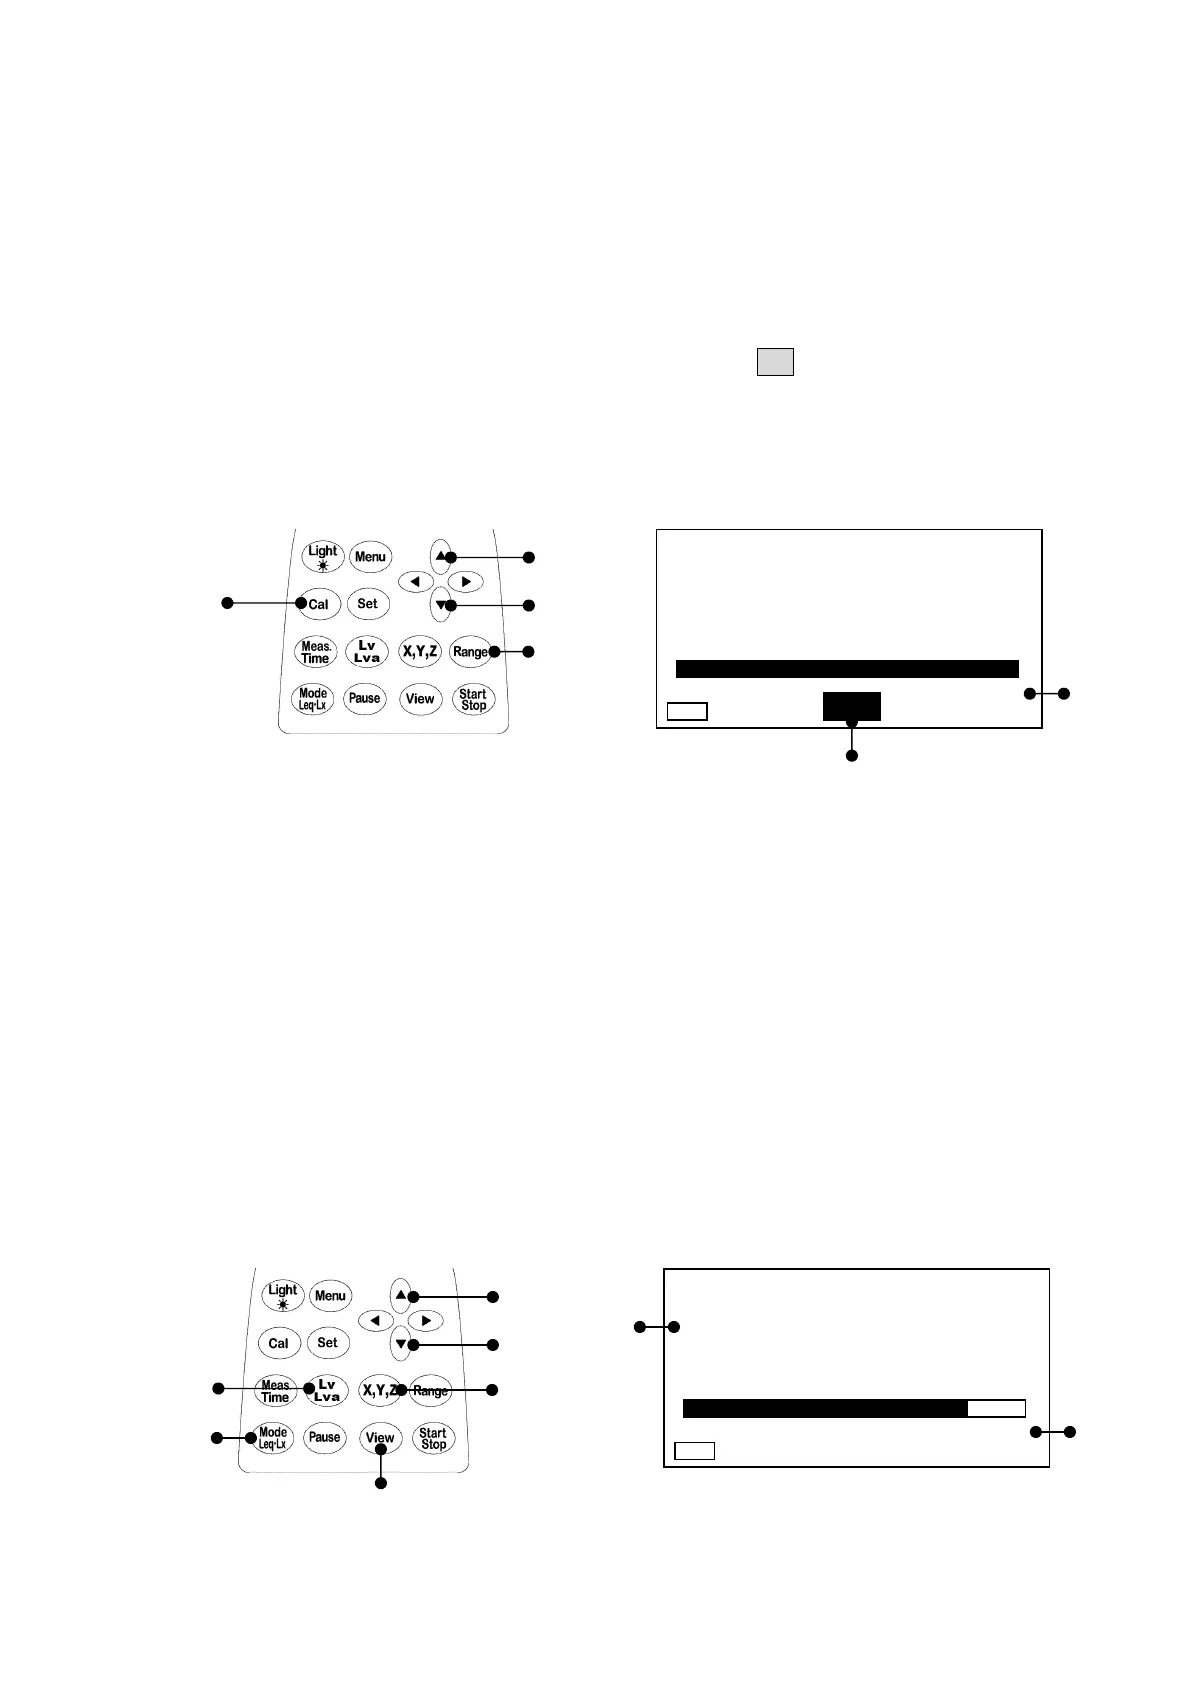
Calibration
1) Press the [
Cal
] key to switch into calibration status. The Cal lights in the calibration screen.
2) Press the Range key, select
110 dB
with the cursor key [▲][▼], and press the [
Range
] key to
register.
3) Turn the calibration volume on the side panel so that the level display indicates
110dB
.
4) Press the [
Cal
] key one more time to end the calibration.
Note) This can be displayed even on a 3 channel screen display or list display screen.
For the 3 channel screen display, the same values are displayed on the all channels.
Measurement of vibration level (Lv)
1) Switch the screen into the normal screen display with the [
View
] key.
2) Select the channel to be set with the [
X
,
Y
,
Z
] key.
3) Select the range in [▲][▼] direction with the [
Range
] key and set with the [
Range
] key.
4) Set so that the measurement mode display becomes
Lv
display with the [
Lv
,
Lva
] key and
[
Mode Leq・Lx
] key.
5) Likewise, change the channel with the [
X, Y, Z
] key to set.
6) After setting, the vibration level in each channel can be measured with the [
X, Y, Z
] key.
7) When checking the three channels simultaneously, switch to 3ch screen display with the
[
View
] key.
・ The digital display is updated every one second, and displays the present vibration level.
・ The bar display is updated every 0.1 seconds to be displayed.
1), 4)
2)
2)
2)
1), 4)
2)
50 110
1s 000h00m00s
Z
LV
dB
Cal
50 110
1s 000h00m00s
Z
LV
dB
Manu
1), 7)
2), 5), 6)
3)
3)
4)
4)
2)
3)