#if defined(SECONDARY_I2C_PORT)
Serial.print("Secondary port (Wire1) ");
TB.theWire = SECONDARY_I2C_PORT;
TB.printI2CBusScan();
#endif
delay(3000); // wait 3 seconds
}
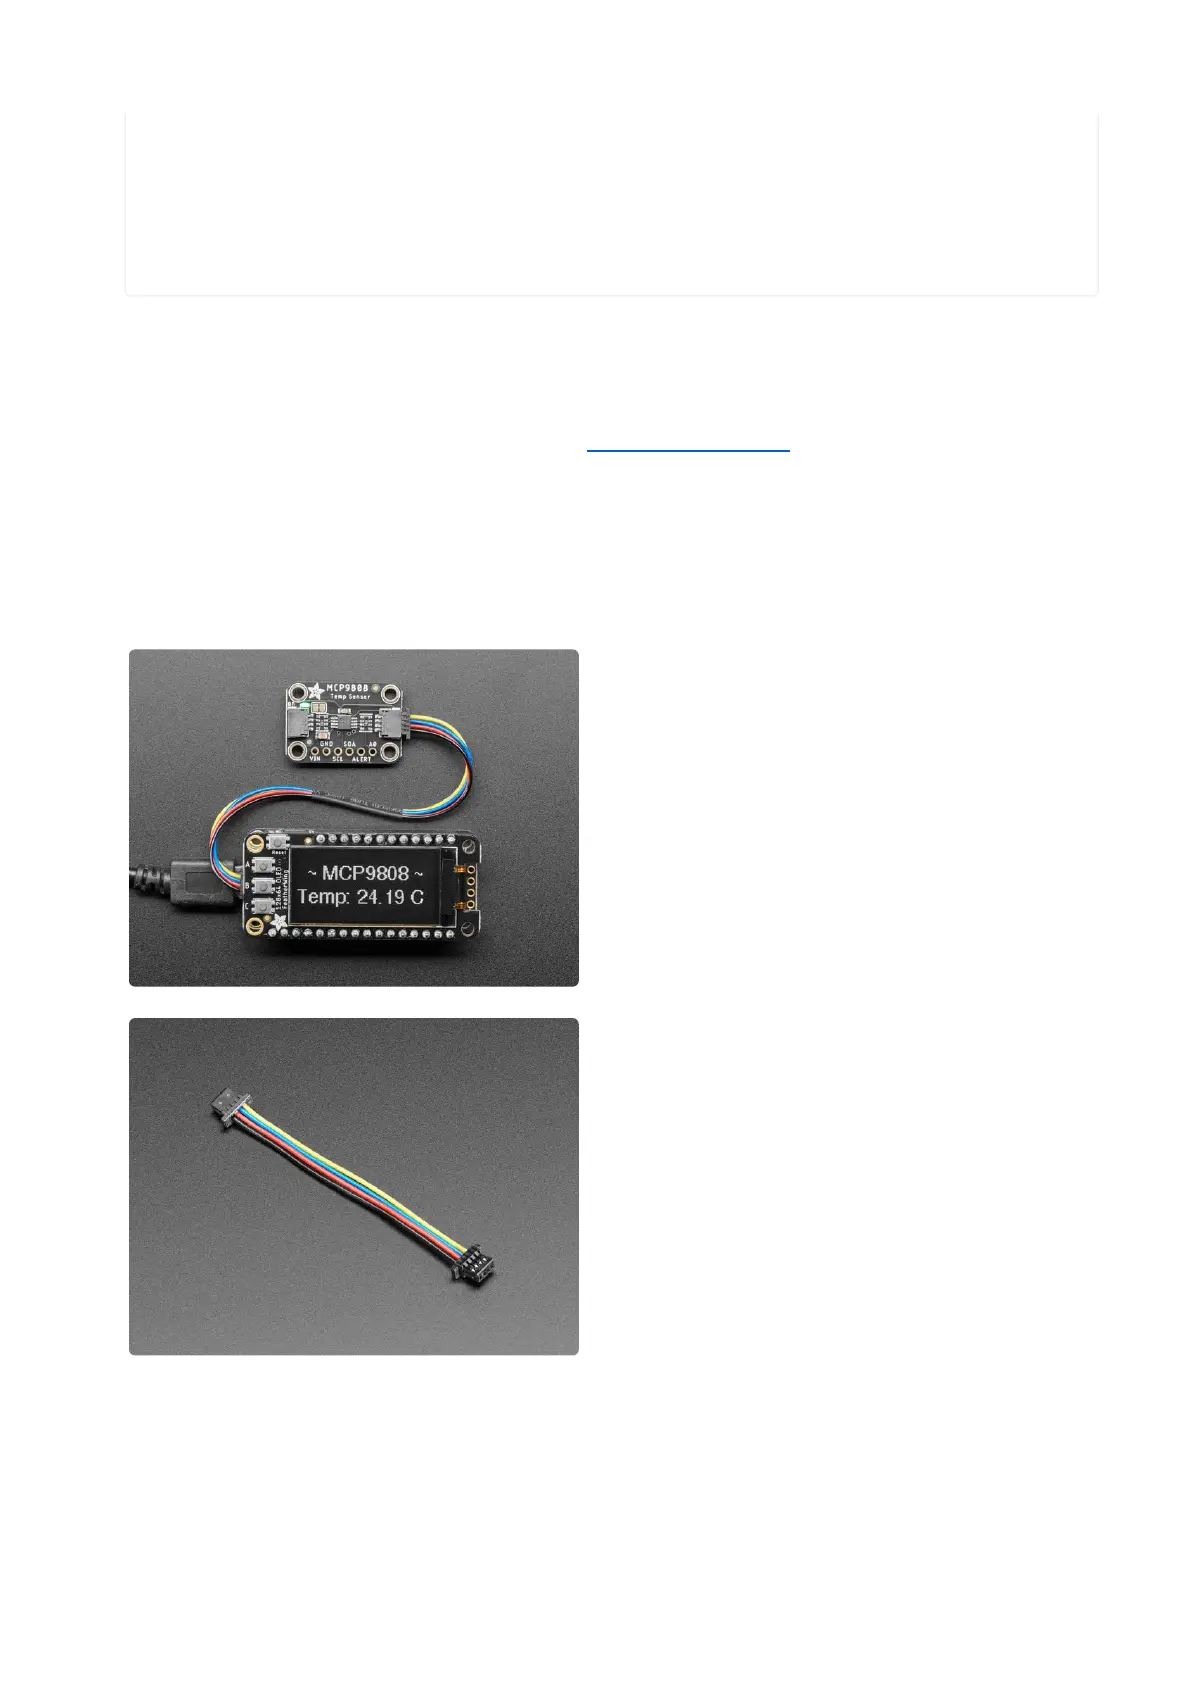
Wire up I2C device
While the examples here will be using the Adafruit MCP9808(), a high accuracy
temperature sensor, the overall process is the same for just about any I2C sensor or
device.
The first thing you'll want to do is get the sensor connected so your board has I2C to
talk to.
Adafruit MCP9808 High Accuracy I2C
Temperature Sensor Breakout
The MCP9808 digital temperature sensor
is one of the more accurate/precise we've
ever seen, with a typical accuracy of
±0.25°C over the sensor's -40°C to...
https://www.adafruit.com/product/5027
STEMMA QT / Qwiic JST SH 4-Pin Cable -
50mm Long
This 4-wire cable is50mm / 1.9" long and
fitted with JST SH female 4-pin
connectors on both ends. Compared with
the chunkier JST PH these are 1mm pitch
instead of 2mm, but...
https://www.adafruit.com/product/4399
Wiring the MCP9808
The MCP9808 comes with a STEMMA QT connector, which makes wiring it up quite
simple and solder-free.
©Adafruit Industries Page 207 of 263
 Loading...