9
Quickly Fix Photographs
Photoshop Elements Quick Fix
f you are new to digital photography or experi-
enced at digital imaging, you’ll find the tools
you need to correct and enhance your photos
in Photoshop Elements. In this tutorial you’ll learn
about basic tools and techniques to make your
photos look their best. Be sure to look under the
Help menu to read additional tutorials.
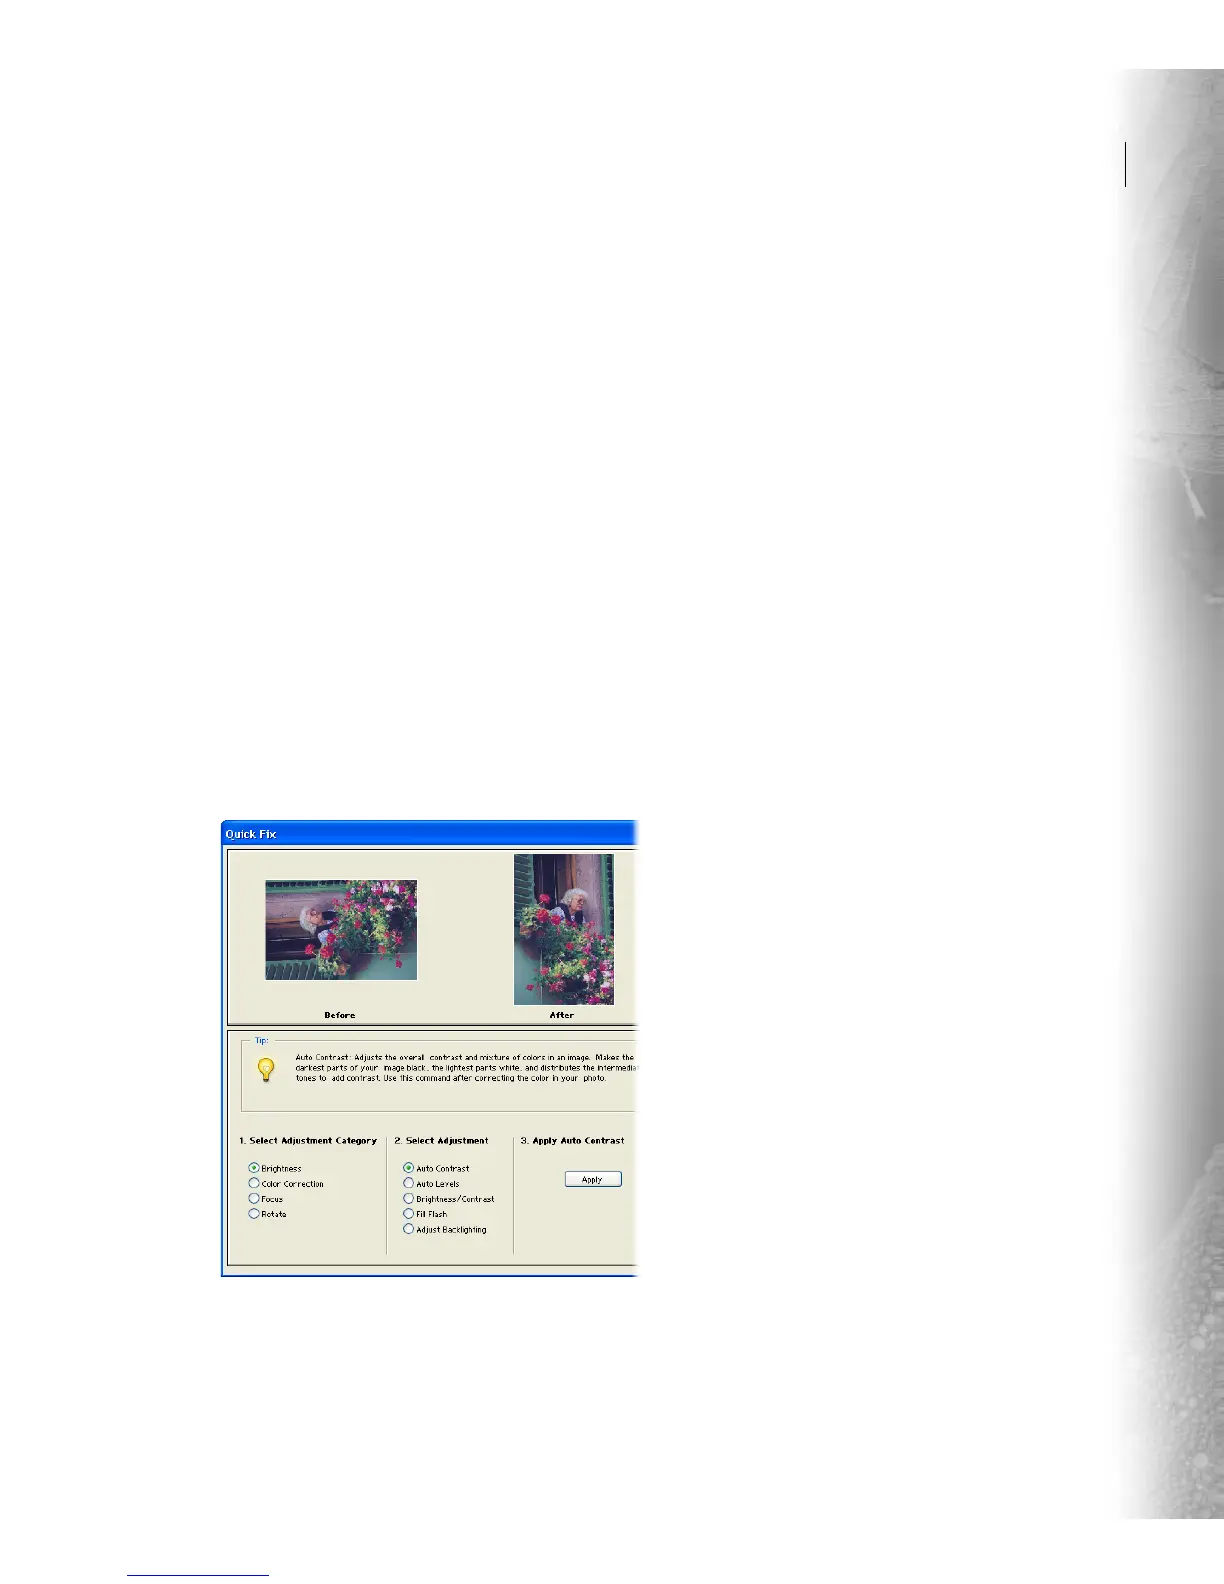
The Photoshop Elements Quick Fix dialog box
gathers several image correction tools in one spot.
You can fix photos that are too dark or too light,
have an off-color cast, need more contrast, or need
sharpening. Before and after previews let you
compare adjustments to your original image
before saving the changes.
1. Open the Quick Fix dialog box.
With the file you want to fix open, choose
Enhance > Quick Fix. The Quick Fix dialog box
opens and presents tools for fixing photographs
and tips for using the tools.
To make adjustments to your photograph:
Select an adjustment category Choose a category
from the list:
• Brightness adjusts your photo’s contrast and
brightness, and quickly fixes overexposed or
underexposed areas.
• Color Correction adjusts the saturation and
color (hue) in your photo, and automatically
corrects a color cast.
• Focus sharpens or blurs your photo.
• Rotate flips your image horizontally and verti-
cally, or rotates your image at 90° or 180° angles.
Select an adjustment Each category has multiple
adjustments that you can choose. The Tips
provide more information for each adjustment.
Apply the adjustment If an adjustment has
options to set, drag the slider to increase or
decrease the value. If you selected an automatic
adjustment, click Apply.
2. Rotate the photograph.
Choose Rotate from Select Adjustment Category,
rotate the photo right, and then click Apply.
The photograph in our example was taken with a
digital camera at a vertical orientation. The After
preview shows the new orientation.
I