CHAPTER 11
198
Creating Shapes and Text
Because anti-aliasing greatly increases the number
of colors in an image, you may want to turn anti-
aliasing off when designing for the Web. In Web
images, anti-aliasing can make file sizes larger and
cause stray colors to appear along the edges of
type. To avoid these issues, you may prefer to leave
text with jagged edges.
To turn anti-aliasing on:
Select the type layer in the Layers palette and do
one of the following:
• Choose Layer > Type > Anti-Alias On, or
choose Layer > Type > Anti-Alias Off.
• Select the Anti-aliased button in the
options bar.
To turn anti-aliasing off:
Select the type layer in the Layers palette and do
one of the following:
• Choose Layer > Type > Anti-Alias Off.
• Deselect the Anti-aliased button in the
options bar.
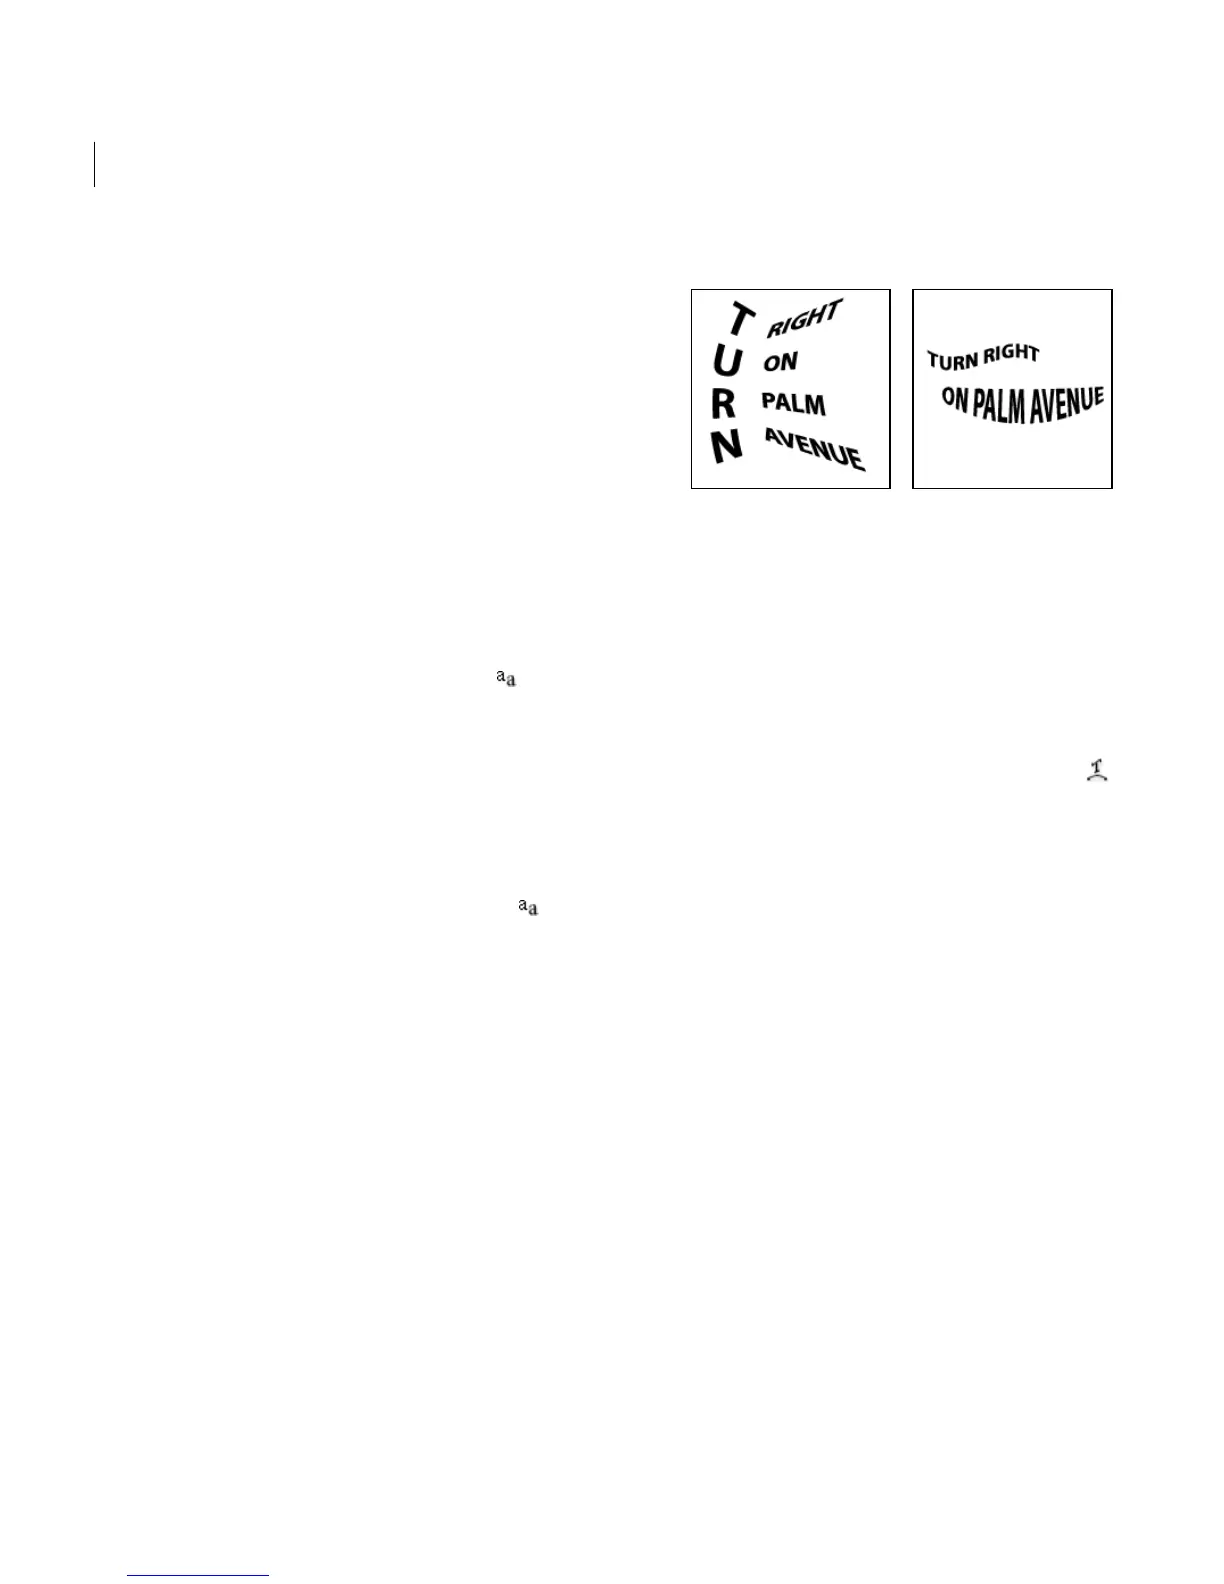
Warping type layers
Warping allows you to distort type to conform to a
variety of shapes; for example, you can warp type
in the shape of an arc or a wave. Warping applies to
all characters on a type layer—you cannot warp
individual characters. The warp style you select
determines the basic shape of the warped layer,
while warping options let you control the orien-
tation and perspective of the warp effect.
Type layers with warp applied
Note: You can’t warp to text that uses faux bold
formatting.
To warp type:
1 Select a type layer.
2 Do one of the following:
• Select a type tool, and click the Warp button
in the options bar.
• Choose Layer > Type > Warp Text.
3 Choose a warp style from the Style pop-up
menu.
4 Select an orientation for the warp effect—
Horizontal or Vertical.
5 If desired, specify values for additional
warping options:
• Bend to specify the amount of warp.
• Horizontal Distortion and Vertical Distortion
to apply perspective to the warp.
6 Click OK.