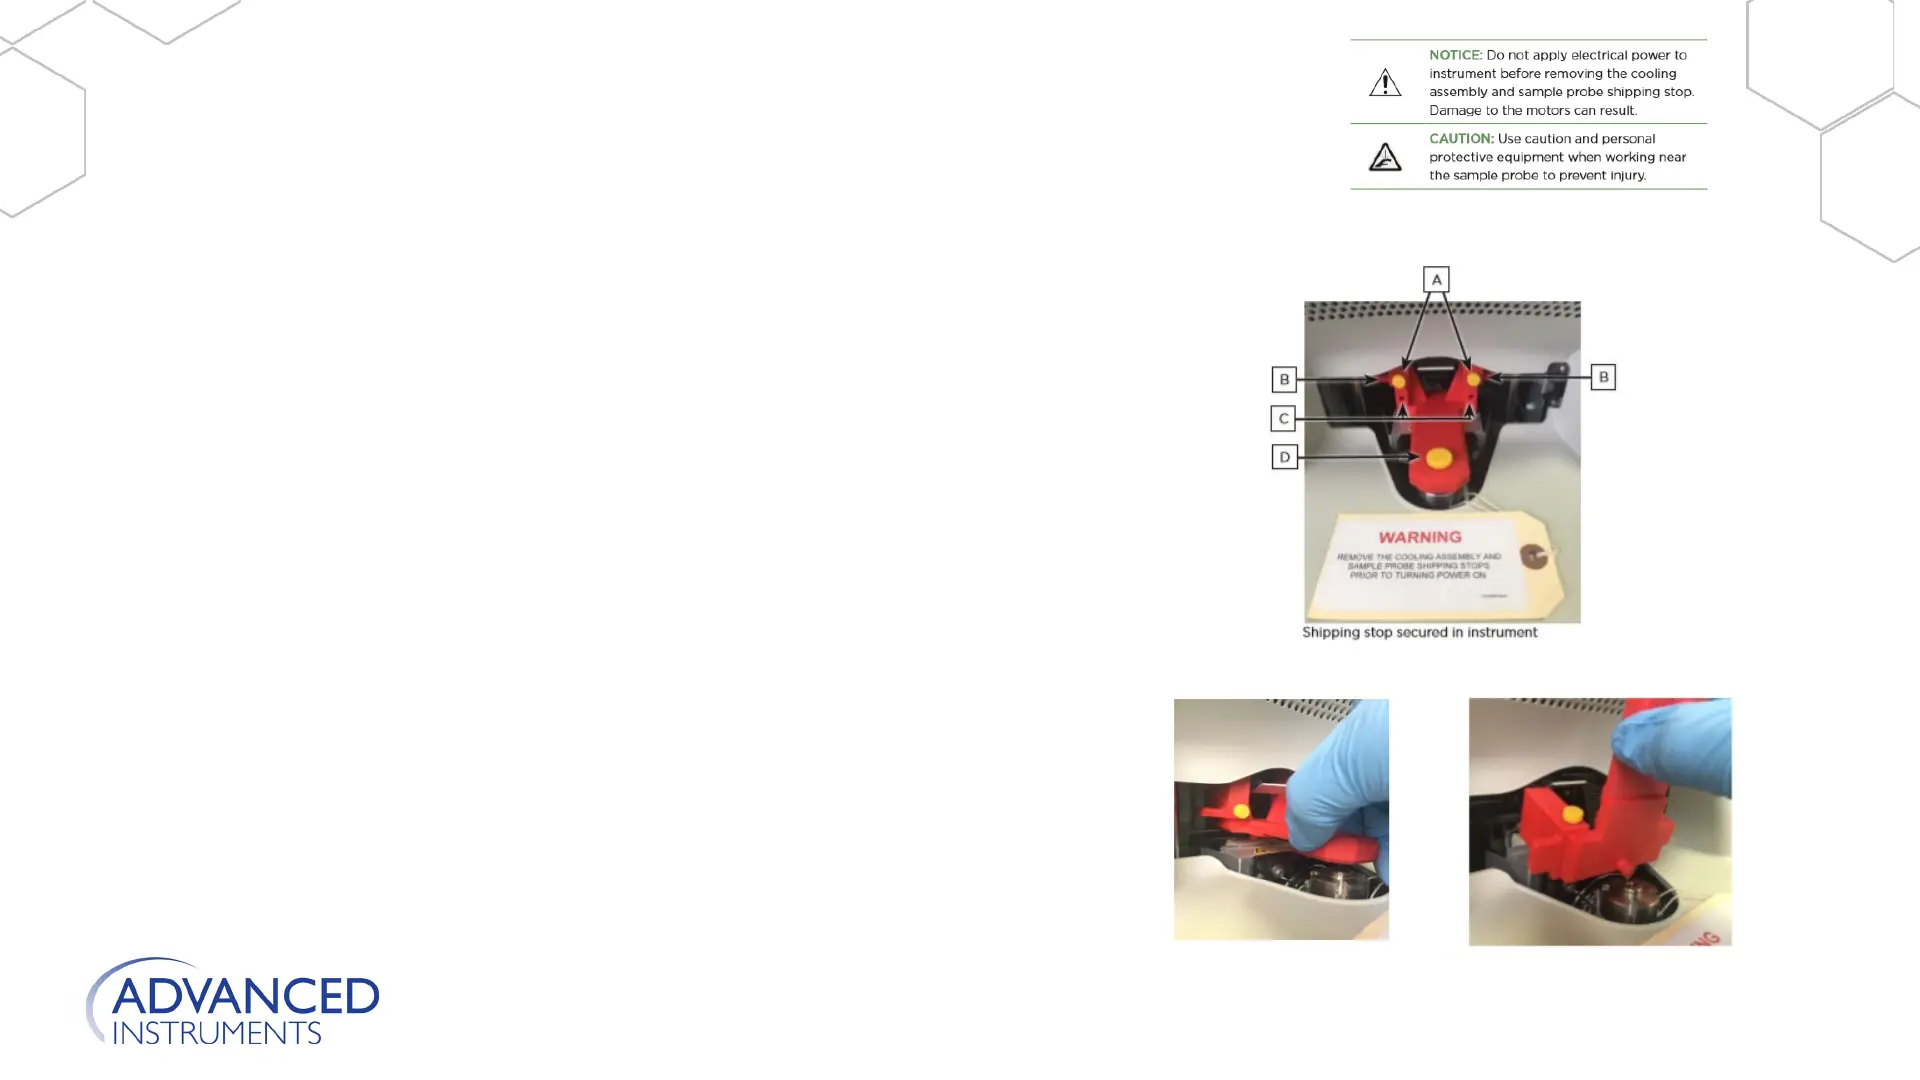
• Step 4 - Removing the ship stop
You must remove the ship stop that secures the sample cooling assembly and the sample probe
mounting block assembly.
5
Installation and Setup
1. Disconnect power to the instrument.
2. Unscrew and save the two small yellow
screws [A].
3. Lower both ship-jacks [B] to the lowest
position.
4. Store the screws in the storage holes [C].
5. Unscrew and save the large yellow screw [D]
6. Grasp the base of the ship stop and gently lift
it up and rotate it about 45-degrees.
7. While it’s lifted and rotated, tilt the ship stop
back about 90-degrees and gently slide out
of instrument.
8. Remove and read the warning label.
Step 7
Step 6

 Loading...


