Pulling on the sides of the bag outward causes the layers to flatten, decreasing the possibility of
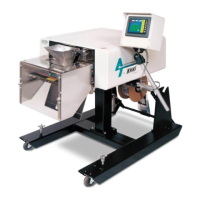
folds. To turn the Flat Seal Assembly ON, press the <Flat Seal> button on the Options menu and
toggle ON the ON/OFF button. Use the <Setup> button to make it easier to mechanically adjust
the fingers along the front plate slots on the T-1000. See Fig. 3-24. Once the mechanical
adjustment is complete, press <ON> and <AUTO> for normal operation of the flat seal
assembly. In the Auto mode, the fingers will automatically extend into the bag immediately
prior to the pressure bar sealing the bag. When finished, press the <Exit> button to return to the
Options menu.
3.28 Twin Seal
The Twin SealTM option is not included with the standard T-1000 program package. This option
is available and will place an additional seal approximately 3/4” from the initial seal. The
product is sealed in the bag with two parallel seals
approximately 3/4" apart. The Twin SealTM option is a
function of the program and requires no mechanical setup.
The Twin Seal
TM option is ideal for products which: 1)
require an extended shelf life, 2) are medical products and
require medical/pharmaceutical packaging, 3) are heavy or
bulky and difficult to seal and 5) require high integrity
seals. To turn on the Twin Seal
TM option, press the <Twin
Seal> menu option and toggle the option ON.
Note: You may need to decrease the Seal Point value on the Bag Setup Screen to allow space for
two seals on the same bag.
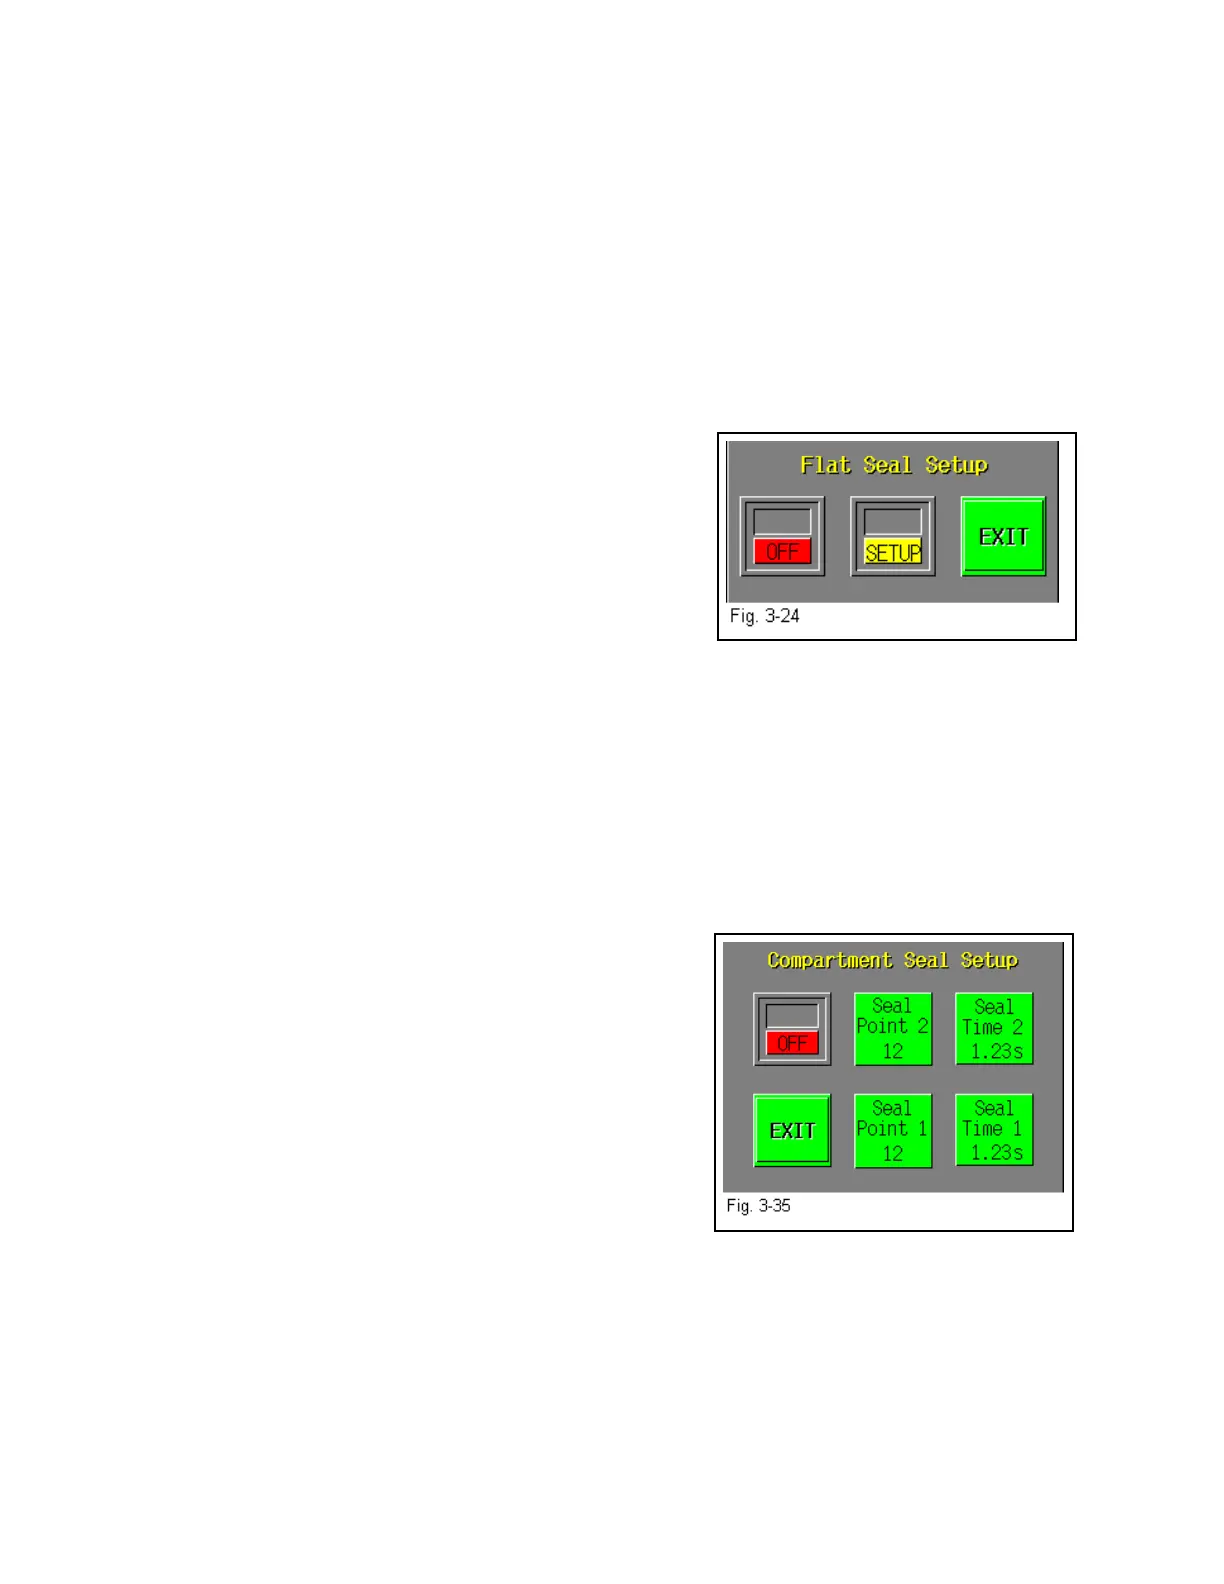
3.29 Compartment Seal
The Compartment Seal option is offered to allow for two different products in the same bag to be
packaged, separated by a seal. For instance, it may be necessary to segregate a sharper object
(screw) from a plastic component (mounting plate). Both seal points can be adjusted by the
operator to increase or decrease the size of each
compartment. However, the larger object should be placed
into the bag first.
First set Seal Point 1 by pressing the <Seal Point 1> button
and typing in the value on the number keypad. Adjust the
first seal point until the desired location is achieved.
Then, turn the option ON by toggling ON the ON/OFF
button. Adjust the second seal point by pressing <Seal
Point 2> and entering a value in the number keypad.
Adjust the value of the second seal point until the desired
position is achieved. Each seal time may be adjusted if
you wish the Trim Seal after the second seal has been placed on the bag. See Fig. 3-35.
41