3 Installing Intuvo 9000 GC Column
To Replace the 9000 GC/MS Tail
62 7000/7010 Series TQ GC/MS Operating Manual
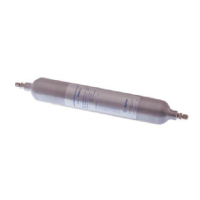
To Replace the 9000 GC/MS Tail
This procedure is necessary if you are switching to a source that requires a
different 9000 GC/MS Tail, replacing a leaking gasket or a contaminated 9000
GC/MS Tail, or separating the 9000 GC from the MS.
Materials needed
• Gloves, clean, lint-free (Large 8650-0030) (Small 8650-0029)
• Tweezers (8710-2460)
• 9000 GC/MS Tail, used with a standard source (G4590-60009)
• 9000 GC/MS Tail, used with a HES (G4590-60109)
• Intuvo gasket, polyimide 5/pk, for temperatures < 350 °C (5190-9072)
• Intuvo gasket, nickel 5/pk, for temperatures 350 °C to 450 °C (5190-9073)
• Intuvo torque driver stored on oven door (5190-9571)
• 7/16-inch open-end wrench
Procedure
1 Vent the MS (See “To Vent the MS” on page 124.) When prompted, set the
temperature for the ion source, quads, inlet, detector, column, Guard Chip,
9000 GC/MS Tail, and other components in the flow path heated zones to
< 40 °C.
2 If you are using hydrogen or other flammable gas as a carrier gas, close the
manual gas supply valve to the instrument before turning off the MS power.
3 Wait until the GC reaches the ready state indicating the components are
cooled below 40 °C before continuing the steps in this procedure.
4 Open the front analyzer chamber. (See “To Open the Front Analyzer
Chamber” on page 156.)
The inlet, detector, bus components, and column can be hot enough to cause
burns. Cool heated zones to a safe handling temperature before continuing.
Always wear clean gloves while handling any parts that are in the flow path
going to the analyzer or parts that are located inside the analyzer.
 Loading...